Azure goes from an Alpha release to Beta – and includes VPC deployments, an improved user experience, and management of client profiles within the console.
The only enterprise-grade messaging as a service in all the public clouds is back with more improvements to make it even more useful for architects, middleware teams and developers. Here’s a quick look at what’s available in April:
- Improved Azure support
- Better user experience for Standard and Enterprise accounts
- Enhanced client profile control
Let’s look at each in more detail.
Improved Azure Support
You first had a look at Azure services as an Alpha release in March, and they’re now upgraded to Beta. This means upgrades are supported, and you can also deploy services in your Azure private clouds (Azure Virtual Networks). You must have an Enterprise account to access Azure services, and creating services in Azure follows the same flow as for other cloud providers.
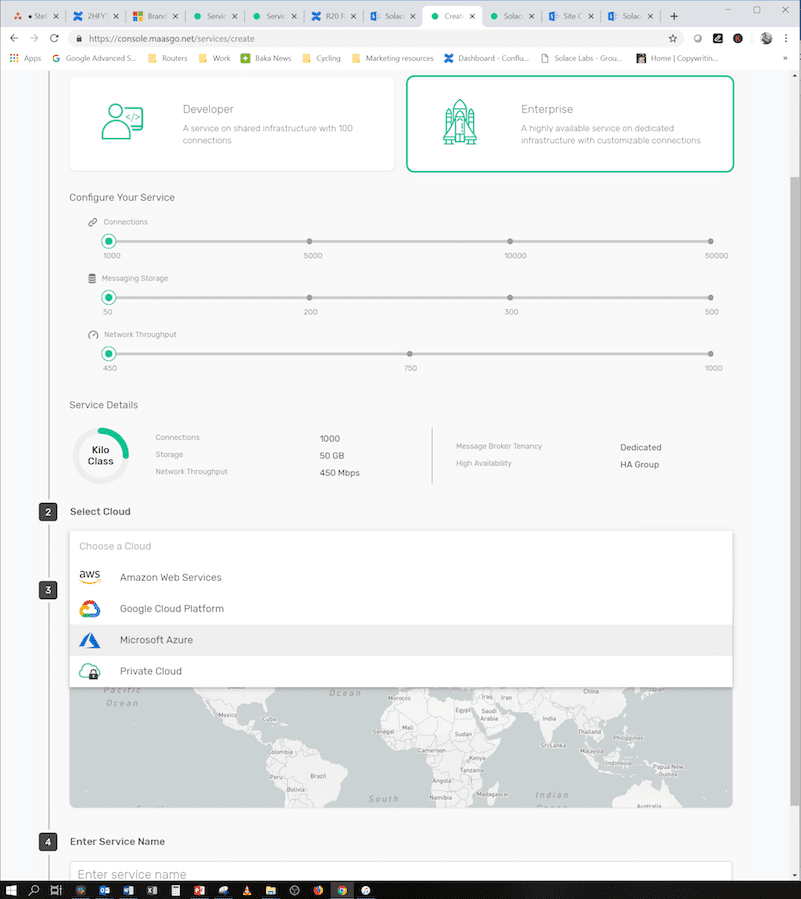
Select Azure from the list of available clouds in the Create Service console (note the service creation experience has been improved, more on that below).
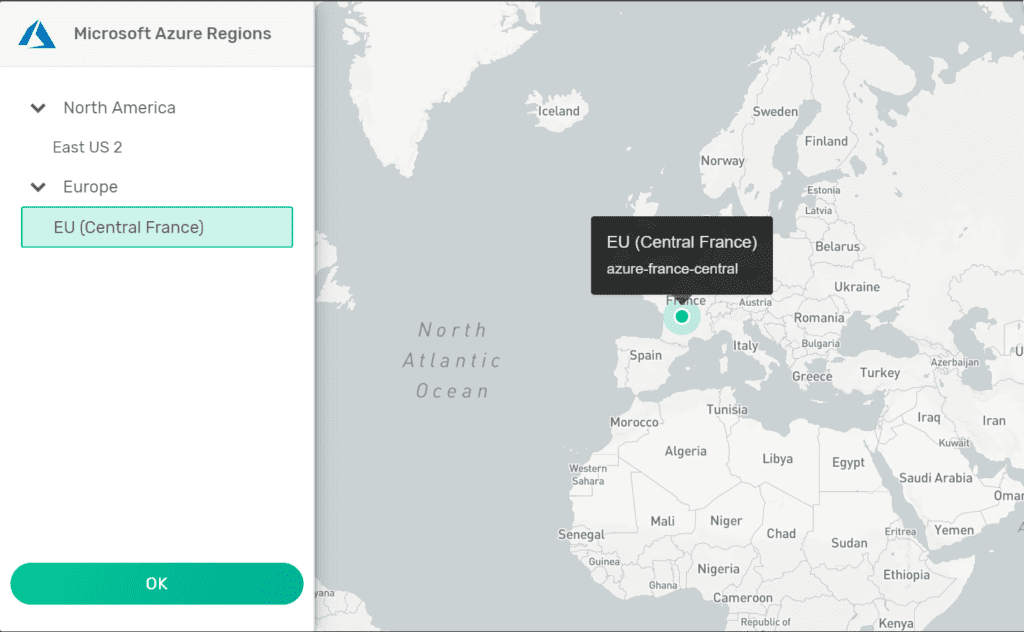
Select your region (Eastern US or France in Beta – other regions coming soon).
Give your service a name, select “Start Service,” and your new service will be up and running in a few minutes.
If you want to try starting services in an Azure Virtual Network, please contact us from within the Console and we’ll be happy to set it up for you.
Better User Experience for Standard and Enterprise Accounts
You’ll notice a number of changes to the user experience in both Standard and Enterprise accounts.
Let’s look at each in turn.
Standard Accounts
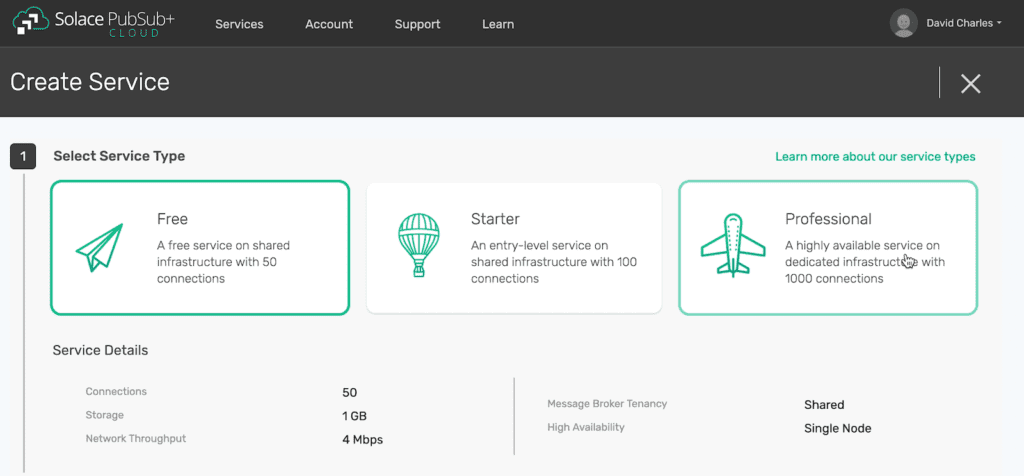
When you log in to a Standard account, you’ll be directed to the Start Service page, where you can choose between Free, Standard and Professional plans. Free plans remain unchanged, with 50 connections; Starter plans are what were formally known as Nano plans, and have shared tenancy and 100 connections (soon to be upgraded); and Professional plans are what was formerly called Kilo, and come with dedicated infrastructure and 1000 connections.
You can try Free plans at any time, and you just need to activate credit card billing to try Starter and Professional plans.
Enterprise Accounts
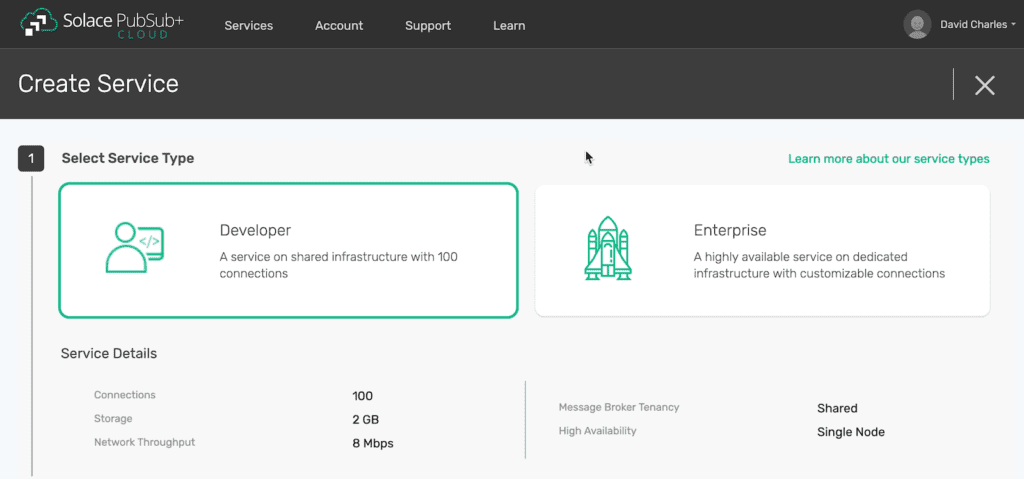
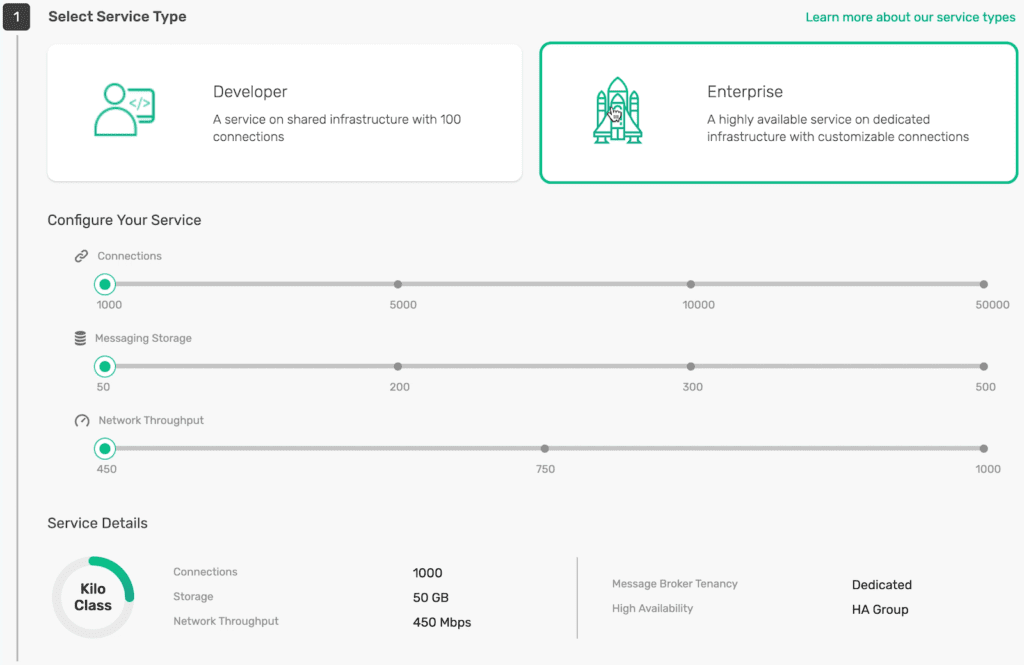
When you log in to an Enterprise account, you’ll also be directed to the Start Service page. The process you follow within the console has also been changed to reflect how we are offering services. First off, you’ll notice you can choose between two types of plans: Developer and Enterprise.
The Developer plan is what was formerly called Nano, with 100 connections and shared tenancy, which will be improved with a dedicated plan and increased functionality.
Starting up Developer services remains otherwise unchanged. Creating Enterprise services is where you’ll notice a real difference.
You can now configure your service according to your needs, adjusting the sliders for the connection count, storage and network throughput you need. The service class (seen in the bottom left of the above image) will adjust automatically, which represents the IaaS quota you will be using to create the service.
If your account doesn’t have enough IaaS remaining to support the service you want to create, you’ll be instructed to contact us about getting your account size increased.
Once you create a service, you’ll notice the console also gives you more information about the service in a few of the tabs.
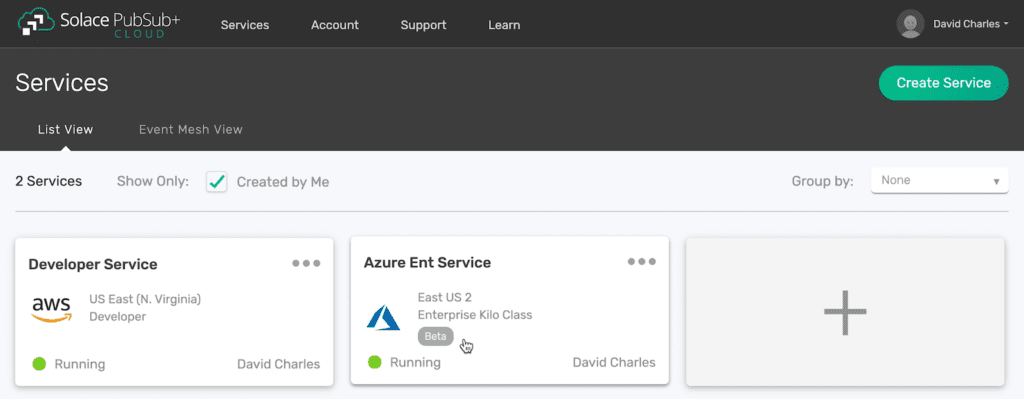
For example, when you look at your list of services, you’ll see details such as the service type and if the service is in Beta.
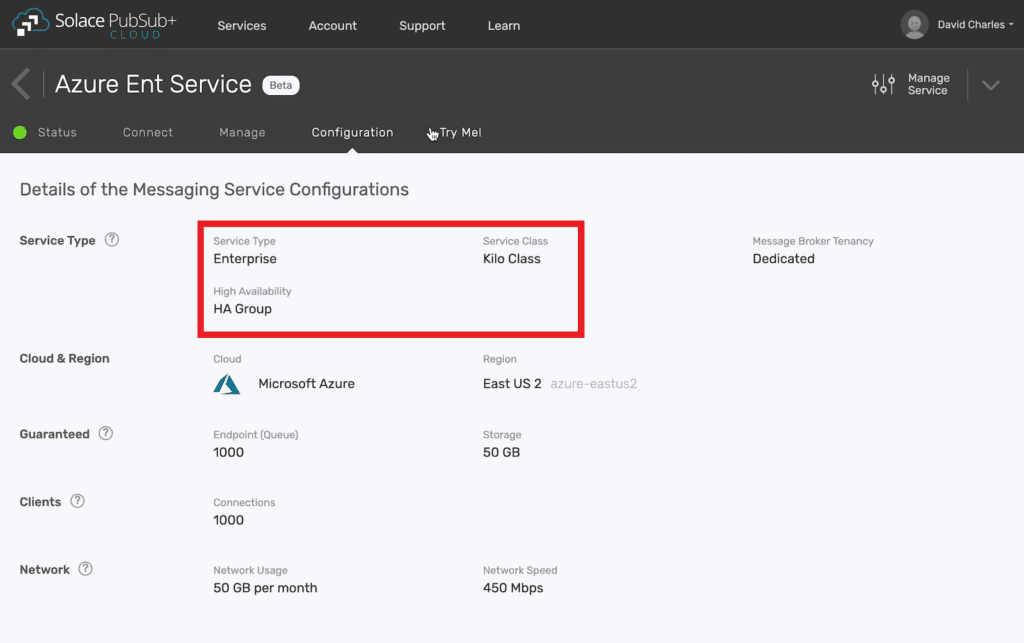
If you click on the service icon and go into the configuration tab for your service, you will see both the service type and the service class, so you have a better understanding of the resources that will be consumed in a VPC IaaS environment.
Enhanced Client Profile Control
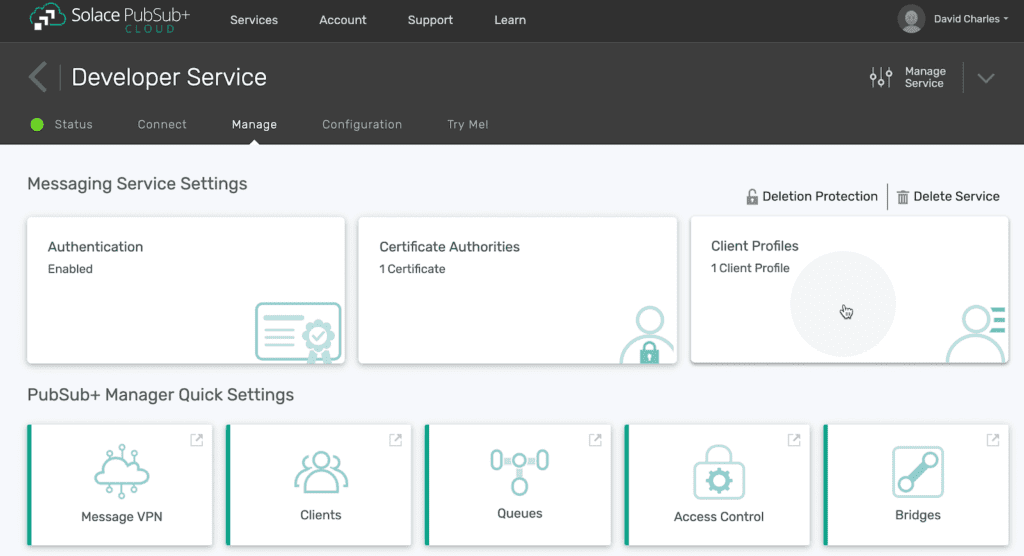
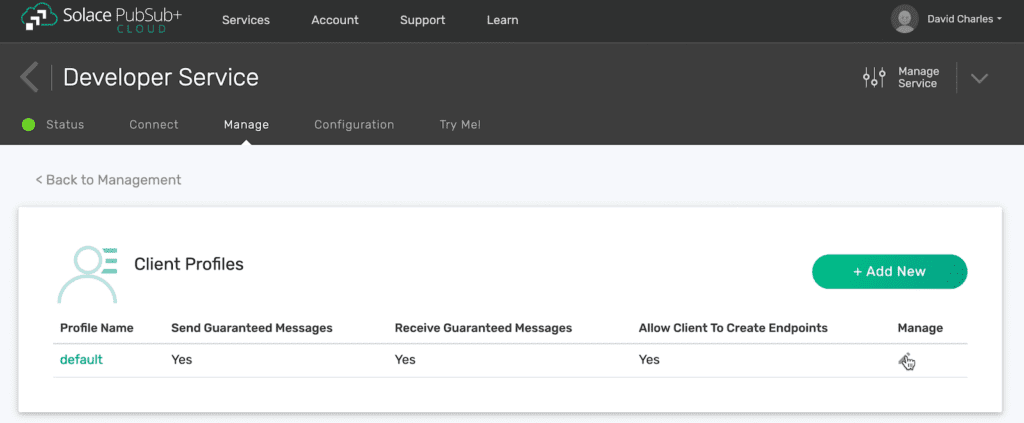
You gain increased control over client certificates with this release. You can manage this feature by navigating to the Manage tab in the Console and selecting Client Profile.
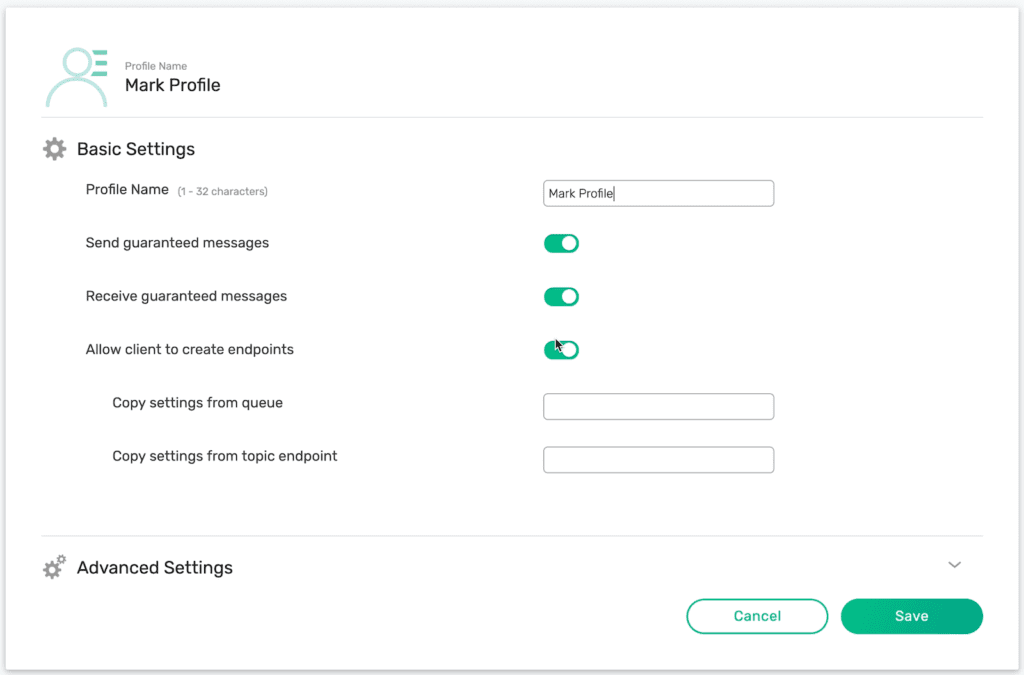
From there you can see a list of profiles that exist and add new profiles or edit them by selecting the add new button or the pencil icon under the Manage column of the profile, respectively.
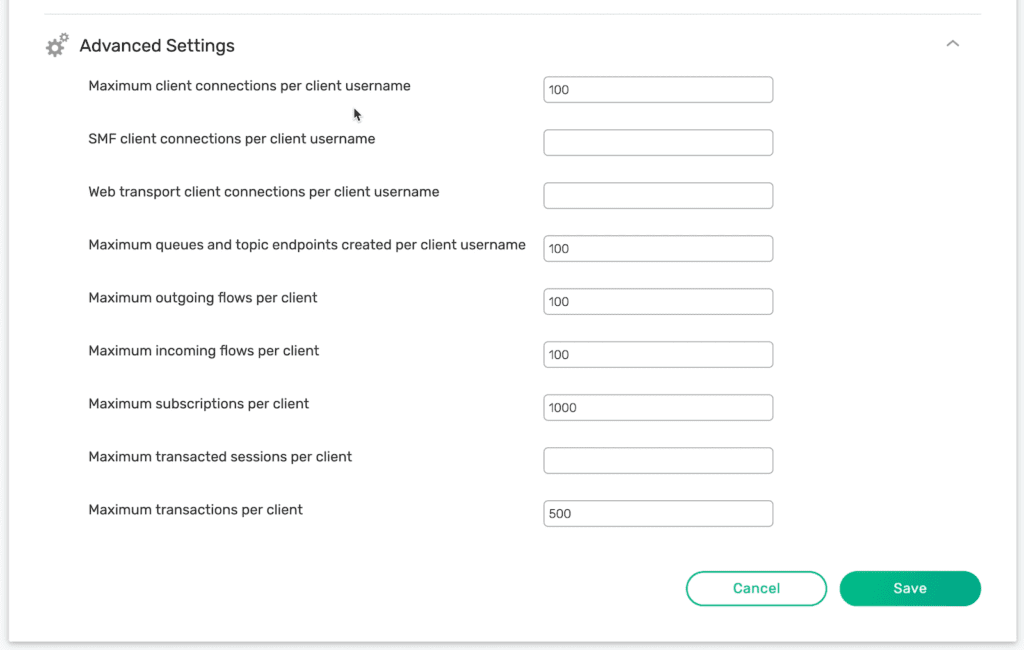
You can adjust basic and advanced settings in the pop-up window – these were previously only available to administrators of our software or hardware brokers.
That’s it for this month; as always, I hope you like these changes. Stay tuned for more improvements coming soon!
Explore other posts from category: Products & Technology

 Mark Spielman