Even if you’re familiar with messaging, publish/subscribe patterns, and queues we recommend you take a few minutes to learn how events, messages and topics work in Solace.
Kick things off in 3 easy steps:
1) Set up Solace Event Broker
![]() The easiest way to get started quickly is with the Docker image. You can download the software event broker image, create a container, and configure the necessary ports with just one command.
The easiest way to get started quickly is with the Docker image. You can download the software event broker image, create a container, and configure the necessary ports with just one command.
2) Configure and Deploy your Broker
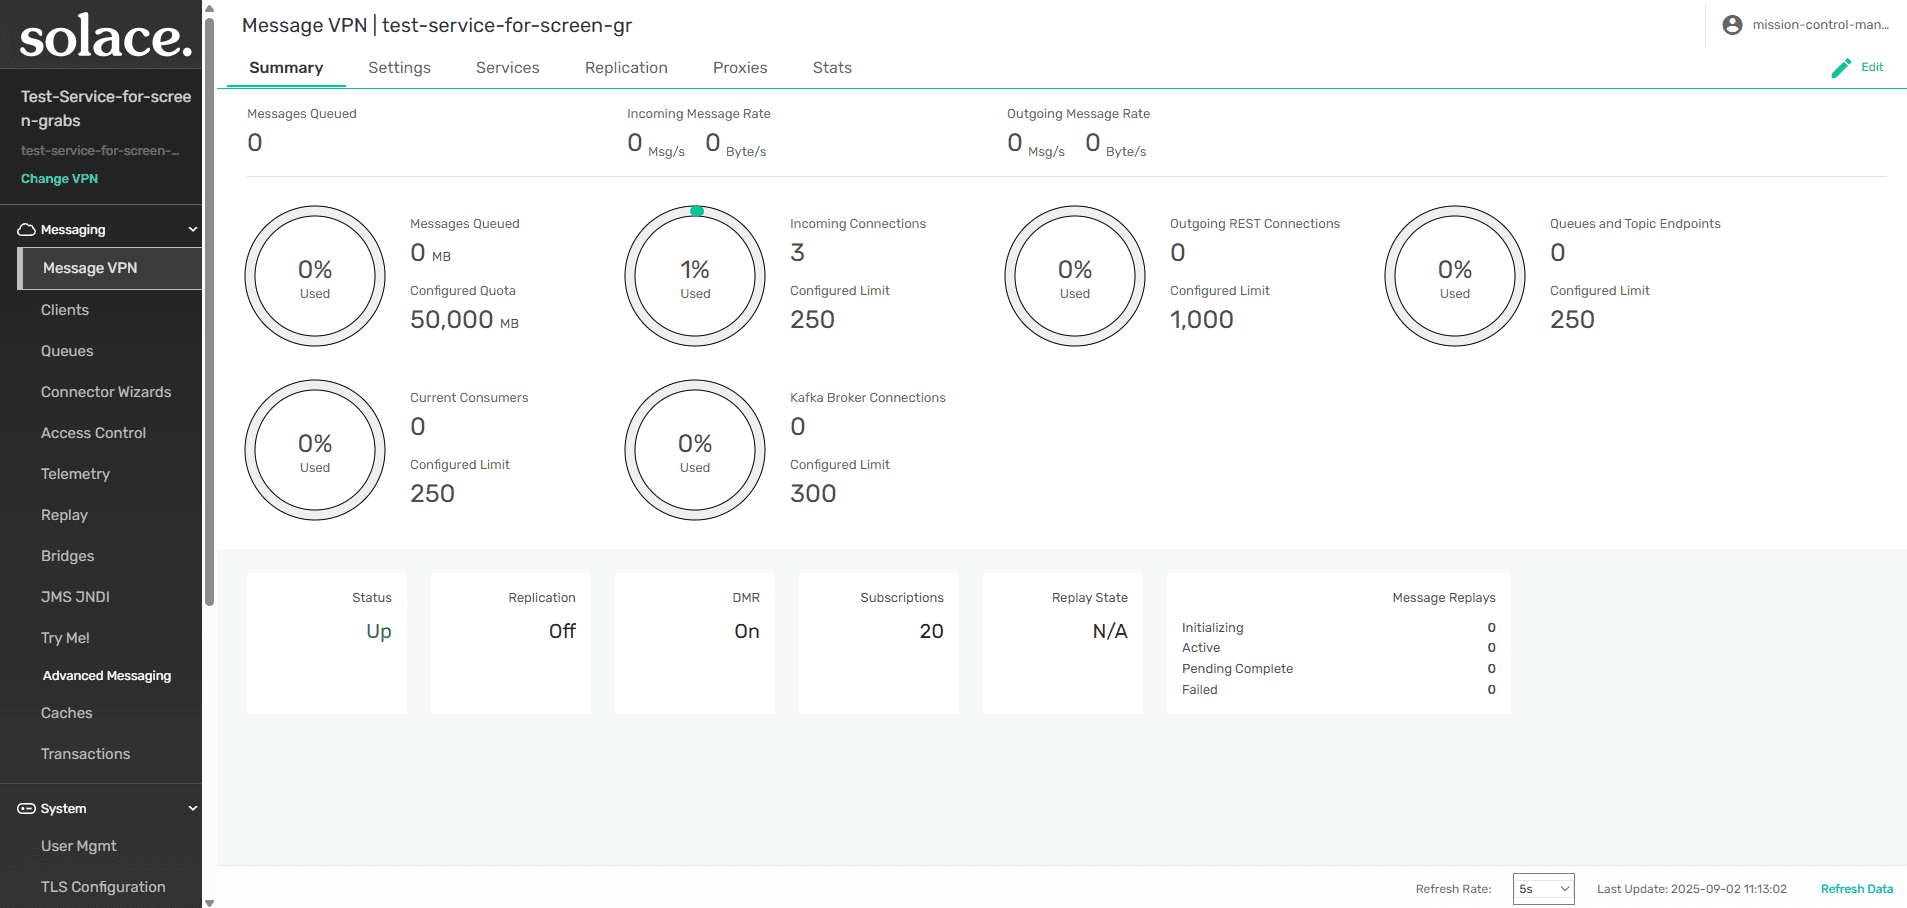 Solace Manager’s browser-based management console lets you set up and run Solace software event brokers in a range of common cloud services and hypervisors, and configure those event brokers for a variety of uses.
3) Experiment with Smart Topics
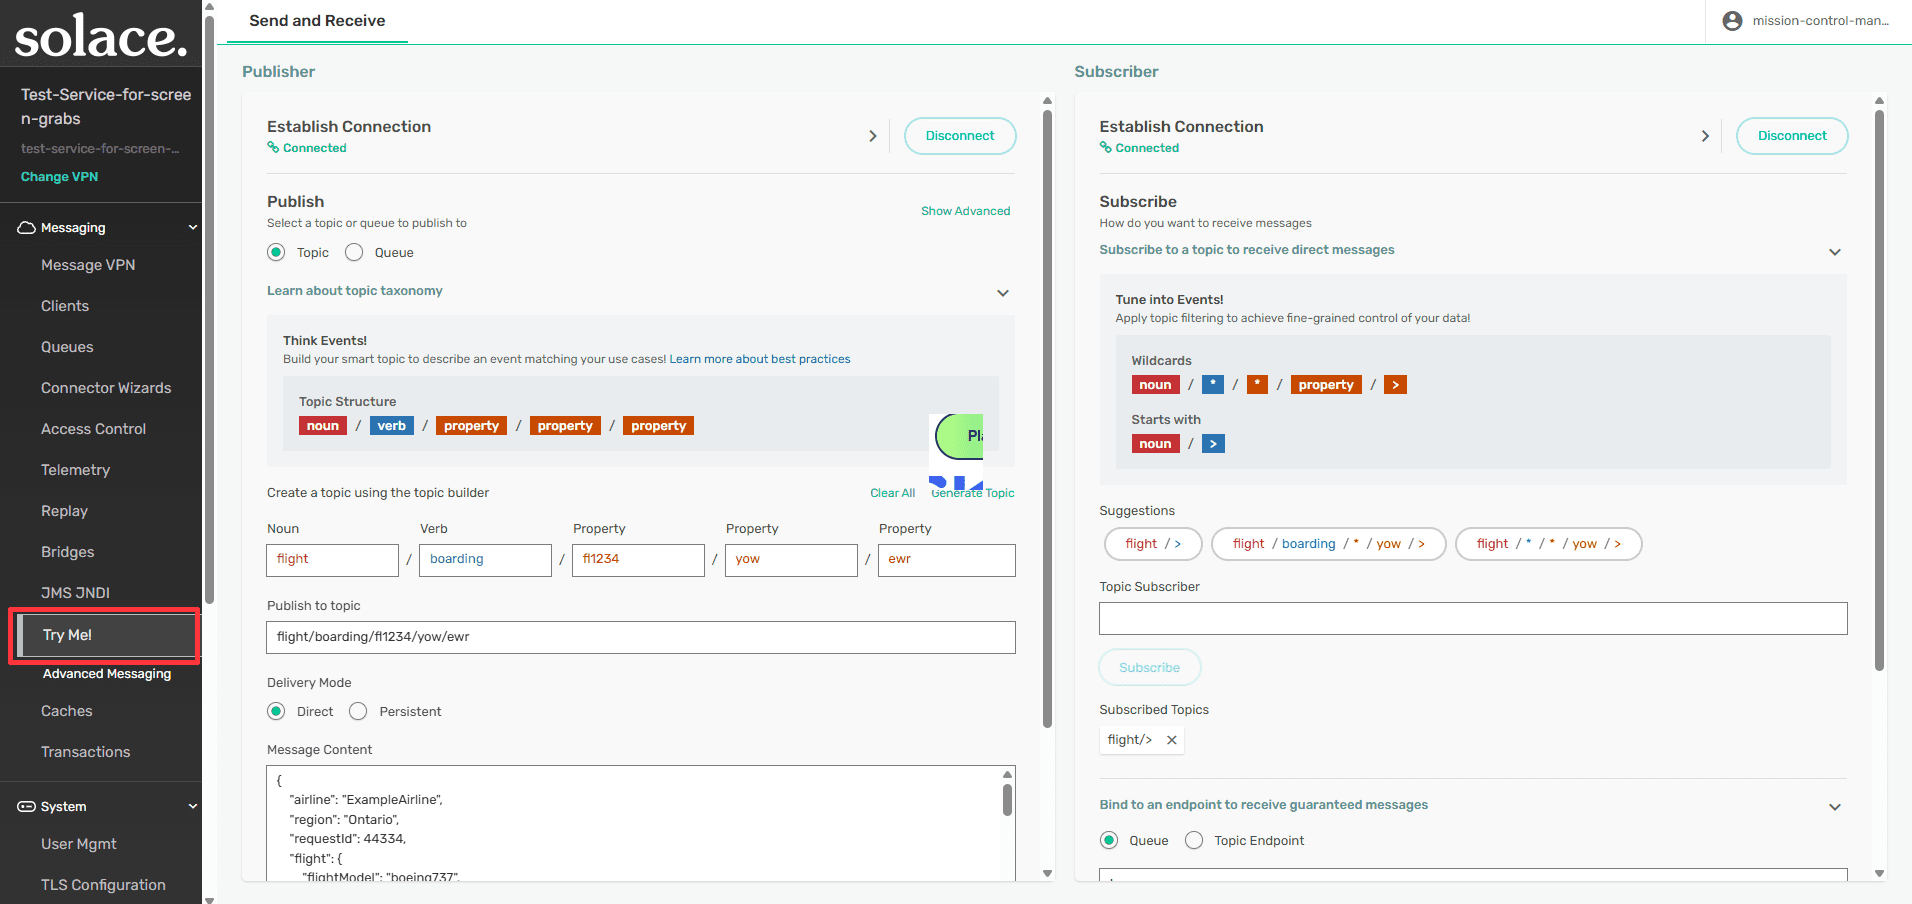 Solace makes topics smarter. Solace smart topics are hierarchical and filterable at every level, and dynamic message routing takes care of the rest. The “Try Me” function makes it easy for you to learn how to use them.
Advance Your Skills
Use The Try-Me CLI Tool
 To dig into into all the details of event driven streaming and integration we have created a sample application and CLI-based tool that will be familiar to developers – Fully documented and ready to help you get up to speed quickly. You are ready to start streaming with Solace Event Broker Using the helpful Try-Me CLI tool and the thorough documentation your entire EDA toolbox at your disposal. Begin publishing and subscribing events with a few simple exercises.
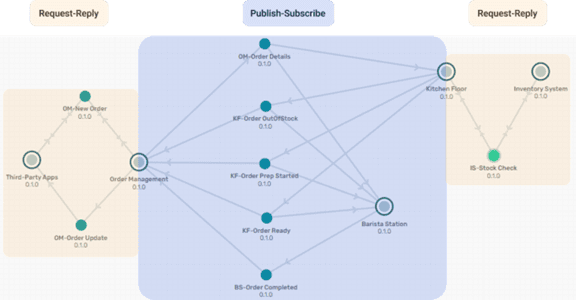
Explore Scaling Patterns
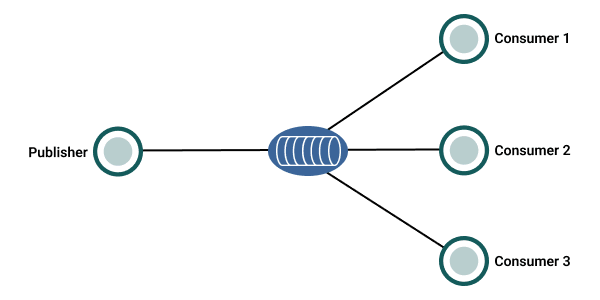 Learn about fan-out, request-reply and consumer scaling patterns and how easy they are to implement in your Solace Event Broker.
More to Learn and Practice
Once you understand the main concepts and have tried some basic examples, you can move on to more complex concepts and tasks like connecting your own applications, building applications, creating an event mesh, and operating your environment.
Next Steps
Congratulations, you are ready! Join a community of your peers to help answer questions and engage with our team of amazing developer advocates.
- Join the Community
- Check out our Developer Resources Site
- Sign up for Solace Academy to take courses and get certified