Snowflake is a data warehouse built for the cloud. It provides enterprises with a cost-effective combination of the power of data warehousing, the flexibility of big data platforms, and the elasticity of the cloud. Snowflake can help you bring together diverse data into one system for data warehousing, query processing, and analytics. The solution enables Solace messages to be published to Snowflake tables via S3.
Solace PubSub+ Platform is an event streaming and management platform that helps enterprises design, deploy, and manage event-driven systems that span cloud, on-premises and IoT environments so they can be more real-time. It allows creation of event-driven apps and microservices on any platform with whatever language, open protocols, and APIs you choose. Solace PubSub+ has native connectivity to S3, which can be staging area for Snowflake.
In this blog post I will create a pipeline flowing from Solace PubSub+ into Snowflake that is real-time and can be used to power a real time analytics process or dashboard.
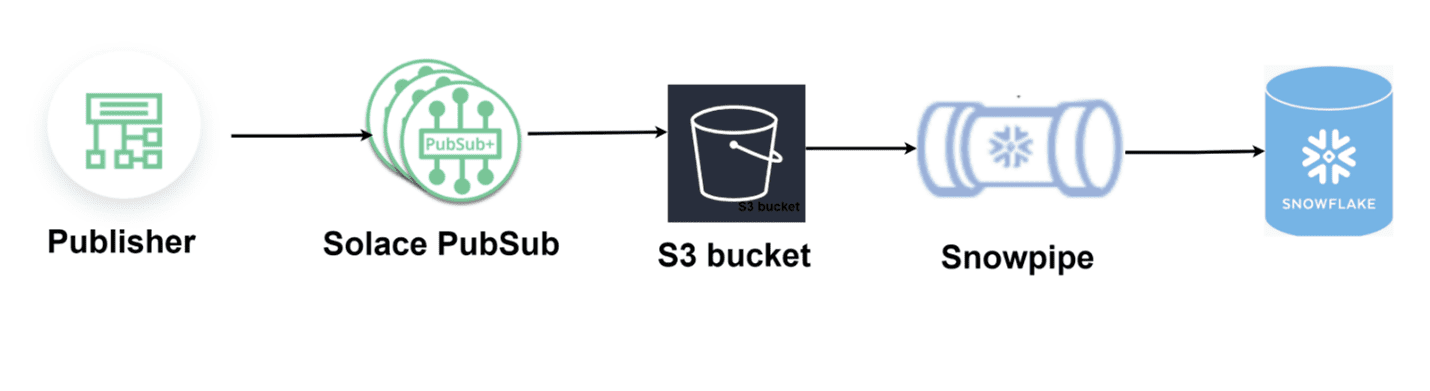
Solace provides native connectivity to S3. The Solace PubSub+ broker uses a REST Delivery Point (RDP) as a webhook to publish messages to S3 as files. This can be achieved without any intermediary services like API gateway or lambda. S3, in turn, can be useful as the staging area for loading Snowflake tables via Snowpipe. Snowpipe loads data from S3 files as soon as they are available in a stage. Solace also has native connectivity with S3 equivalents on other cloud providers such as Google storage and Azure Data Lake Storage, so a similar solution can be built if you are not using Amazon Web Services.
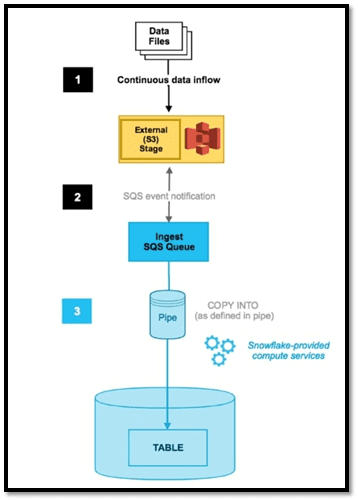
Snowpipe is Snowflake’s continuous data ingestion service. Snowpipe enables real-time ingestion of records into Snowflake tables as they arrive in the stage. A stage is a storage location from where Snowpipe can load data into a Snowflake table. In this example, we are using Amazon S3. In a nutshell, Snowpipe provides a “pipeline” for loading data in micro-batches as soon as it is available.
The Snowpipe flow is illustrated as below:
The output of our work today will create a pipeline flowing into Snowflake that is near real-time and can be used to power a larger analytics process or dashboard.
- Configure Solace–S3 integration
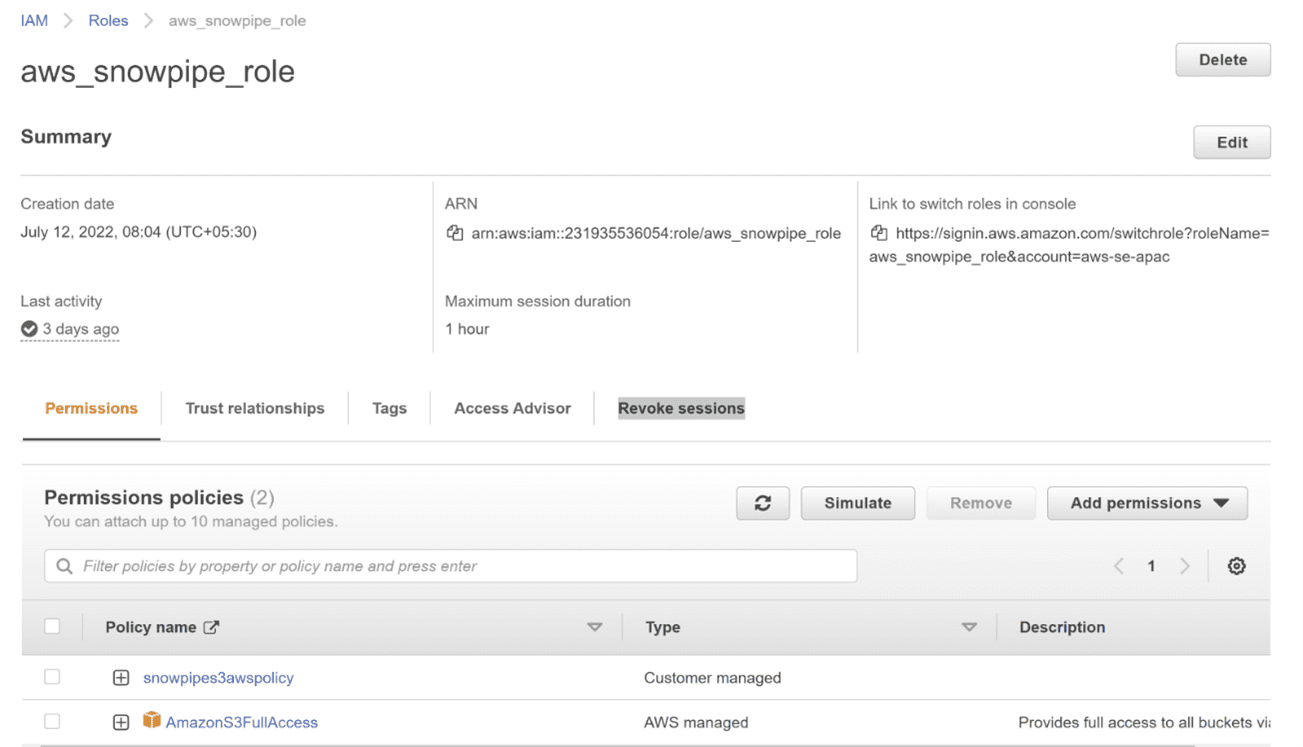
Store events on Amazon Simple Storage Service (Amazon S3) from PubSub+ event brokers by leveraging REST Delivery Points (RDPs) to generate Amazon data lakes to archive and analyze your events as part of your event-driven architecture (EDA) journey. The Solace RDP click to connect wizard for S3 automatically creates all the REST Delivery Point components (RDP client, REST Consumer, queue, and queue binding) you need for Amazon S3. Configure the REST S3 consumer using this video tutorial. There is also the integration hub to help you spin up your RDP for S3. - Create roles for S3-snowpipe integration
Snowflake storage integrations uses AWS Identity and Access Management (IAM) to access S3. The S3 bucket is referenced by the Snowflake integration from an external (in this case, S3) Snowflake stage object.

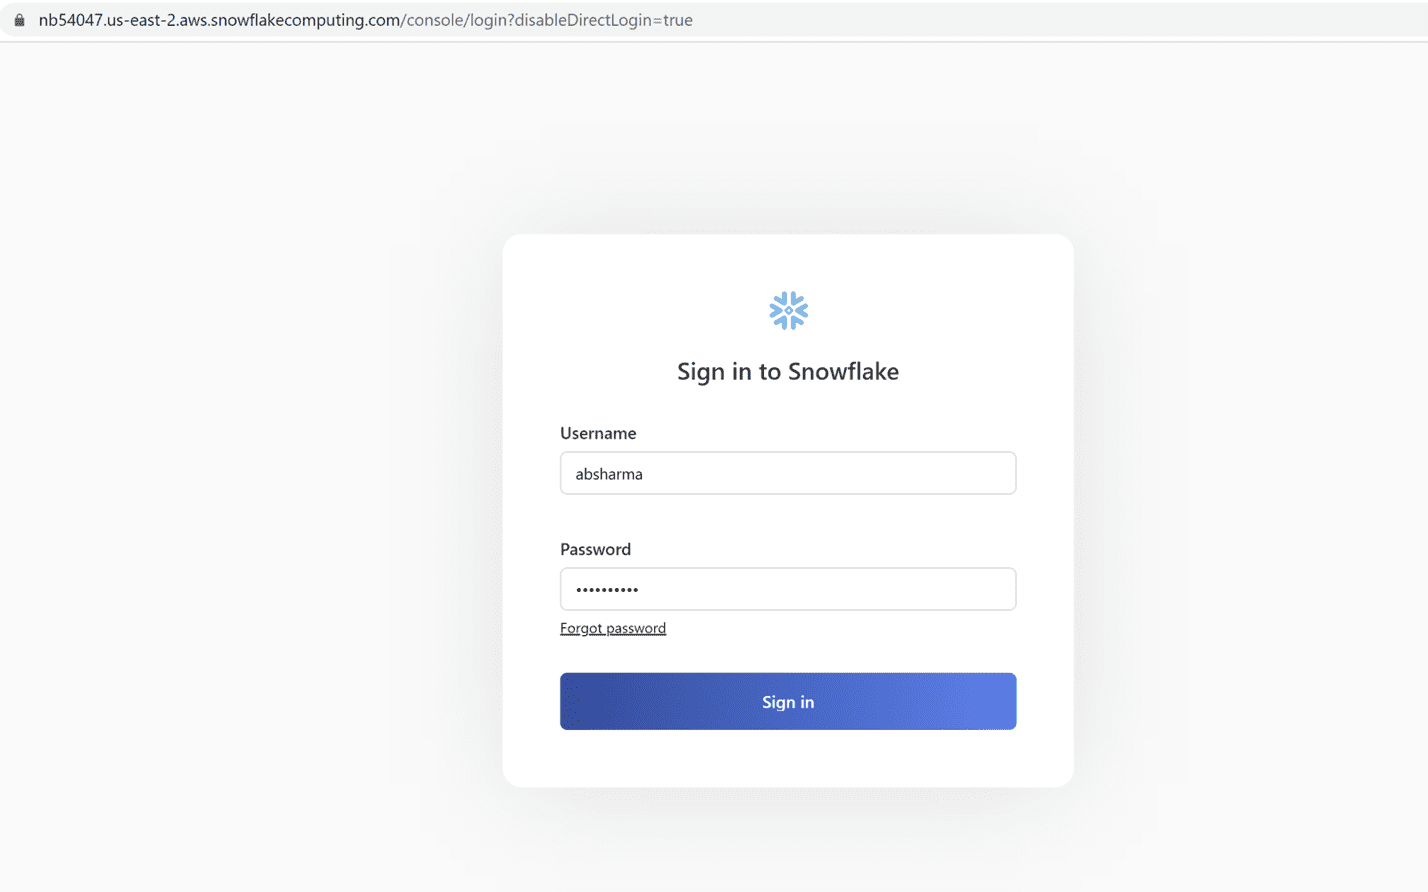
- Log in to snowflake account and switch to classic view
Classic view provided ease of use. One can prefer to go for the conventional view.
Classic view in Snowflake provides the worksheet to execute the queries.

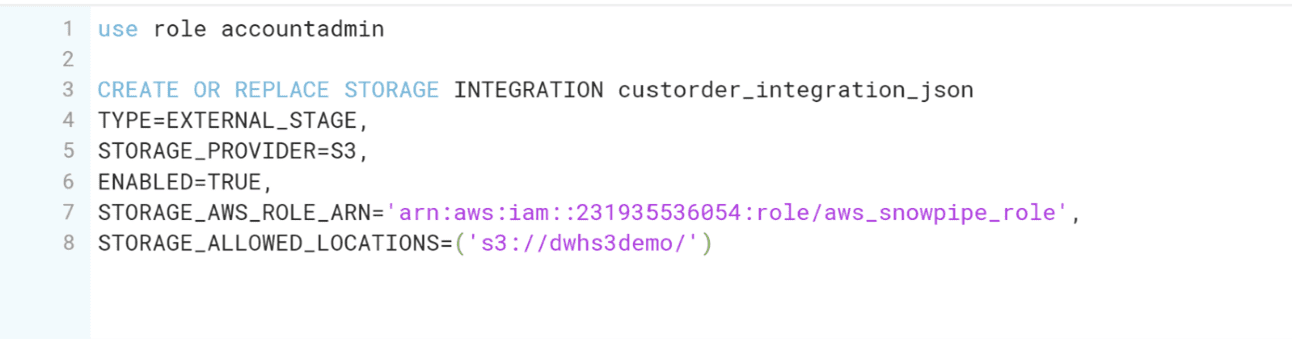
- Use trial account in snowflake to execute queries
This allows to create a storage integration, which in this case is S3. Use the role created in the above step to fill in the variable STORAGE_AWS_ROLE_ARN. This role allows the Snowpipe to access the bucket for auto ingesting the data from S3 buckets to Snowflake table.

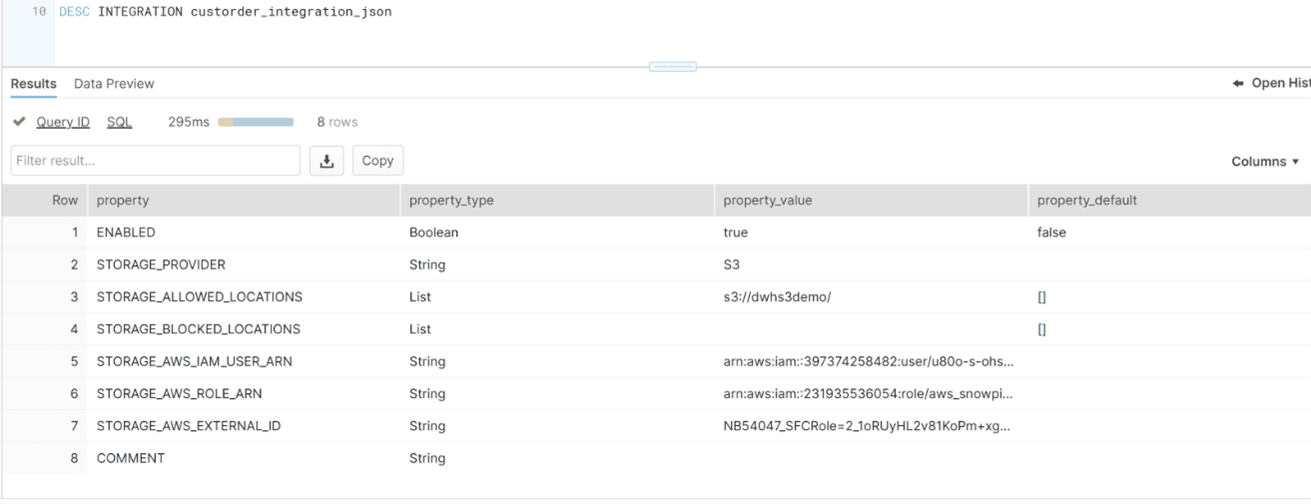
- Update role trust relationships in AWS IAM
Take note of the STORAGE_AWS_EXTERNAL_ID and STORAGE_AWS_IAM_USER_ARN in the Integration storage created above. As mentioned above this role allows the Snowpipe to access the bucket for auto ingesting the data from S3 buckets to snowflake table.

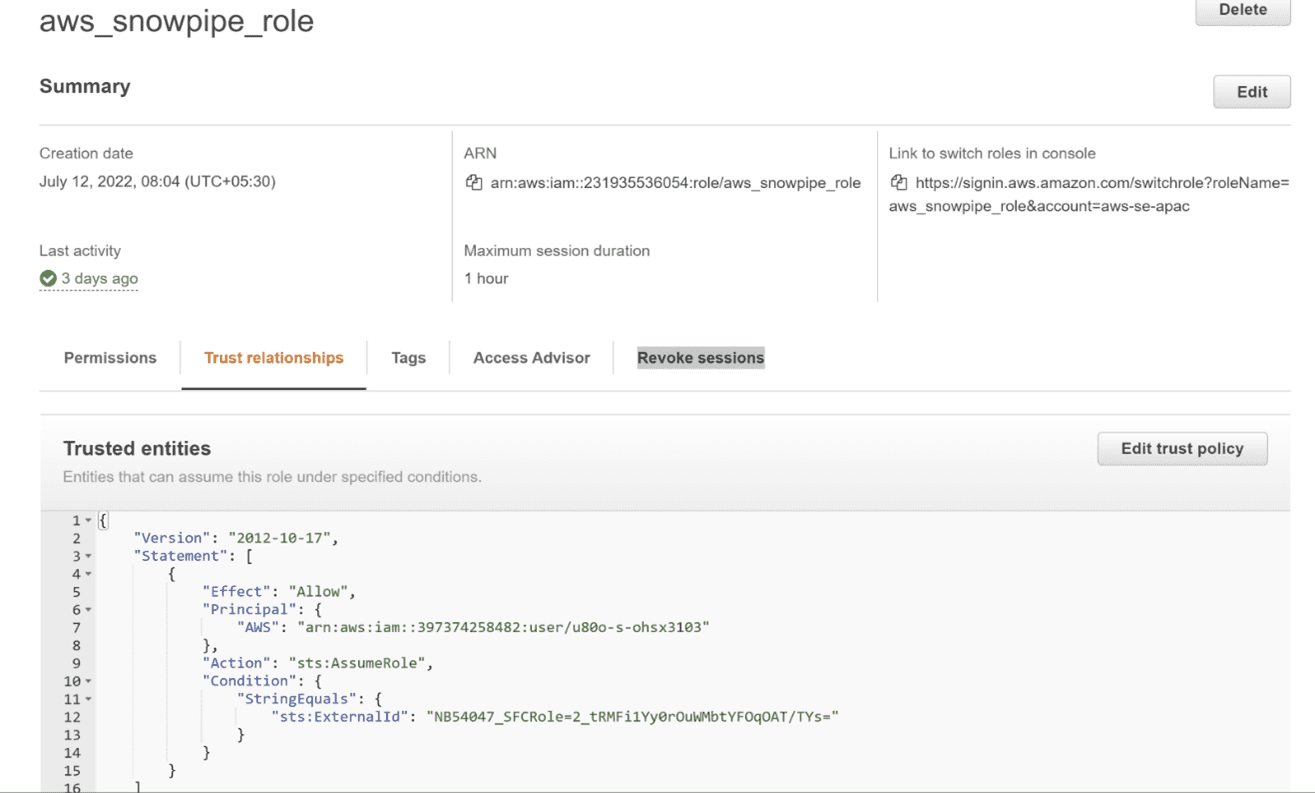
Replace the principal and external-id with the STORAGE_AWS_ROLE_ARN and STORAGE_AWS_IAM_USER_ARN in the role trust relationships section.

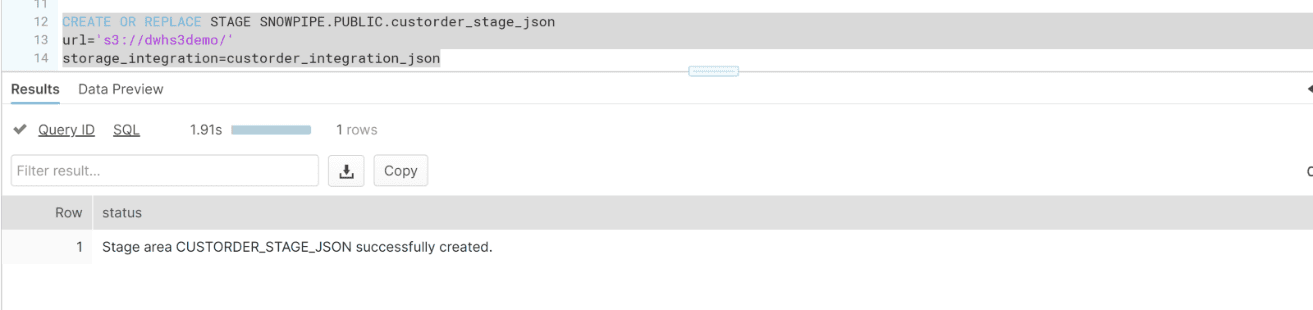
- Create a stage as S3 bucket and link it to integration
The S3 bucket acts as the stage area for Snowpipe, files kept in this bucket and auto ingested in the Snowflake table.

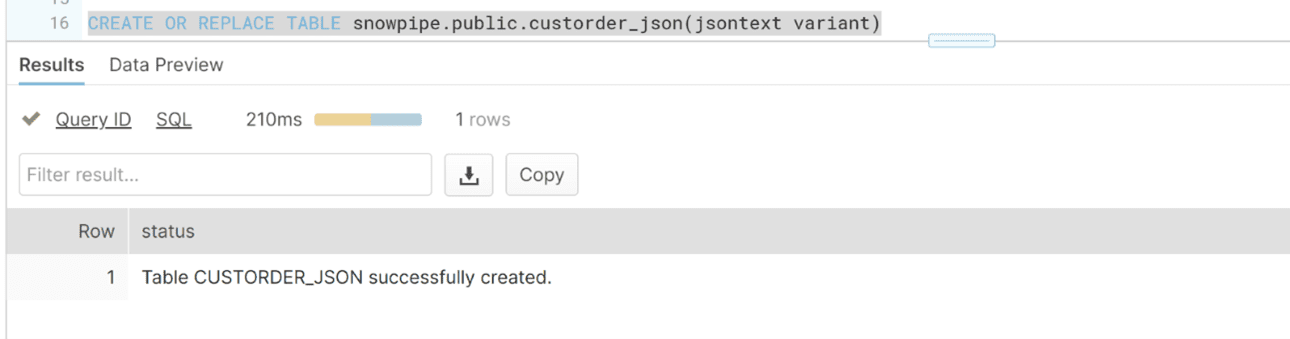
- Table creation to hold JSON data
Create a table to hold jsontext variant. This will contain all the records in JSON format, since in this tutorial, the messages are published to Solace and in turn in S3 bucket in JSON format.

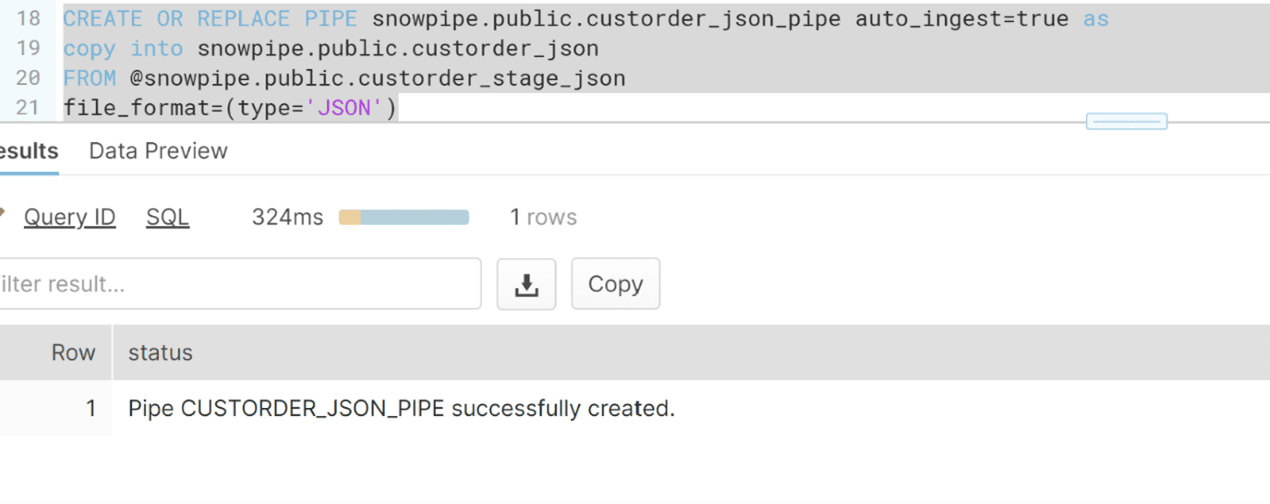
- Create Pipe
Create the pipe to receive real-time streams from S3 to Snowflake, also mark auto-ingest as true. If auto-ingest is false, a lambda function or custom implementation will be required to send a REST request to snowflake with the list of newly created files. This pipe helps to copy the data from the stage table (S3 in this case) to snowflake table.

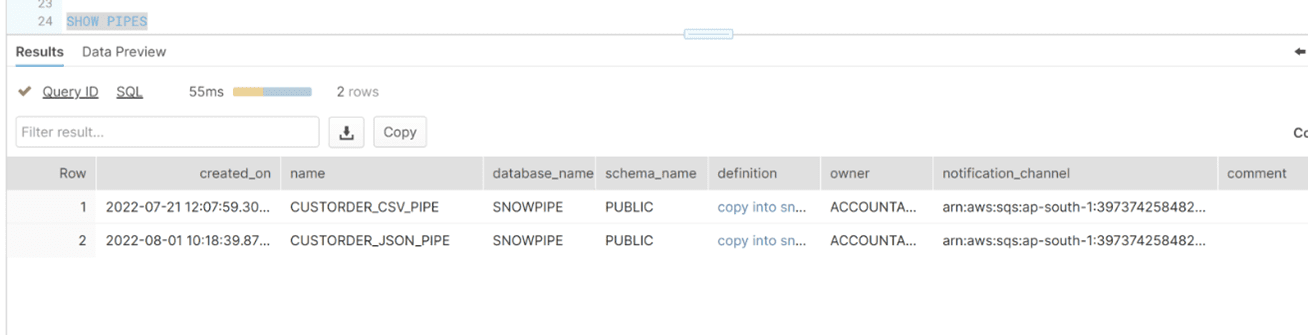
Execute the show pipes command. Copy the notification channel column value from the table. This will be utilized in the next step.

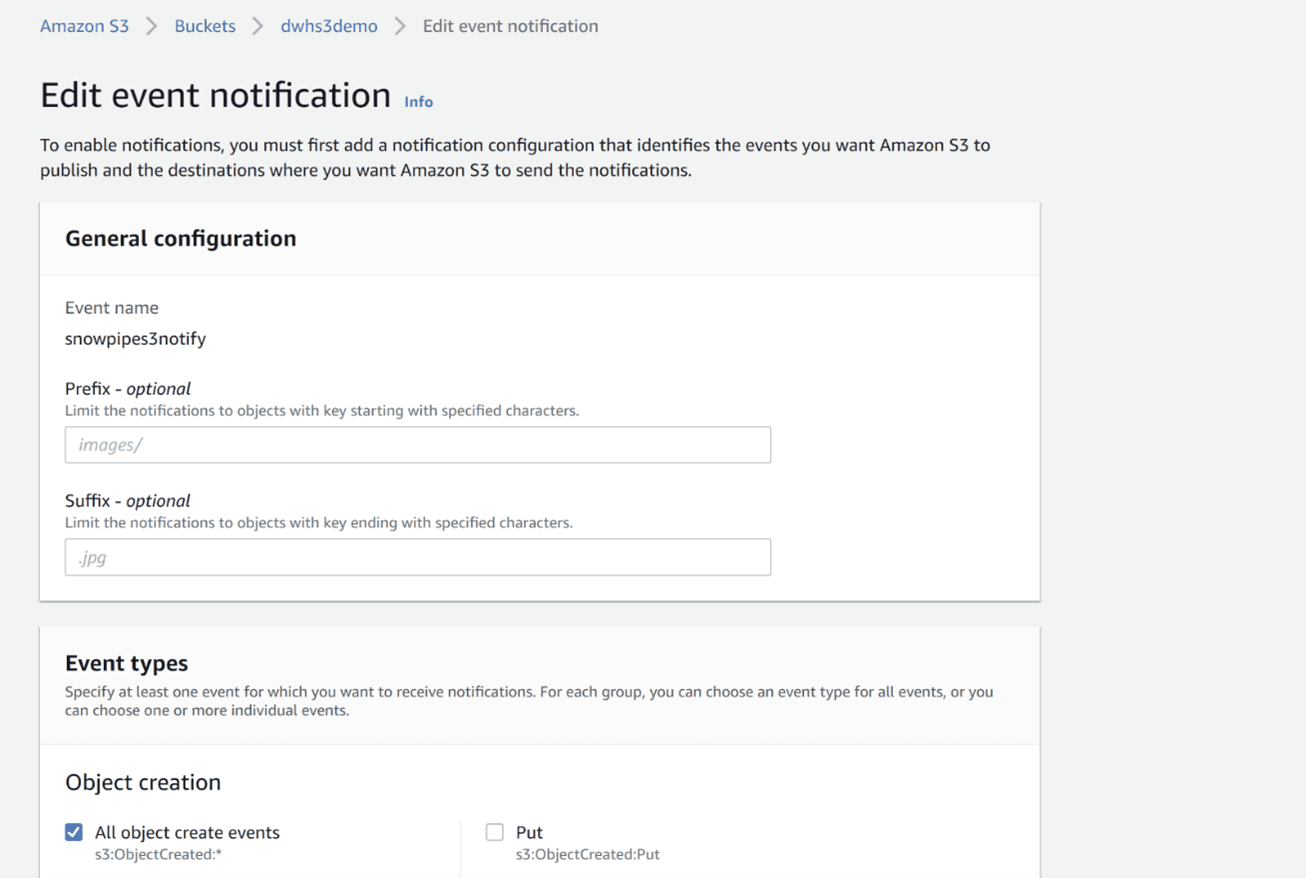
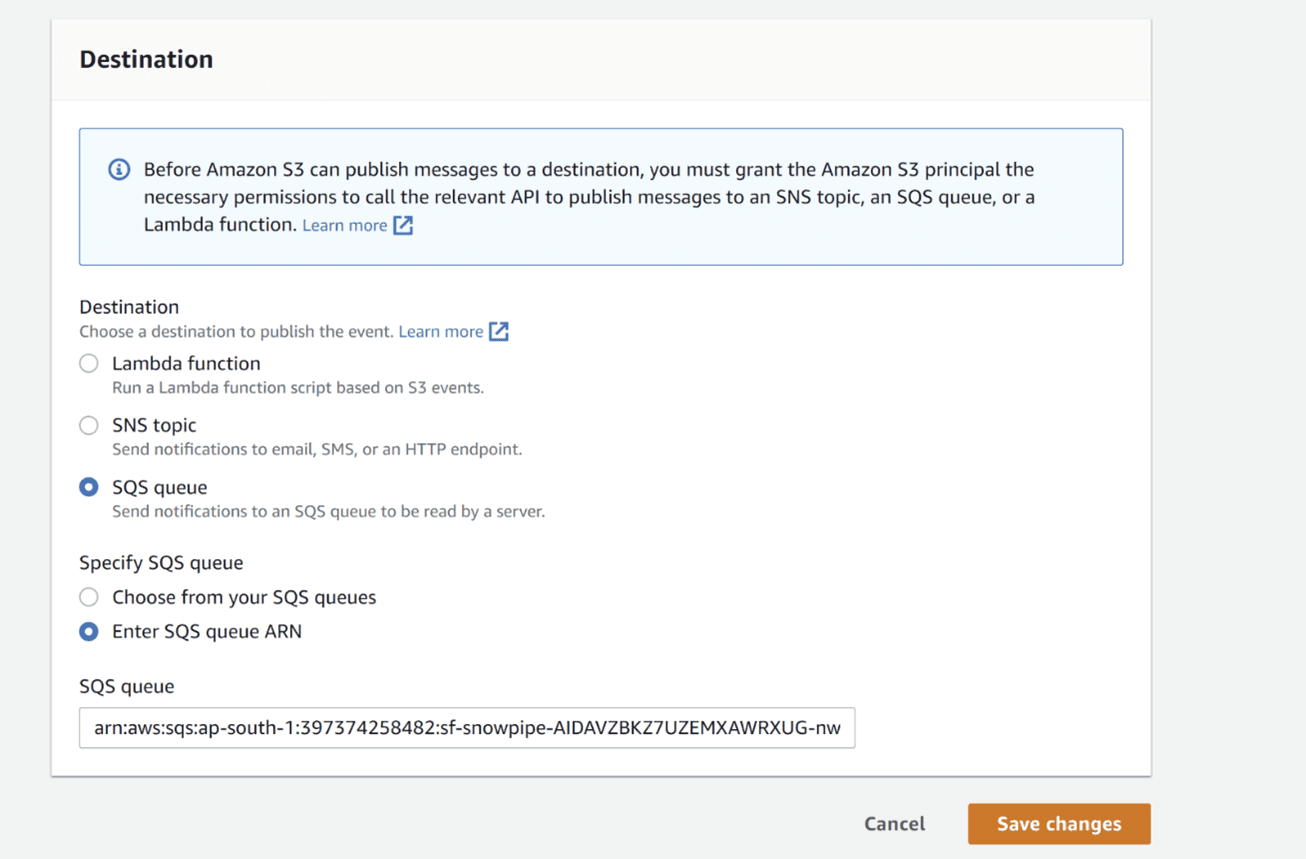
- Associate the S3 bucket with SQS in event notification
As soon as the message is published on the broker and the file is created on S3, an event notification is sent to the SQS queue, which acts as the trigger to the Snowpipe to load the files in S3.

Update the SQS queue value with the notification channel information captured in the earlier step:

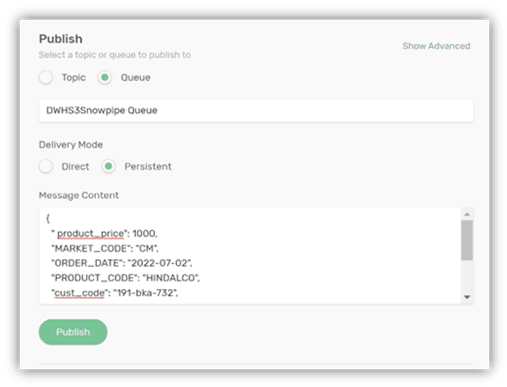
- Publish JSON messages to the queue
Connect to the broker and publish a sample JSON message to the queue, configured in Solace-S3 integration, in step 1.

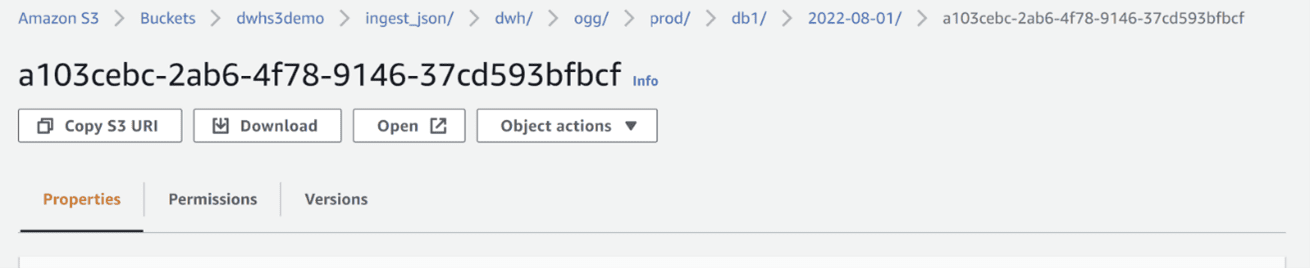
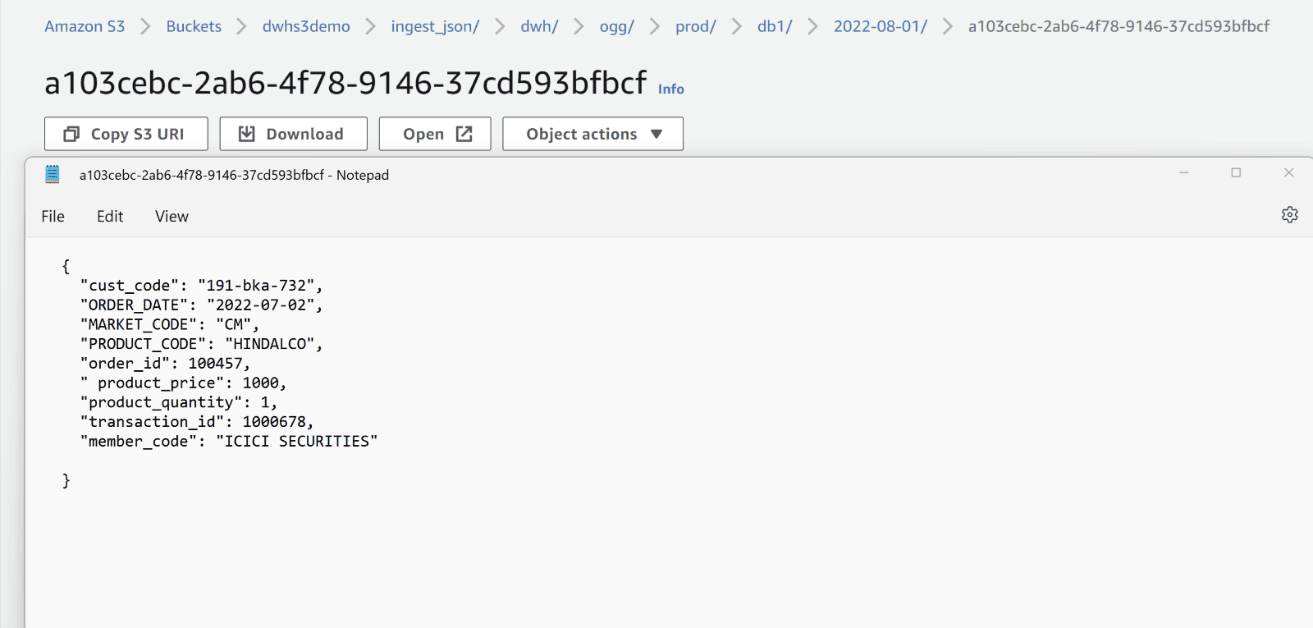
- Validate file is created in S3
As soon as the message is published on the queue, the REST S3 consumer picks up the message and writes it to S3 bucket.


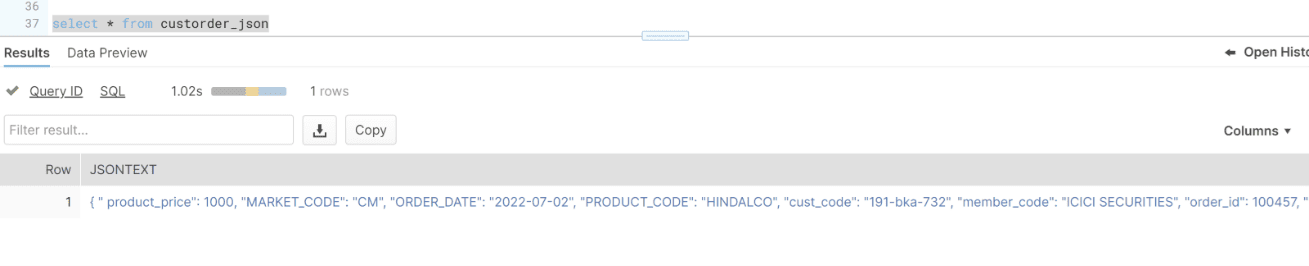
- Verify the records in custorder_json table
This table is mentioned while creating pipe between S3 and Snowflake table. The table contains the JSON text which is treated as object in Snowflake.

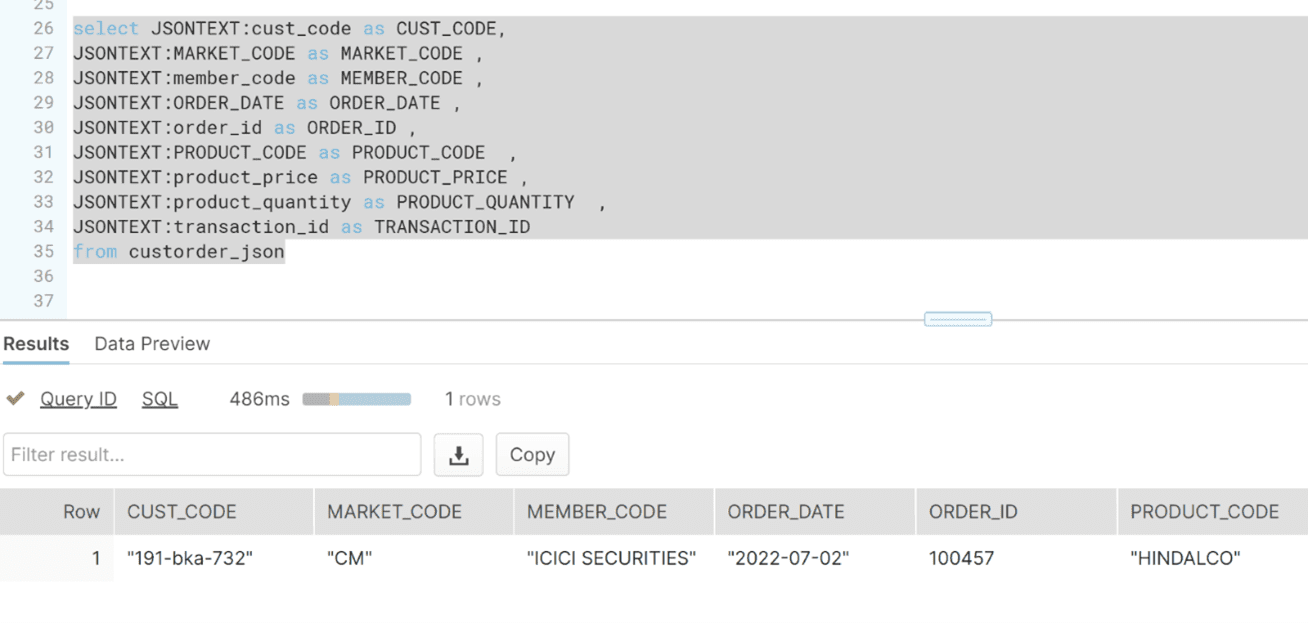
- Flatten the JSON records
The JSON text in the custorder_json can be flattened and accessed by the query. One can easily create a view or query for fetching the details from the JSON text and manipulate the data for data-mining operations.

Conclusion
In this blog post I described a solution for real-time integration between Solace PubSub+ Event Broker and Snowflake for JSON records. Furthermore, this solution can be extended to any business use case where a real-time/near-real-time data ware-house solution is required. This can be widely used in real-time analytics, which can help fast-moving businesses strengthen marketing and sales synergy, optimize workflows, and react quickly to customer behavioral data and market dynamics. If you have any questions or want to learn more, visit the Solace Developer Community.
Explore other posts from category: For Developers


Subscribe to Our Blog
Get the latest trends, solutions, and insights into the event-driven future every week.