Let me start with a disclaimer that I am very new to Arduino. Despite having an Electrical Engineering degree, I had never really played around Arduino until very recently. The code referenced in this post was handed down to me by my colleagues at Solace.
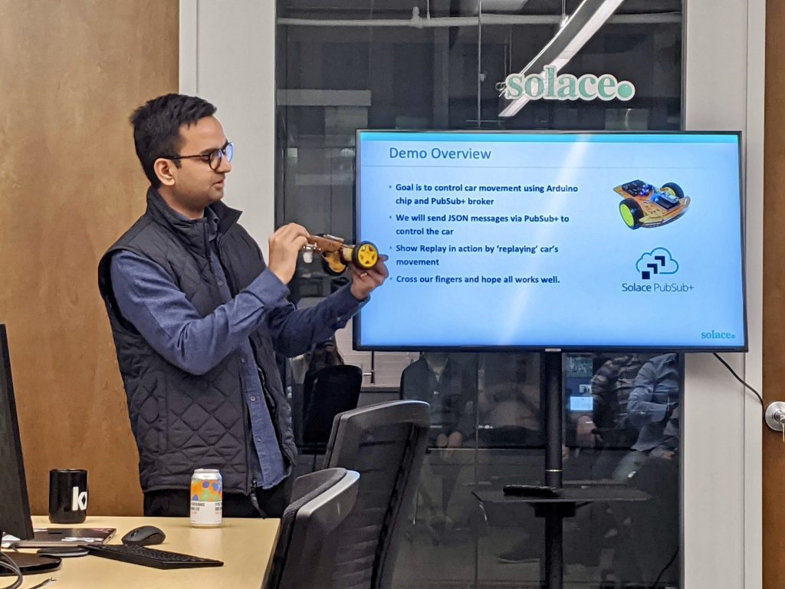
Recently, I presented for the first time at Solace’s meetup in New York. For this meetup, we decided to cover a specific feature of Solace PubSub+ which we thought our users and prospects would find interesting: Replay. PubSub+’s Replay feature is relatively new but extremely powerful and one that many users have welcomed.
Every meetup’s success depends on two factors:
- Food and drinks
- Demo
Food and drinks were a no-brainer. We got a bunch of delicious pizza and lots of craft beer (lagers, pilsners, sours, and even rosé cider!).
However, having a cool demo for your meetup requires a lot of planning. We could have easily demoed Replay via PubSub+ admin UI. While it would have gotten the point across, it wouldn’t have been visually appealing. After a lot of discussions, we decided to use a car powered by Arduino and controlled by PubSub+. The idea was simple and visually appealing. We would build an Arduino-powered car and control it by sending MQTT messages via PubSub+. Then, we will replay those messages and show the car repeating its earlier steps (this is when the crowd goes “oooh aaaah”).
In this post, I would like to show you how you can build your own Arduino-powered car and control it with PubSub+ Event Broker. Let’s get started.
Here are the steps to achieve our goal:
- Assemble car from the car kit
- Configure code and upload to Arduino chip
- Send messages to control the car
Assemble Car from the Car Kit
I don’t want to document all the steps I followed to assemble the car because, to be honest, I was just following instructions from other blogs. The instructions that came with the kit were not very helpful and very difficult to understand.
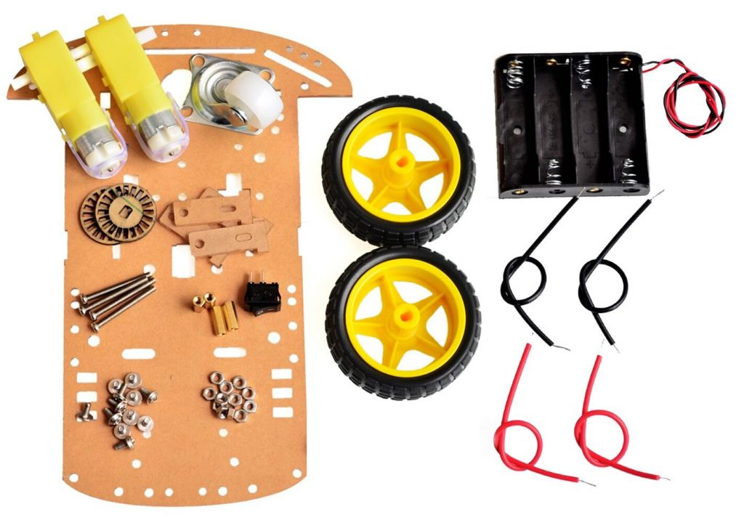
You can buy the kit from Amazon. More details about the kit can be found on this site. This YouTube video was very helpful and I highly recommend using it as a starting point.
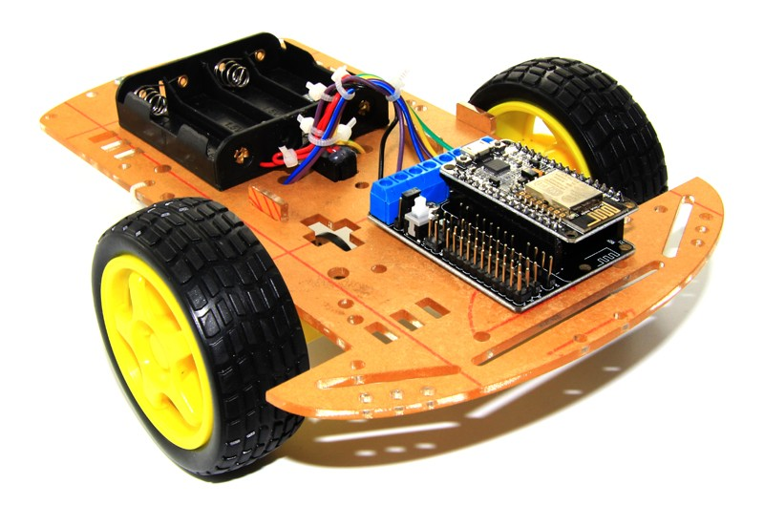
The assembled car should look like this:
Configuring Code and Uploading to Arduino Chip
Once you have the car assembled, it is time to upload code to the Arduino chip. You can find the code on Solace’s github. In the repo, you will find car_demo/arduino/src/car_kit.ino which is the code that you will need to open using Arduino IDE and upload it to chip. Note that the following instructions are meant for the ESP8266 chip only.

Downloading Arduino IDE
To be able to upload code to the chip, you will need to download and use the Arduino IDE. I recommend downloading the software instead of just using the browser version. Once installed, open car_kit.ino in the Arduino IDE.
Configuring code
Before you can upload the code, you need to modify the code slightly to get it to work for you. You need to make a minimum of two changes:
- Enter wifi details so the chip can connect to the Internet
- Enter MQTT broker details
Modify the following lines by entering your Wifi details:
const char* ssid = "<ssid>";const char* password = "<ssid_pwd>";
Modify the following lines by entering your MQTT broker details:
const char* mqttServer = "";
const int mqttPort = ;
const char* mqttUser = "";
const char* mqttPassword = "";
You will need an MQTT broker running so you can enter the relevant connection settings. Of course, I would recommend using Solace’s PubSub+ Event Broker which supports MQTT. You can spin up an instance via Solace Cloud for free.
Configuring board
Before uploading this code to your Arduino chip, you will need to configure your IDE to work with the specific model of your chip as well as install PubSubClient and ArduinoJson libraries.
Arduino IDE supports a lot of ‘boards’/chips out-of-box but sadly, doesn’t support the ESP8266 chip. So, we need to add it manually to Arduino’s Board Manager. To do so, go to Arduino > Preferences and enter the URL: http://arduino.esp8266.com/stable/package_esp8266com_index.json
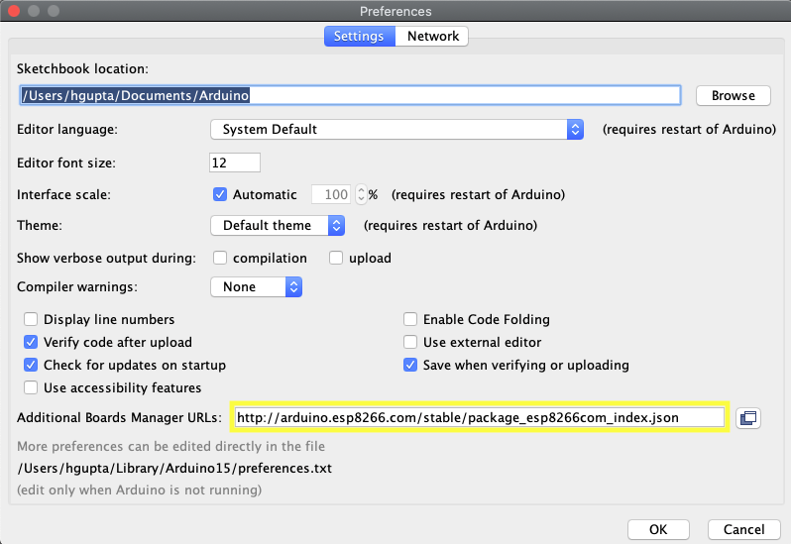
Click OK.
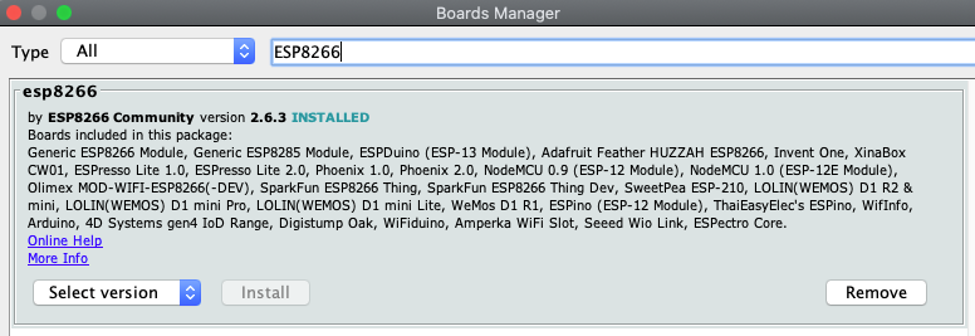
Now, go to Tools > Boards > Boards Manager, and search for ESP8266. You will now see ESP8266 board by ESP8266 Community. Click on Install to install it. You can also choose to install a specific version if needed. We are using 2.6.3 currently.
Installing necessary libraries
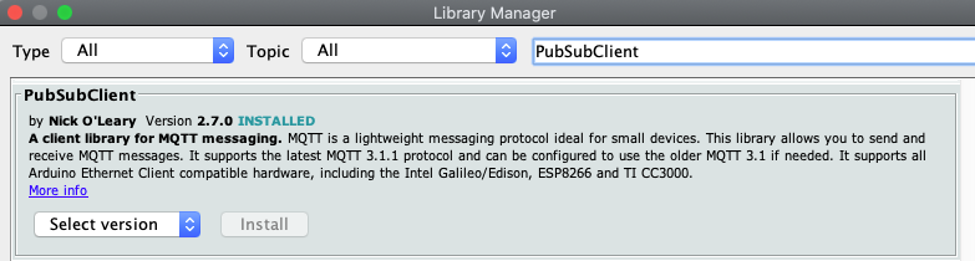
Now, you are ready to install PubSubClient and ArduinoJson libraries. You can easily do that by going to Tools > Manage Libraries and simply searching for them and installing them.
Once you have these libraries installed, you are ready to upload the code to the Arduino chip. Plug your chip into your computer via Micro USB cable. You will see a blue LED light as soon as you plug in the chip. If you don’t see the light, try toggling the white switch on the chip to turn it on.
Finally, go to Sketch > Upload to upload the code to your chip.
That’s it!
Sending MQTT messages via PubSub+
You can now go to PubSub+ UI and send some sample messages to your chip to control the car.
Getting the Chip ID
If you are using the exact code from car_kit.ino, you will need to publish messages to car/drive/${chipID} topic where chipID is your Chip’s ID. You can get the Chip ID by looking at the output of your code in the Serial Monitor. To be able to run the Serial Monitor from Arduino, you will need to make sure your chip is plugged in via USB to your laptop. When you upload the code, you can run the Serial Monitor to see the output.
Here is the output of my Serial Monitor:
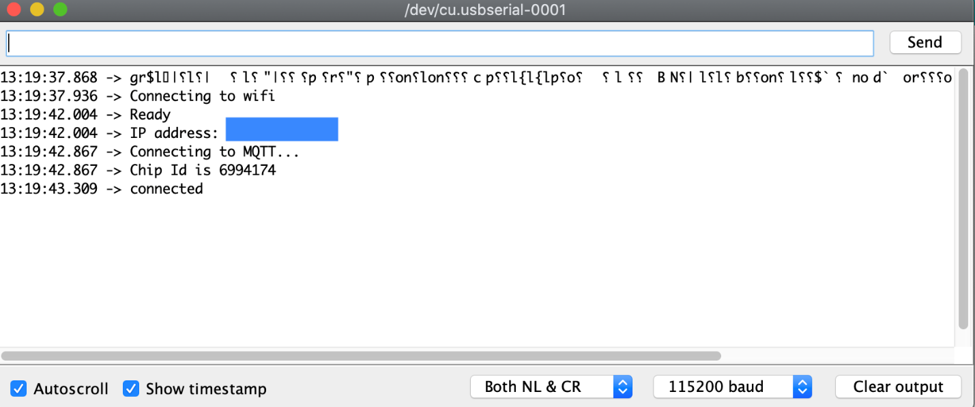
As shown in the screenshot above, my Chip ID is 6994174.
Here is some good documentation on how to use Arduino’s Serial Monitor.
Sending MQTT Messages
The payload of your message should be in JSON format and should include three values:
- l – power for the left motor with a range of -100 to 100
- r – power for the right motor with a range of -100 to 100
- d – duration in milliseconds
Negative power will make the motor turn in the opposite direction compared to positive power. For example, l:100, r:100 and d:500 will make the car move forward for 500 milliseconds. If you want to turn right, you can set l to 0 and if you want to turn left, you can set r to 0, respectively. You can control how far the car drives by adjusting the duration (d) parameter.
Here is a sample payload:
{
"l": 100,
"r": 100,
"d": 700
}
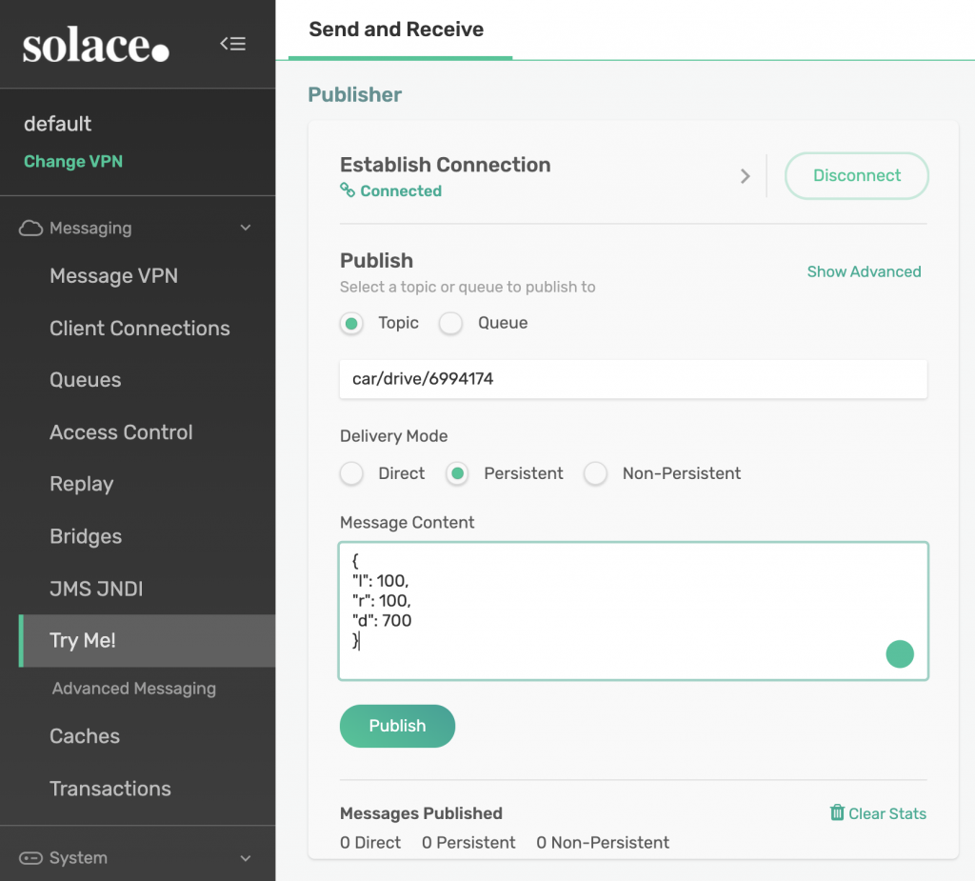
Solace PubSub+ Try Me! Publisher
It’s up to you how you would like to publish these JSON messages. For development, you can simply use Solace’s Try Me! tab and use the Publisher app there to publish these messages.
Of course, you can build a nice shiny app or program a joystick to send such messages. It’s up to you how creative you want to get!
Architecture
Now that we have our car running, let’s take a step back and look at the architecture of our setup:
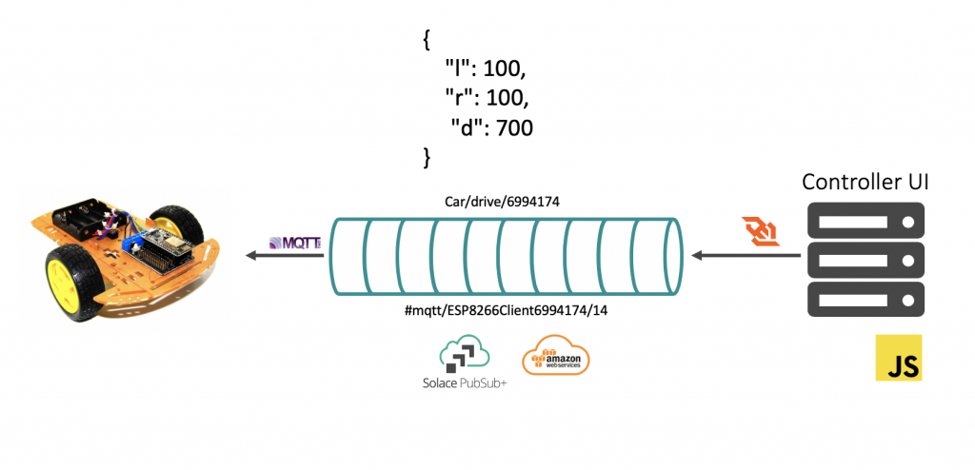
On the left side, we have our assembled car powered by an Arduino chip and subscribing to an MQTT topic with QoS 1. You can see where we specify the subscription in the code:
// Subscribe to car specific drive commands
    char carDriveTopic[40];
    sprintf(carDriveTopic, "car/drive/%lu", chipId);
    client.subscribe(carDriveTopic, 1);
As you can see, we are subscribing to car/drive/${chipId} with QoS of 1. Specifying QoS to be 1 causes PubSub+ to create an internal queue and map car/drive/${chipId} topic to the queue. When we publish JSON messages to the car/drive/${chipId} topic, our messages are sent to the queue and then to the Arduino chip.
On the right side, we have our Controller UI which is simply the javascript Publisher app on Try Me! tab on Solace Cloud.
Needless to say, the MQTT broker being used here is Solace’s PubSub+ Event Broker running on AWS.
That’s pretty much it! I hope you found this post useful. For more information, visit PubSub+ for Developers. If you have any questions, post them to the Solace Developer Community.
Explore other posts from category: For Developers


Subscribe to Our Blog
Get the latest trends, solutions, and insights into the event-driven future every week.