
Fronting synchronous HTTP endpoints with queues and topics allows senders and receivers of information to actively participate in event-driven systems, which are usually the domain of asynchronous messaging interactions.
Solace PubSub+ lets you front HTTP endpoints with queues and topics by proxying RESTful calls via REST Delivery Points (RDPs) and API Microgateway software. In this post I’ll discuss the differences between those options and show you how to use the API Microgateway to proxy a SOAP Web service. To keep things interesting, our sample Web service requires clients to use both TLS and WS-Security.
Here’s a visual overview of what we’ll be doing:

Prerequisites
You should know:
- How to set up, configure and use PubSub+, and obviously you’ll need a copy of PubSub+, which you can download here.
- How to install and use Docker and Linux
- About SOAP Web Services
Differences Between the API Microgateway and RDP
Solace PubSub+ supports two approaches to RESTful messaging, namely REST messaging mode and the API Microgateway or REST gateway mode. The table below summarizes some of the key differences between the two approaches.
| REST Messaging Mode | REST Gateway Mode (Microgateway) | |
|---|---|---|
| Default mode | Fire & Forget (request/reply optional) |
Request/Reply |
| Propagates HTTP headers? | No | Yes |
| Supports all HTTP verbs? | No | Yes |
| Receive requests on | Queues | Topics |
In short, we tend to use RDPs when the use case calls for sending vanilla HTTP POSTs, with optional request/reply semantics. Since we want a reply from the postoffice endpoint and may need to optionally set the SOAPAction header, the Microgateway approach is the better choice.
Find a Secure SOAP Web service
First, we need to find a SOAP Web service that supports HTTPS and WS-Security. Fortunately, Canada Post offers several APIs that match these criteria once you register with their free Developer Program. Why Canada Post? Because we’re a proud Canadian company!
For this tutorial, we’ll be querying the GetNearestPostOffice operation to find postal outlets near Solace’s headquarters in Ottawa, Canada.
Fire Up a Solace PubSub+ Instance
Next, we need to set up a PubSub+ instance. The simplest way to achieve this is via the PubSub+ Docker Compose YAML. Be sure to uncomment the line exposing the REST Default VPN port, i.e. 9000. Without this, we won’t be able to execute an HTTP POST against the PubSub+ instance.
Log in to Your Broker Instance
Once the container boots up, log in to http://localhost:8080 in your browser with the username admin and password admin.
You should now have a secure SOAP Web service from Canada Post, a PubSub+ instance, and be logged in to your broker instance.
Set up the Microgateway
In this section I’ll explain how to enable the Microgateway connectivity, then create the RDP, a REST consumer, and a queue binding.
Enable the Microgateway Connectivity
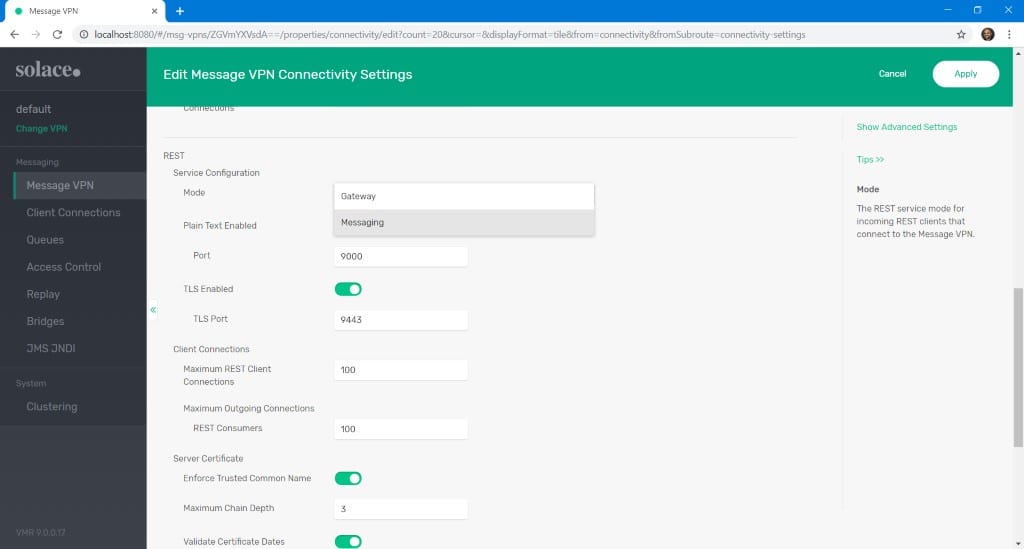
To enable the Microgateway connectivity:
- Navigate to Message VPN > Connectivity > REST.
- Change the service’s mode to Gateway.

Keep in mind that microgateways operate at the VPN level, which means you cannot mix and match REST Delivery Points and gateways for a given VPN.
Create the RDP
Although distinct, gateways leverage RDPs internally to achieve service connectivity. Consequently, we still need to set up an RDP to connect to our Canada Post service.
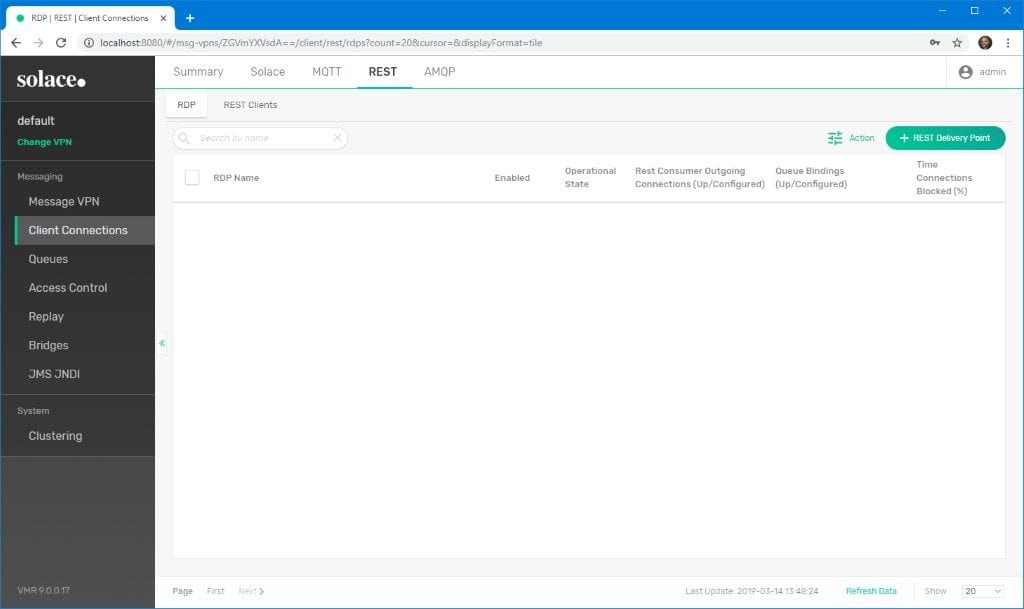
- Click on the default VPN and go to Client Connections > REST. This will bring up the RDP configuration page.

- Click on the green REST Delivery Point button in the top right corner.
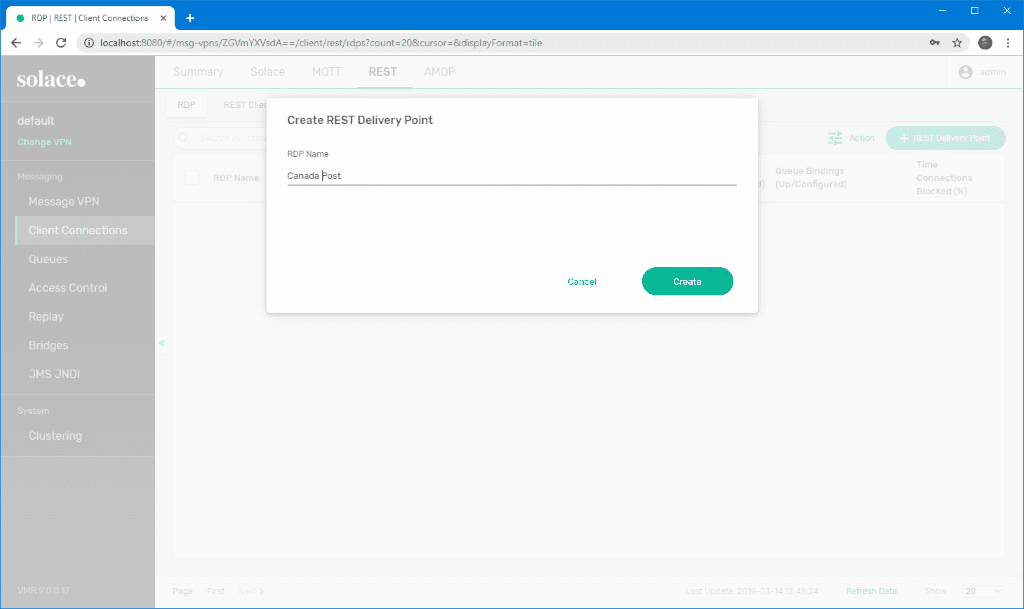
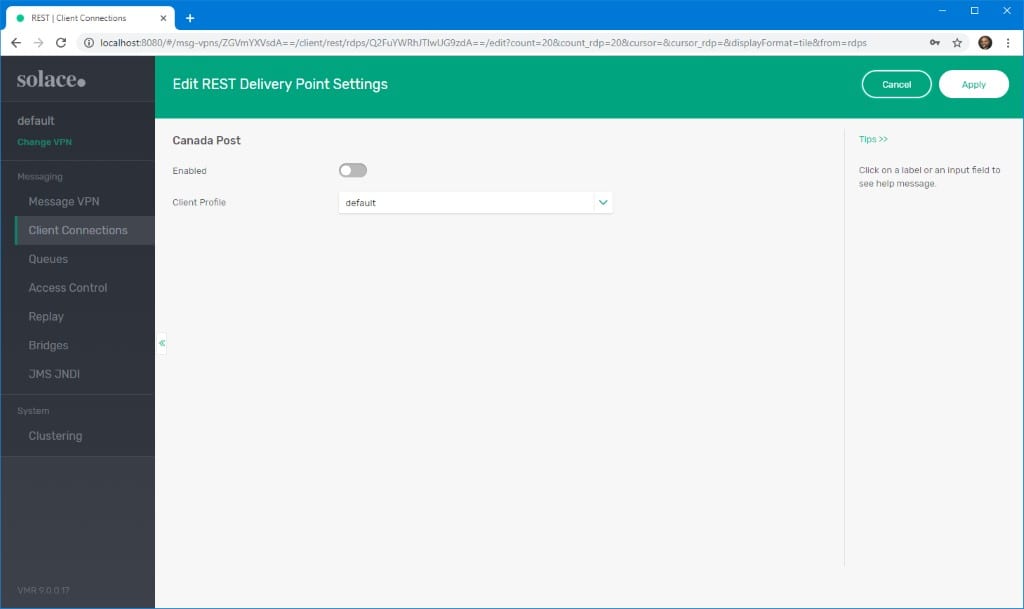
- Give your RDP a name (e.g. Canada Post) and click Create. Keep in mind that this step does not do anything functional. We’re simply establishing a top-level bucket for the actual SOAP configuration.
- Leave the defaults and click Apply. Do not turn on Enabled yet.
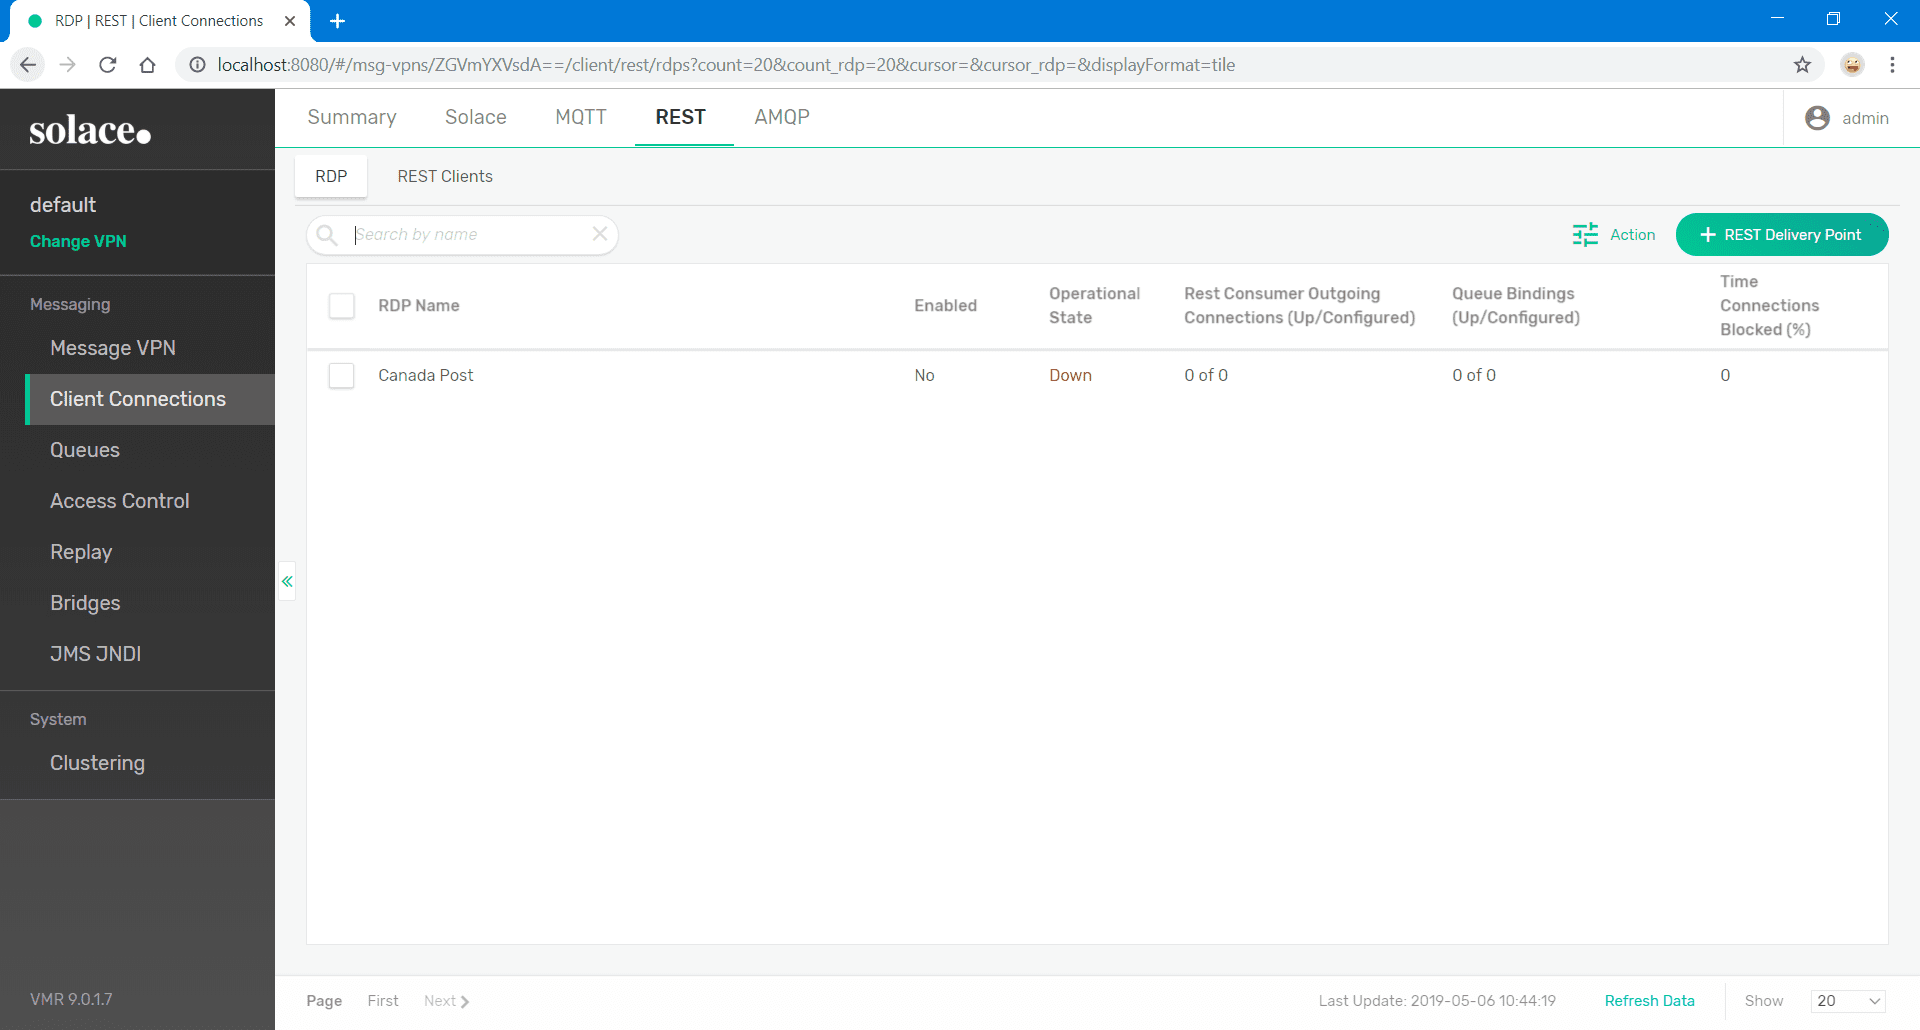
- The newly created RDP is displayed in the Downstate along with some operational data.

Create a REST Consumer
To create a REST consumer:
- Click on the newly created RDP to drill down to REST Consumers: Canada Post > REST Consumers. This is where we define the connection parameters for the Web service.
- Click on the green REST Consumer button to add a new REST consumer.
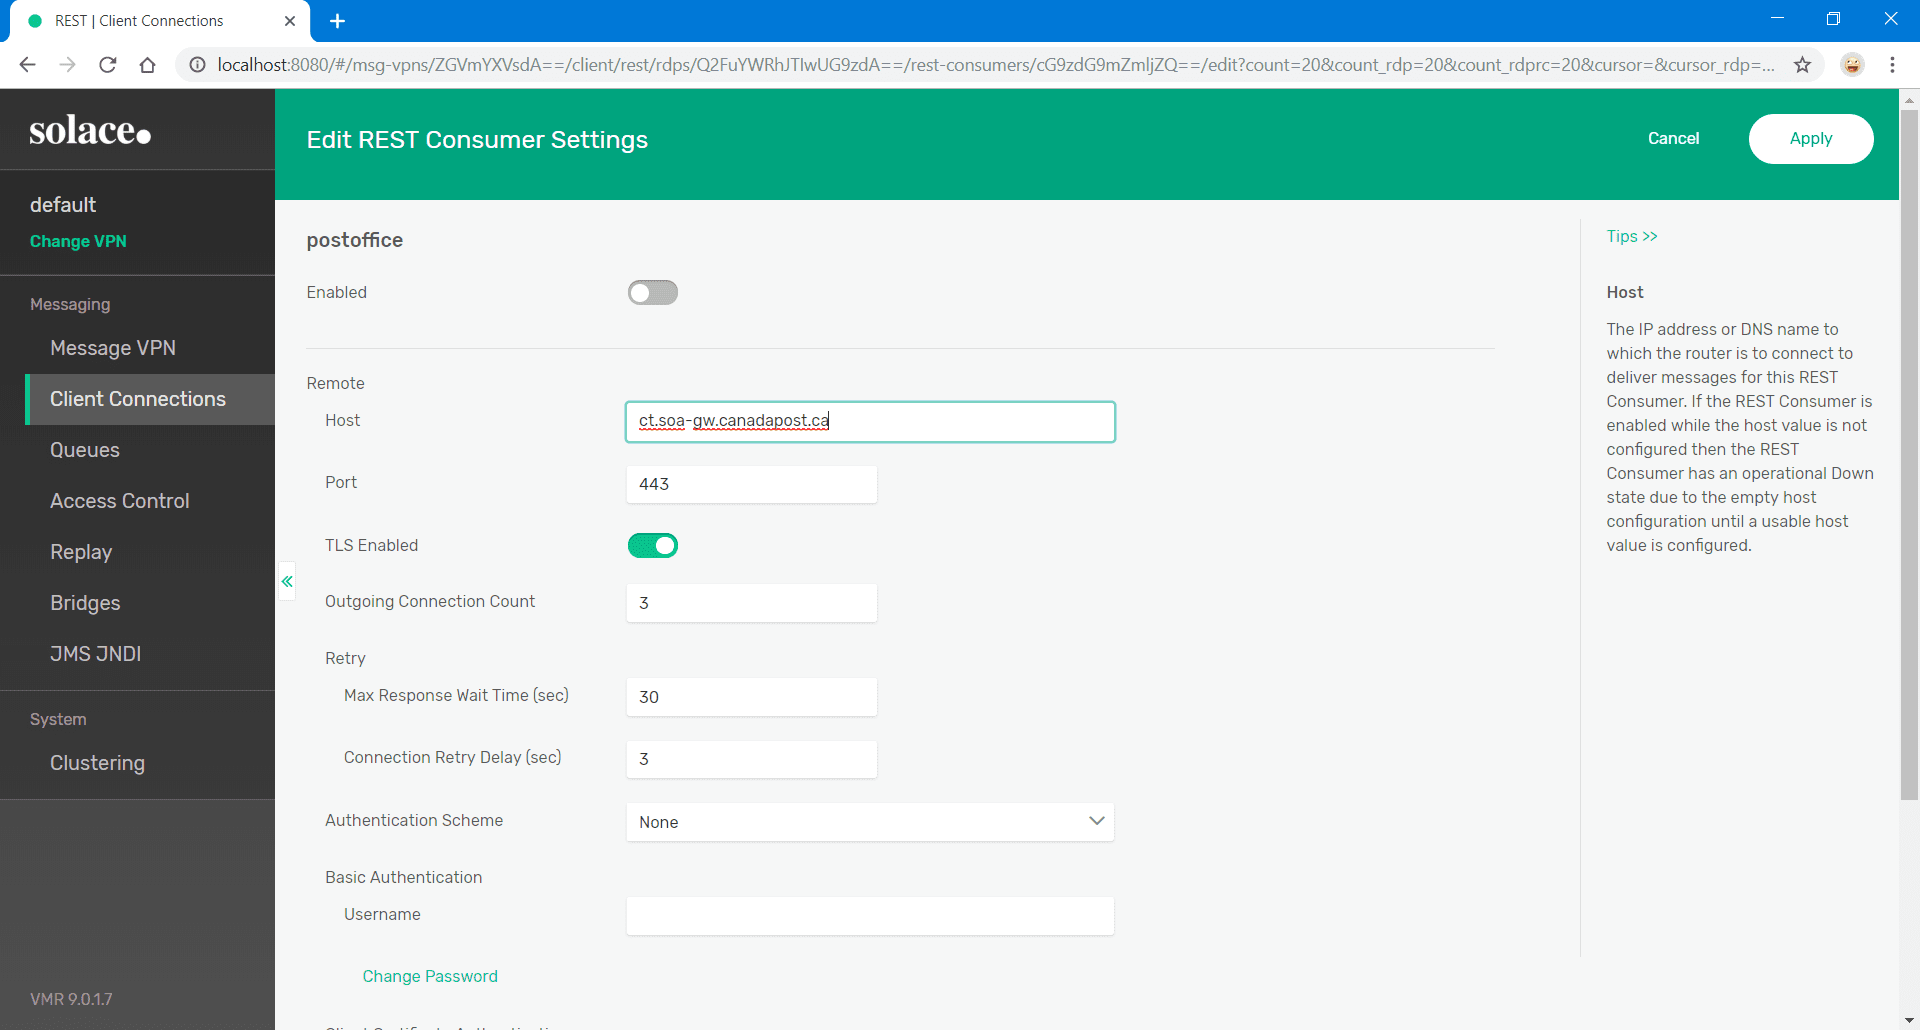
- Give the new REST consumer a name that reflects the SOAP endpoint (e.g. postoffice if the URL is http://www.canadapost.ca/ws/soap/postoffice). Though not strictly necessary, naming your endpoint this way helps to keep things identifiable in situations with multiple endpoints.

- Click on your new consumer endpoint, complete the host details, and set the port to 443 for HTTPS. Do not enable the consumer yet.
- Click Apply.

Create a Queue Binding
Along with the host, you need to identify the exact endpoint to connect to. Since PubSub+ is primarily an event broker, clients interact with it via queues and topics. Consequently, we need to attach the endpoint to a queue to receive SOAP payloads. This is done through queue bindings.
To bind a queue, you need to define a queue, bind the queue to the SOAP endpoint, and subscribe the queue to a topic.
Define a Queue
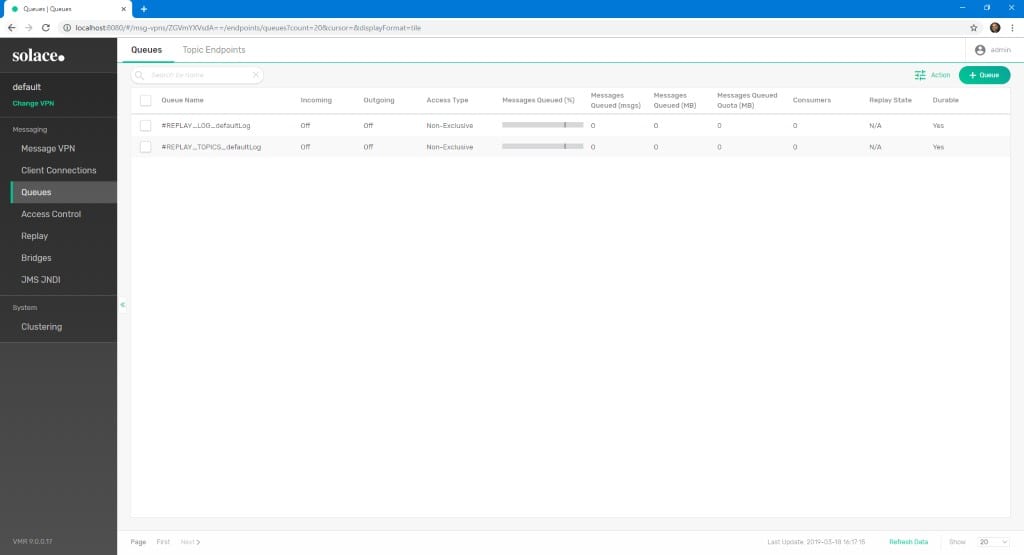
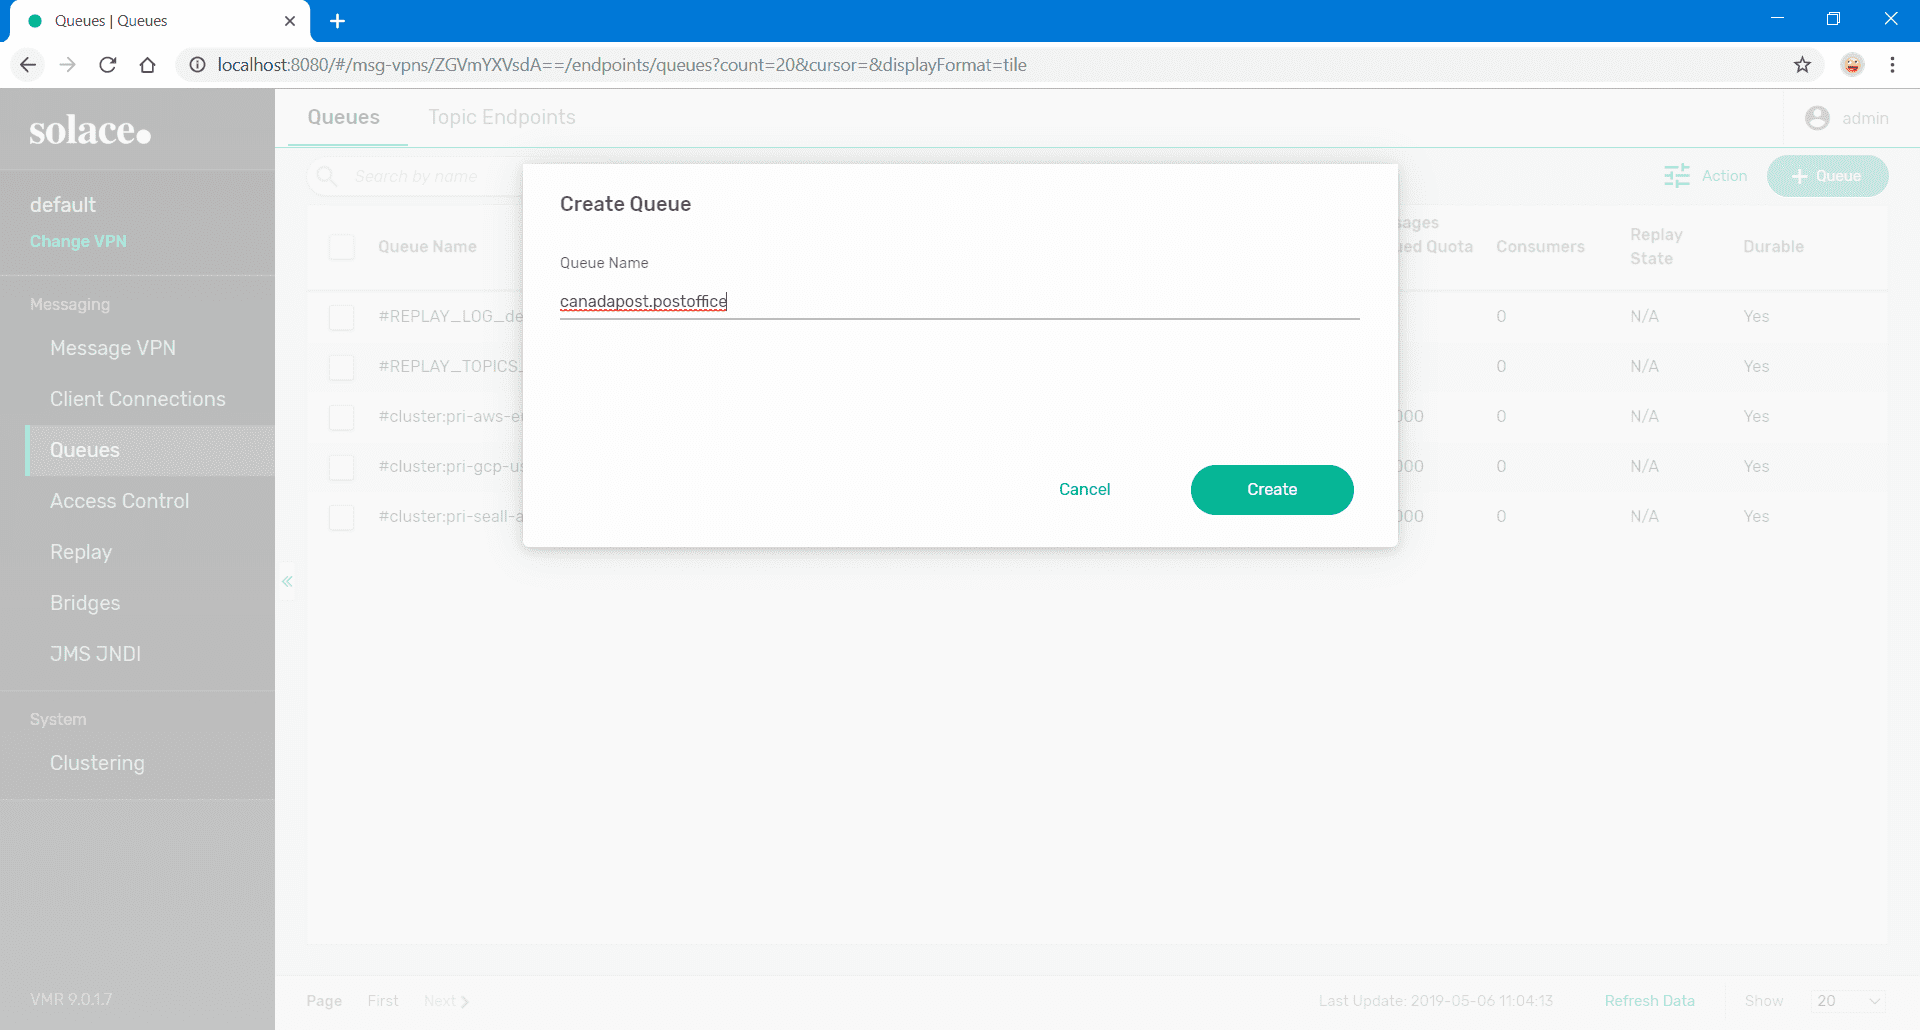
- Navigate to the Queues tab and click on the green + Queue button in the top right corner.

- Create a queue in the form of
[rdpname].[consumername]and click Create. This format is not mandatory but useful when you need to quickly identify the queue related to a given SOAP endpoint.
- Tune the queue settings as necessary for your implementation and click Apply.

Bind the Queue to the SOAP Endpoint
Now that we have a queue defined, you can bind it to your SOAP endpoint.
- Navigate to Connections > REST > Canada Post > Queue Binding.
- After clicking on the green + Queue Binding button, select the queue we previously created and click Create.
- In the dialog that pops up, enter the SOAP endpoint in the Post Request Target field and click Apply.
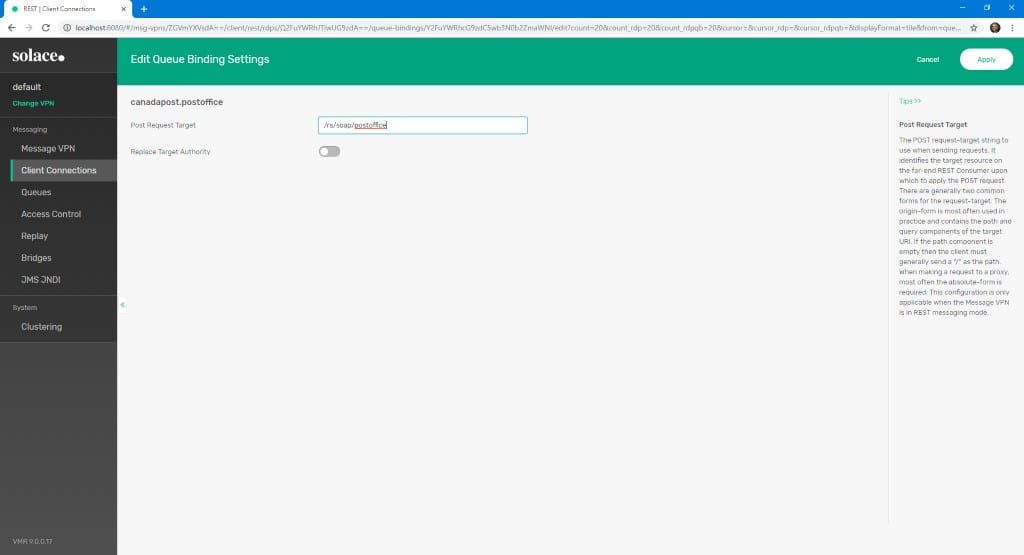
Note: Don’t forget the leading “/”.
Set Up a Topic to Queue Subscription
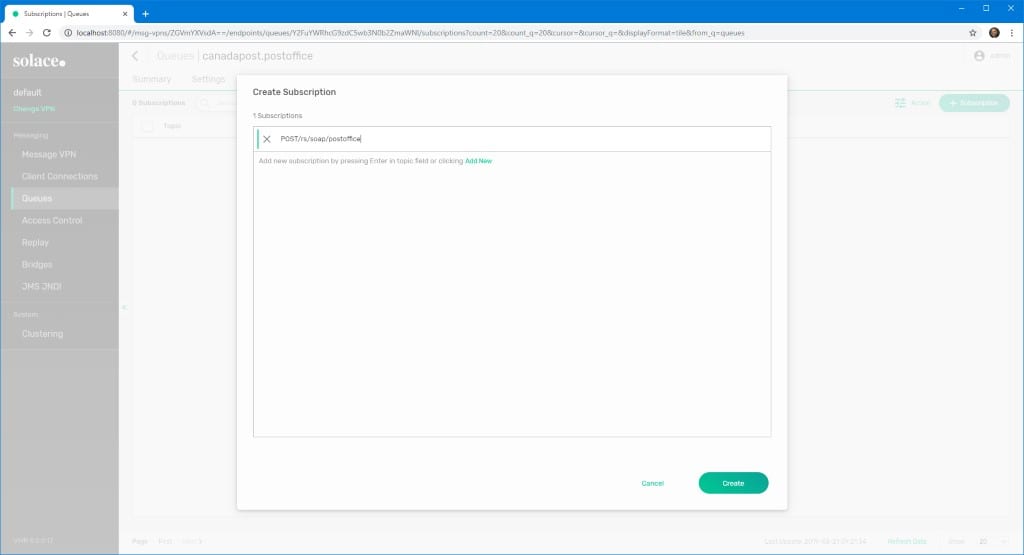
Microgateway mode requires users to send service requests on a special topic consisting of the HTTP Method + HTTP Resource Path. This is then mapped to the queue binding you created above. Listing 1 demonstrates how a topic may be constructed.
- Resource path from WSDL: https://ct.soa-gw.canadapost.ca/rs/soap/postoffice
- HTTP Method: POST
- Resulting PubSub+ topic: POST/rs/soap/postoffice
- To subscribe our queue to this topic, navigate to Queues > postoffice > Subscriptions and click + Subscription.
- Enter the relevant subscription and click Create.
Once subscribed, any requests POSTed to /rs/soap/postoffice on the broker are forwarded to the associated queue, triggering a call to the example Web service.
Set Up TLS
In this section I’ll explain how to upload the TLS certificates, load the certificate authority and add Trusted Common Names.
Phew! The service is now set up… well, almost. You’ll notice that we have not enabled anything yet since TLS has not been configured. We will do this by adding the appropriate certificate authorities (CA) to the PubSub+ trust store in PEM format.
Note: Certificate Authorities can currently only be setup using the PubSub+ CLI and the Solace Element Management Protocol (SEMP).
Upload the TLS Certificates
PubSub+ requires that the entire certificate authority chain for a given site be uploaded to the /certs directory on the broker. Initially obtaining the certificates can be accomplished using a browser or openssl. However, the exact process is outside the scope of this post.
Note: The root & all intermediary CAs must be installed individually on the PubSub+ instance. PubSub+ does not support bundled CAs.
Once you have the individual certificates, connect to the container’s shell and save each certificate under /usr/sw/jail/certs. The easiest way is to open a text editor in the directory and copy and paste the contents of each certificate to a new file.
C:\Users\UshShukla>docker exec -it <PubSub+ container name> /bin/bash

The Solace PubSub+ Standard is proprietary software of
Solace Corporation. By accessing the Solace PubSub+ Standard
you are agreeing to the license terms and conditions.
[root@f0fb1e6fe45d ~]# cd /usr/sw/jail/certs
[root@f0fb1e6fe45d ~]# vi geotrust-rsa-ca.pem
…paste contents…
…save file…
…repeat for other certificates…
Load the Certificate Authority
Now that our CAs are saved, we need to load them into the PubSub+ trust store, as documented here. An example of loading the root certificate authority is provided below.
[root@f0fb1e6fe45d certs]# /usr/sw/loads/currentload/bin/cli -A

Solace PubSub+ Standard Version 9.0.0.17

The Solace PubSub+ Standard is proprietary software of
Solace Corporation. By accessing the Solace PubSub+ Standard
you are agreeing to the license terms and conditions.

To purchase product support, please contact Solace at:
https://solace.com/contact-us/

Operating Mode: Message Routing Node
f0fb1e6fe45d> enable
f0fb1e6fe45d# configure
f0fb1e6fe45d(configure)# authentication
f0fb1e6fe45d(configure/authentication)# create certificate-authority DigiCert-Global-Root-CA
f0fb1e6fe45d(.../authentication/certificate-authority)# certificate file digitrust-root-ca.pem
We name the certificate authority according to the Common Name (CN) (e.g. DigiCert…). This approach reduces the likelihood of duplicating CAs in the trust store.
Once uploaded to the trust store, the original CA file can be removed from the /certs/ directory.
Add the Trusted Common Names
For PubSub+ to identify the appropriate certificate(s) to use when interacting with the Web service, we need to update our RDP configuration with the Common Names of each certificate. The example below uses openssl to get this information, though you could just as easily inspect the TLS output of your browser.
[root@f0fb1e6fe45d certs]# openssl s_client -connect ct.soa-gw.canadapost.ca:443
CONNECTED(00000003)
depth=2 C = US, O = DigiCert Inc, OU = www.digicert.com, CN = DigiCert Global Root CA
verify return:1
depth=1 C = US, O = DigiCert Inc, OU = www.digicert.com, CN = GeoTrust RSA CA 2018
verify return:1
depth=0 C = CA, ST = Ontario, L = Ottawa, O = Canada Post Corporation, OU = Information Technology-2, CN = stg10.canadapost.ca
In the listing above, we care about all the CN entries.
- In the WebUI, log in and navigate to Client Connections>REST>Canada Post>REST Consumers>postoffice>TLS Options
- Click on the green + Trusted Common Name button to add the individual CNs.
The completed setup looks like this:
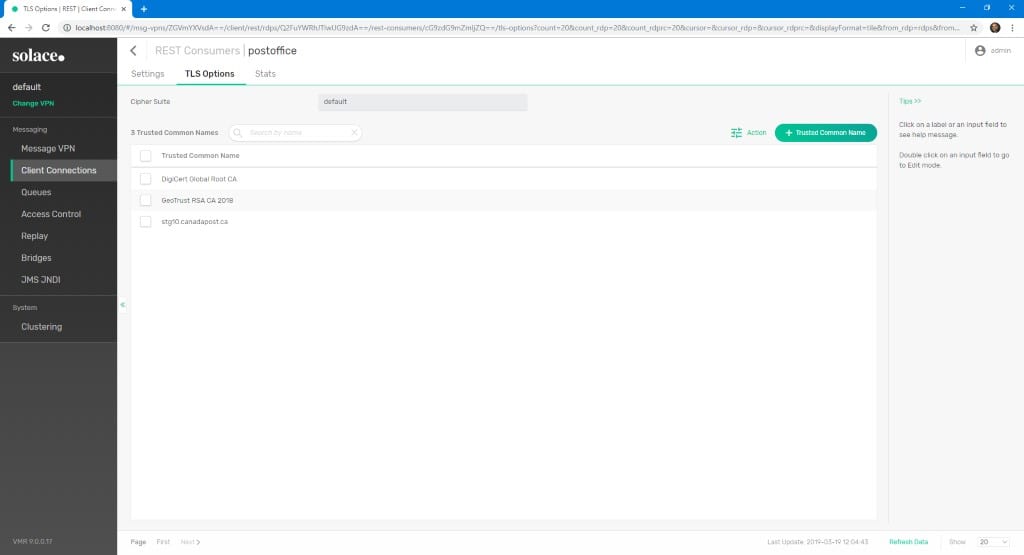
Note: We added the CN of the leaf certificate too, i.e. stg10.canadapost.com.
Enable the RDP and Test the Setup
In this section I’ll explain how to enable the RDP and test the setup.
Enable the RDP
We are ready to fire up the REST Delivery Point! Individually enable each of the configuration elements below:
- REST Consumer > postoffice > Enabled
- Client Connections > REST > Canada Post > Enabled
If everything has been configured correctly, the RDP status should be Up.
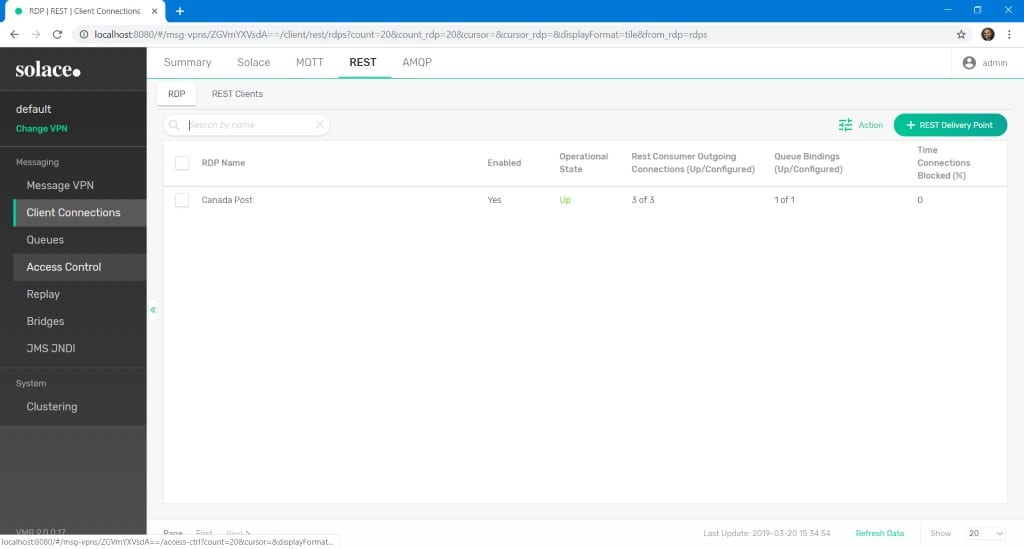
You can drill down to ensure the REST Consumer is Up, too.

Test the Setup
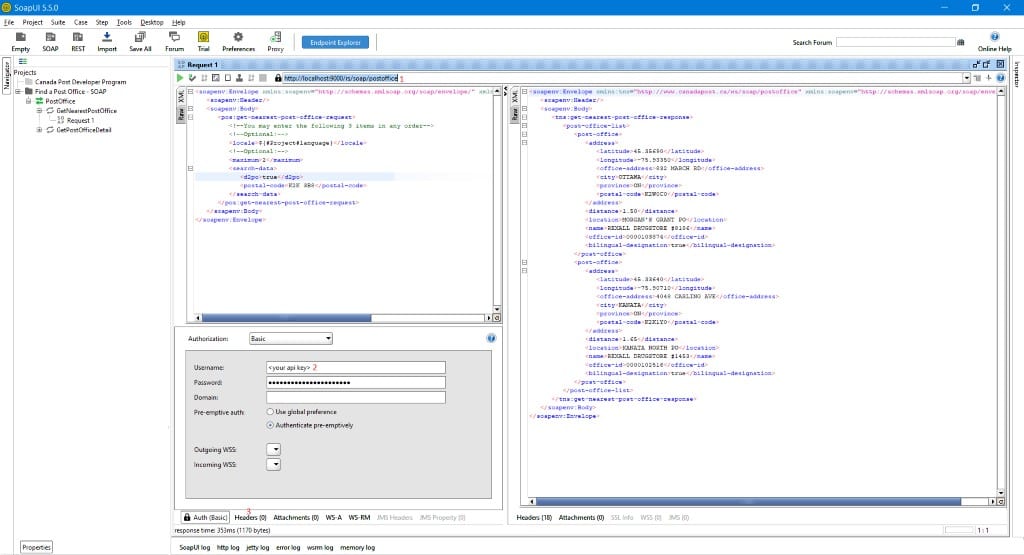
We can test our setup using SOAPUI.
  <?xml version="1.0"?>
- <soapenv:Envelope
  xmlns:pos="http://www.canadapost.ca/ws/soap/postoffice"
  xmlns:soapenv="http://schemas.xmlsoap.org/soap/envelope/">
     <soapenv:Header/>
    -<soapenv:Body>
      -<pos:get-nearest-post-office-request>
            <!--You may enter the following 3 items in any order-->
            <!--Optional:-->
         <locale>${#Project#language}</locale>
               <!--Optional:-->
         <maximum>2</maximum>
        -<search-data>
               <d2po>true</d2po>
               <postal-code>K2K 3B8</postal-code>
         </search-data>
      </pos:get-nearest-post-office-request>
   </soapenv:Body>
</soapenv:Envelope>
Notes:
- The service host in this case is the broker, and we are POSTing to the resource path configured in our topic-queue mapping.
- We enable basic authentication and select the option to
Authenticate pre-emptively. Why? Since PubSub+ acts as a proxy to the final service, it needs to have the entire payload available to send. Otherwise our call will fail. Selecting the option above essentially ensures SOAPUI pre-builds the entire request payload, including the WS-Security headers. - Be sure to set the SOAPAction HTTP header if necessary. This example does not require it.
Conclusion
With a little effort, PubSub+ can let you expose SOAP Web services across an asynchronous messaging architecture, allowing them to fully enjoy the benefits of an event-driven architecture.
Learn more about:
Explore other posts from category: For Developers


Subscribe to Our Blog
Get the latest trends, solutions, and insights into the event-driven future every week.