This is the fifth of a series of blog posts in which I walk through the creation of a simple chat app with Solace PubSub+. In the last part, I explained how to add a simple authentication server and send a REST POST request as a Publish/Subscribe type of message. In this tutorial, you will learn how to send a REST POST request as a request/reply message. Specifically, you will learn how to:
- Modify the sample code
- Connect the authentication server
- Change the login response message
- Test the authentication and response message
Prerequisite
- Download Git to your computer
- Install Apache Maven
- Sign up with Solace PubSub+ Cloud
- Clone a repository of the samples to your computer
Level
- Beginner
Modify the Sample Code
The accompanying sample code for this tutorial is for sending a REST POST request as a Publish/Subscribe message. Since you will send a REST POST request as a Request/Reply message instead this time, you need to modify the sample code.
To modify the sample code, do the following:
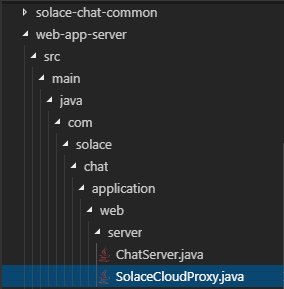
- In your code editor, check out the developer-exercise-5 branch or in your command line, enter
git checkout remotes/origin/developer-exercise-5 -f - In your code editor, open the file
SolaceCloudProxy.java

- Enter the following highlighted code to the section that determines a response to the Http Request to set the Solace reply wait time in milliseconds (Line 56).
//This header determines that the Http Request needs a response
set(“Solace-Reply-Wait-Time-In-ms”,”3000”);
The Solace-specific HTTP header “Solace-Reply-Wait-Time-In-ms” specifies that the message exchange pattern is Request/Reply and the Solace message broker application must wait for the specified timeout value (e.g. 3 seconds) for a reply before it stops.
Learn about Solace-Reply-Wait-Time-In-ms. - Modify the REST template POST request in the section that passes through a response code to expect a response of an authenticated object and to retrieve authenticatedObject from the call (Line 68).
//Pass through a response code based on the result of the REST-ful request
AuthenticatedObject authenticatedObject = restTemplate.postForObject(solaceRESTHost + “/LOGIN/MESSAGE/REQUEST”, request, AuthenticatedObject.class);
“AuthenticatedObject” is defined in the
AuthenticatedObject.javafile under solace-chat-common. It validates a client and determines whether to allow it to connect or not. - Under the above modified code line, enter the following code to define what message the client will get when their request is allowed or denied (Lines 70-73).
if (authenticatedObject.isAuthenticated()) {
    return new ResponseEntity(HttpStatus.OK);
}else {
    return new ResponseEntity(HttpStatus.FORBIDDEN);
}
Connect the Authentication Server
To connect the authentication server to the PubSub+ instance, you need to define the connection details.
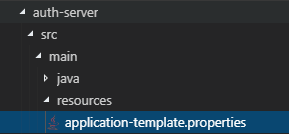
- In the auth-server directory, copy and paste the
application-template.propertiesfile under src > main > resources.

- Rename the copied file to
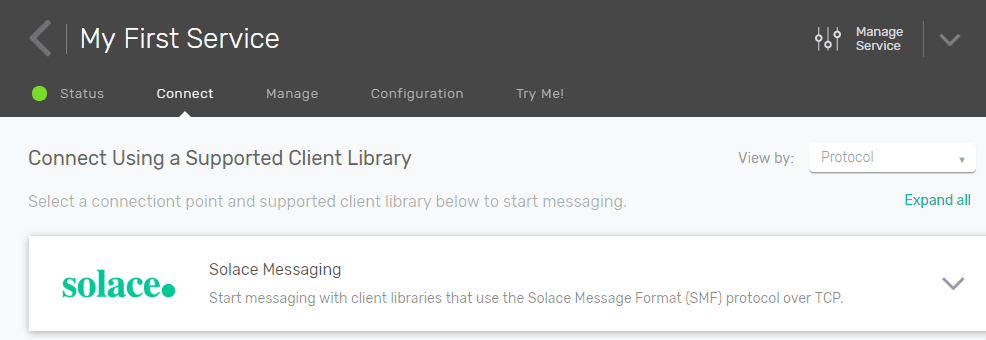
application.properties. - Log in to Solace PubSub+ Cloud and click the Connect tab.
- Open the Solace Messaging section.

- From the Connection Details on the right, copy the following:
- Username
- Password
- Message VPN
- SMF Host
- Paste the connection details to the
application.propertiesfile.


Change the Login Response Message
When you receive a request to log in to the chat application, you need to authenticate the user and then send the response back to the application. To change the login response message, follow the steps below:
-
- In the auth-server directory, open the
LoginMessageReplier.javafile.

- Enter the following highlighted code to add the session subscription (Line 92).
//Add the session subscription here
session.addSubscription(JCSMPFactory.onlyInstance().createTopic( REQUEST_TOPIC), true); - In the
createReplyMessagemethod, enter the following highlighted code to create a message object for the reply message and then convert the Json text in the request message to a user object type (Line 110).private XMLMessage createReplyMessage(TextMessage request) throws JCSMPException { TextMessage replyMessage = JCSMPFactory.onlyInstance().createMessage(TextMessage.class); UserObject userObject = gson.fromJson(request.getText(), UserObject.class); } - Under the above code lines, enter the following highlighted code to validate the user and print out the message depending on the result of the validation (Lines 113 to 119).
private XMLMessage createReplyMessage(TextMessage request) throws JCSMPException { TextMessage replyMessage = JCSMPFactory.onlyInstance().createMessage(TextMessage.class); UserObject userObject = gson.fromJson(request.getText(), UserObject.class); //Validate the user boolean validUser = credentialsRepository.isValidUser(userObject.getUsername(), userObject.getPassword()); if (validUser) System.out.println(“Successfully validated a user”); else System.out.println(“Authentication failed”); } - Enter the following highlighted code to create an AuthenticatedObject type, set the reply message content type, set the text, and set the delivery mode (Lines 120 to 127).
if (validUser)
   System.out.println(“Successfully validated a user”);
else
   System.out.println(“Authentication failed”);
AuthenticatedObject authenticatedObject = new
   AuthenticatedObject();
authenticatedObject.setAuthenticated(validUser);
replyMessage.setHTTPContentType(“application/json”);
replyMessage.setText(gson.toJson(authenticatedObject));
replyMessage.setApplicationMessageId(request.getApplicationMessageId());
replyMessage.setDeliverToOne(true);
replyMessage.setDeliveryMode(DeliveryMode.DIRECT);
return replyMessage;
}
Test the Authentication and Response Message
To test the authentication and login request response message, follow these steps:
- In your code editor, type
mvn spring-boot:runto run the Web application. - Open a new terminal window, change the directory to .\auth-server\, and type
mvn spring-boot:runto run the authentication server. - In your Web browser, type
localhost:8081to view the application. - Log in with a username and a password that are preset in the
HashMapCredentialRepository.javafile under the server directory in auth-server (e.g. ValidUser; solace).
This should bring you to the chat application page. - Refresh your browser and log in with an invalid username and an invalid password. You should see the “Login Failed” error message.
Congratulations! You now have a chat application that allows you to authenticate your user with a request/reply message pattern.
In the next part, you will learn how to modify the Web application to load balance requests.
Related
- How to Build a Simple Chat Application with Solace (Part 6)
- How to Build a Simple Chat Application with Solace (Part 5)
- How to Build a Simple Chat Application with Solace (Part 4)
- How to Build a Simple Chat Application with Solace (Part 3)
- How to Build a Simple Chat Application with Solace (Part 2)
- How to Build a Simple Chat Application with Solace (Part 1)
- Udemy Course: Fundamentals of Solace Development
- In the auth-server directory, open the

Explore other posts from category: For Developers


Subscribe to Our Blog
Get the latest trends, solutions, and insights into the event-driven future every week.