The Internet of Things (IoT) has revolutionized how we live our lives, especially regarding home automation. Event-driven architecture (EDA) is a natural fit for IoT applications, where devices generate events based on changes in their environment or behavior. EDA can help build scalable and efficient IoT systems by enabling real-time processing of events and allowing for decoupling of different components. For instance, in a smart home application, sensors installed in different rooms can generate events based on temperature, humidity, light, and occupancy. In combination with Solace, the leading enabler of EDA for real-time enterprises, EDA can enhance the process of building smart home automation applications by enabling efficient data processing, real-time event streaming, and secure data exchange between devices and applications.
What are EDA and Solace?
EDA is an approach to building software systems where the system reacts to events triggered by changes in state or behavior. Events are the key driving force for communication and data flow between system components. EDA allows for loosely coupled components that can communicate and collaborate in a reactive and scalable way, enabling systems to handle complex and dynamic workflows. EDA is commonly used in real-time applications such as IoT, financial trading, and healthcare, where events are constantly generated and must be processed in real-time.
Solace makes event-driven messaging middleware called Solace Platform that provides a scalable and secure way to transmit data between different system components. Solace Platform enables efficient real-time messaging across different networks, clouds, and devices, making it ideal for IoT, cloud-native, and hybrid environments.
EDA and Solace products can enhance smart home automation by enabling real-time data processing, efficient messaging, and scalable system design. In a smart home environment, EDA can process events generated by various sensors and devices, such as motion, temperature, and door sensors.
Features of a Smart Home Automation Application using EDA and Solace
A smart home automation application using EDA and Solace can have several key features that enhance the home automation experience. Here are some examples of features that can be included:
- Remote control: A smart home application can enable homeowners to remotely control their home devices, such as lights, temperature, and security systems, using a smartphone or tablet. Solace can facilitate real-time data transmission and messaging between the mobile app and smart home devices, enabling remote control and remote monitoring of the home environment.
- Personalization: A smart home application can provide personalized experiences based on the preferences of individual users. Solace can enable the application to analyze user behavior and generate personalized recommendations for optimizing energy usage, managing home security, and improving the overall home automation experience.
- Integration: A smart home application can integrate with other smart home devices and services, such as Amazon Alexa or Google/Apple Home, to provide a more seamless and integrated home automation experience.
- Automation: A smart home application can automate routine tasks such as adjusting temperature, turning off lights, and activating security systems based on pre-defined rules and schedules. EDA can enable the application to trigger actions based on real-time events generated by smart home devices, while Solace can provide a messaging infrastructure that ensures real-time data transmission and processing.
- Monitoring: A smart home application can provide real-time monitoring and alerts for temperature changes, motion detection, and security breaches.
Here are some examples of how each feature could be used to enhance the user experience:
- Remote control: Suppose a homeowner forgot to turn off the lights before leaving. The homeowner can easily turn off the lights from their mobile device, saving energy and reducing the electricity bill.
- Personalization: Suppose a family member likes to wake up in a warm house in the morning. With personalization enabled in the smart home application, the temperature can automatically adjust to the family member’s preferred setting, ensuring a comfortable wake-up experience.
- Integration: Suppose a homeowner has multiple smart home devices, such as a security system, a thermostat, and a lighting system, from different vendors. The homeowner can control and monitor all devices from a single platform, providing an integrated home automation experience.
- Automation: Suppose a homeowner wants to save energy by turning off the lights when nobody is in the room. Automation enables the lights to be automatically turned off when the motion sensor detects nobody in the room.
- Monitoring: Suppose a homeowner is away on vacation and wants to monitor their home for security breaches. With monitoring enabled in the smart home application, the homeowner can receive real-time notifications and alerts on their mobile device if the security system detects suspicious activity, ensuring peace of mind and enhanced security.
Use Cases for Smart Home Automation Applications using EDA and Solace
Smart home automation applications using EDA and Solace can offer various use cases, such as energy management, security, convenience, healthcare, and entertainment. In this section, I’ll discuss some specific use cases where they can be beneficial.
- Energy Management: With smart home automation applications using EDA and Solace, homeowners can effectively manage their energy consumption and reduce their energy bills. For example, homeowners can remotely control their heating and cooling systems, set schedules and timers for lights and appliances, and monitor their energy usage in real-time to identify areas where energy consumption can be reduced.
- Security: Smart home automation applications using EDA and Solace can enhance home security by providing real-time monitoring and alerts for suspicious activity. You can remotely monitor your home security cameras, receive alerts when doors and windows are opened or closed, and set up automation rules to turn on lights and sound alarms when a security breach is detected.
- Healthcare: EDA and Solace can also provide healthcare benefits. For example, elderly people living alone can use smart home applications to monitor their health, such as tracking blood pressure or heart rate. The application can then send alerts to their caretakers or family members in case of abnormal readings.
- Entertainment: Enhancing home entertainment by providing seamless integration with audio-visual systems, enabling you to control and manage their home entertainment systems from a single platform, is also possible. For example, using a single mobile application, you could control your home theater system, streaming services, and audio devices.
Building a Smart Home Automation Application using EDA, Solace and ESP32
Building a smart home automation application using EDA, Solace, and the ESP32 microcontroller effectively improves energy management, security, convenience, healthcare, and entertainment in smart homes. The ESP32 microcontroller is a low-power device that supports wireless connectivity and various sensors and actuators. By integrating it with EDA and Solace products, you can build scalable and reliable smart home automation applications that can be remotely controlled and monitored.
Here’s a high-level overview of the steps involved in building a smart home automation application using EDA and Solace:
- Identify the Use Case: The first step is to identify the use case that the application will address. This includes defining the specific problem the application will solve and the features and functionalities that will be required to address the problem.
- Design the Architecture: Once the use case is identified, the next step is to design the application’s architecture. This includes defining the hardware and software components required to build the application, such as sensors, gateways, messaging brokers, and APIs.
- Develop the Application: After designing the architecture, the next step is to develop the application. This includes developing the user interface, integrating the hardware and software components, and implementing the necessary EDA and Solace functionality to provide real-time monitoring, automation, and integration capabilities.
- Test and Deploy the Application: After developing the application, it must be tested thoroughly to ensure it works as expected. This includes performing functional and non-functional testing to identify and fix any issues that may arise. Once the application is tested, it can be deployed to the production environment.
- Maintain and Update the Application: Finally, it’s essential to maintain and update the application regularly to ensure that it continues to meet users’ needs. This includes monitoring the application’s performance, fixing bugs, adding new features, and updating the application to stay up-to-date with new technologies and trends.
ESP32 Application Demo
I’ll show you how to create a simple ESP32 application that responds to external events and publishes them to Solace Event Broker using the EspMQTTClient library.
Prerequisites
- Arduino IDE
- ESP32 (you can also use ESP8266)
Start with setting up the event broker using the official Getting Started guide.
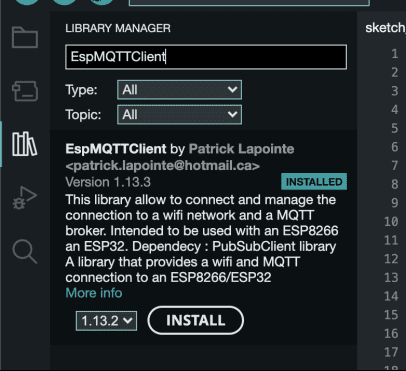
Next, you have to install the EspMQTTClient library from the Arduino IDE. Follow the next steps:
- Open the Arduino IDE
- Open the Library Manager from the side menu
- Search for “EspMQTTClient”

- Press Install
After the installation is completed, open a new sketch (file).
Start by including the library.
#include "EspMQTTClient.h"
Continue by assigning internal variables that will be used later in the code.
#define humidityPin 5
const unsigned long period = 1000; // How frequently to publish the humidity reading in milliseconds
unsigned long currentMillis;
unsigned long startMillis;
int humidityPct = 0;
Next, initialize the MQTT client using the WiFi and MQTT credentials.
EspMQTTClient client(
  "Your WiFi SSID",
  "Your WiFi password",
  "MQTT Server IP",  // MQTT Broker server ip (usually your PC's IP)
  "MQTT Username",   // Default: admin
  "MQTT Password",   // Default: admin
  "TestDevice"      // Client name that uniquely identifies your device
);
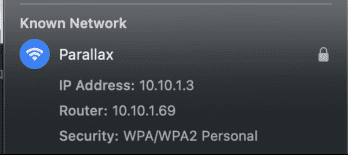
If you’re connecting locally, the MQTT server IP will be the local IP address of your host device. In my case, it is 10.10.1.3, but your might differ and be something like 192.168.x.x, or any address from the private IP range.
Your local IP address is usually found in the network settings.
Next, create a function that subscribes to the topic and publishes a message upon connecting to the WiFi network.
void setup() {
 Serial.begin(9600);
}

void onConnectionEstablished() {
Serial.println("Connection established");
 client.subscribe("mytopic/test", [] (const String &payload)  {
   Serial.println(payload);
 });
 client.subscribe("mytopic/humidity", [] (const String &payload)  {
   Serial.println(payload);
 });
 client.publish("mytopic/test", "Connection established");

}
At the end, add the loop function to publish the event to the broker.
client.loop()must be present in theloop()since the client is “always” listening to events. Learn more about EspMQTTClient’s functions.
void loop() {
 currentMillis = millis();
 if (currentMillis - startMillis >= period) {
   humidityPct = analogRead(humidityPin);
   client.publish("mytopic/humidity", String(humidityPct));
   startMillis = currentMillis;
 }
 client.loop();
}
You can now compile the sketch and upload it to the ESP32.
If no errors are thrown, you can head to http://localhost:8080 on your host device to access the Solace Broker Manager.
After logging in, you’ll be presented with the Message VPNs section.
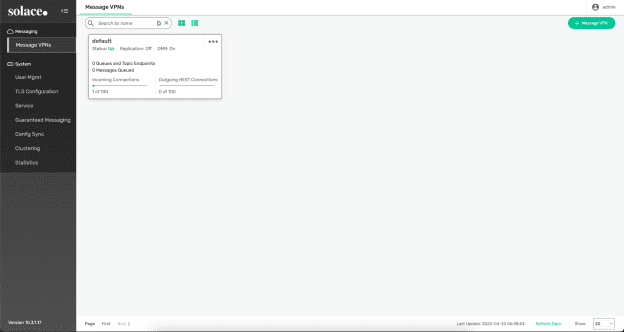
Now click on default.
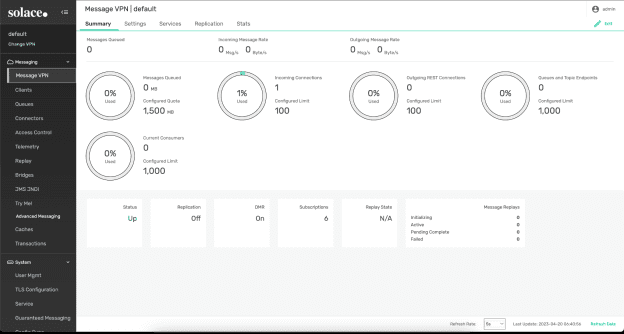
Now on the left panel, select Clients.
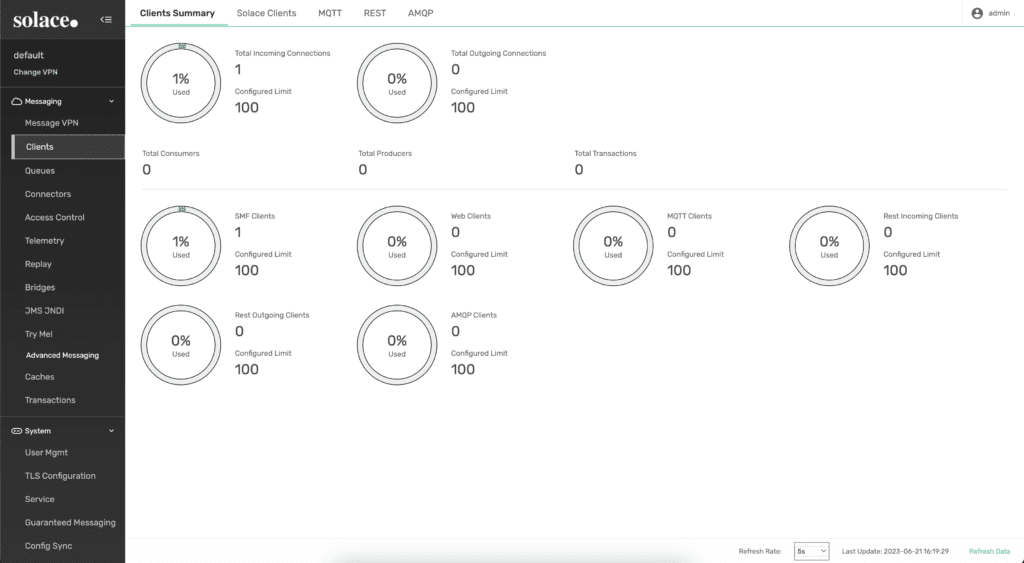
You’ll now have a Clients Summary, from which you can choose Solace Clients.
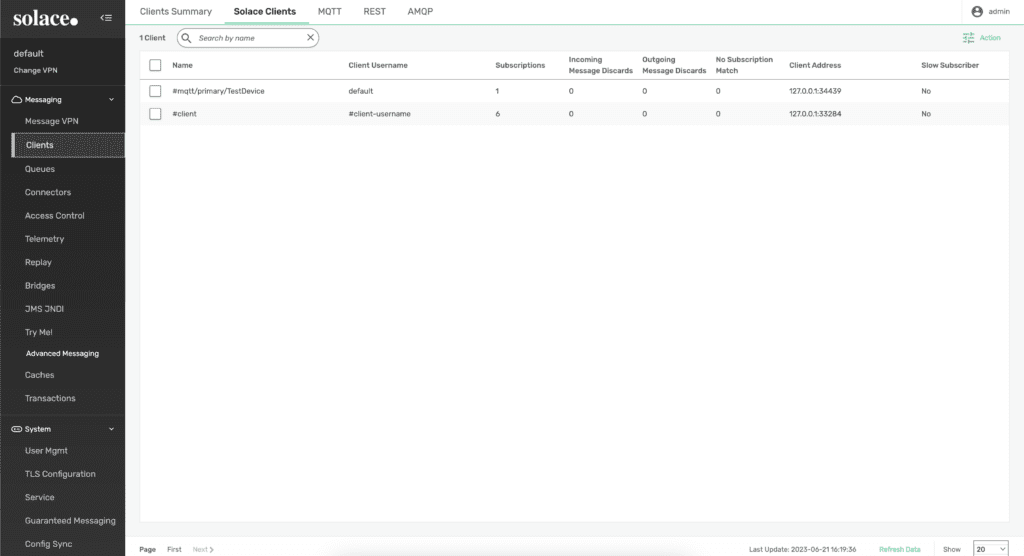
In the Solace Clients summary, you’ll see your device successfully connected to the broker as the #mqtt/primary/{device-name}.

That’s it. Now you can implement external event triggering or sending events from Solace to the ESP32.
To explore more, please refer to the EspMQTTClient’s GitHub repository.
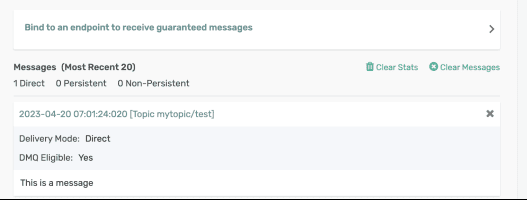
Bonus: Select Try Me! from the left panel to see the incoming messages.
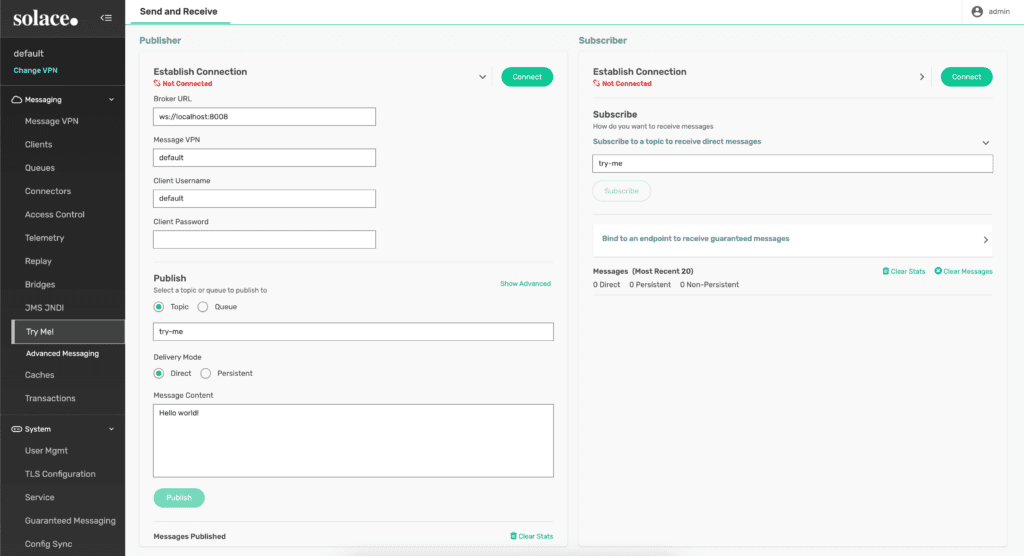
On the right side of the screen, you’ll see the Subscriber section. Please press the Connect button to establish a connection.
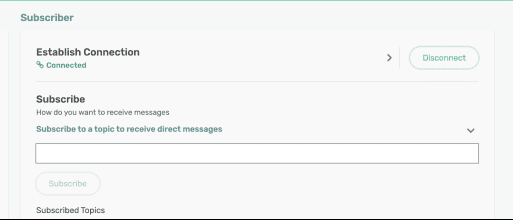
Now, you have to subscribe to the topic defined in the ESP32 sketch. In the case of this guide, the topics are mytopic/test and mytopic/humidity.

To trigger the message “Connection established”, reset the ESP32, and a message should appear shortly in the broker.
Other humidity readings will appear every X milliseconds that you defined in the code.
Additional Resources
To build a smart home automation application using EDA and Solace, you can utilize various resources and tools, including Solace Event Broker, AWS IoT Core, Arduino IDE, Node-RED, and OpenHAB. These tools and resources provide various functionalities, such as messaging, cloud connectivity, firmware programming, visual programming, and device management. By leveraging these tools and resources, you can create scalable, reliable, and efficient smart home automation features that enhance your application.
Conclusion
Combining EDA and Solace with IoT development may be beneficial for your application. External event triggering can be used to personalize end-user experience, increasing overall product satisfaction. A Solace-enabled IoT product can be built as a minimum viable product (MVP) first, proving the capabilities and benefits of EDA combined with products like Solace Event Broker. To continue your EDA and Solace journey, you can look at How to Easily Publish Events from the Cloud to Solace Platform.
About the Author

Explore other posts from categories: For Developers | Solace Scholars


Subscribe to Our Blog
Get the latest trends, solutions, and insights into the event-driven future every week.