Understanding Solace Endpoints: Queues vs. Topic Endpoints
One of the most frequent questions customers ask me is “What is the difference between
How many ways do you know how to create and configure queues in Solace, and add topic subscriptions to them? One way…two? I’d like to show you four ways you can do it.
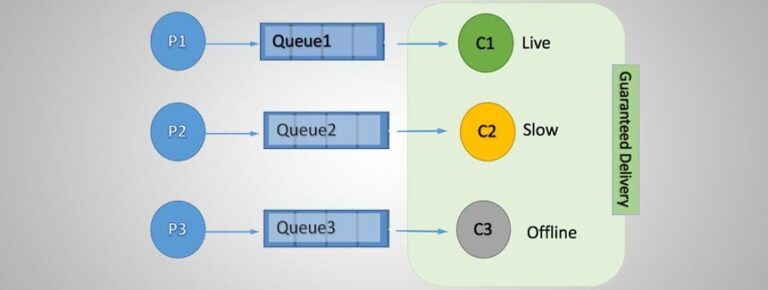
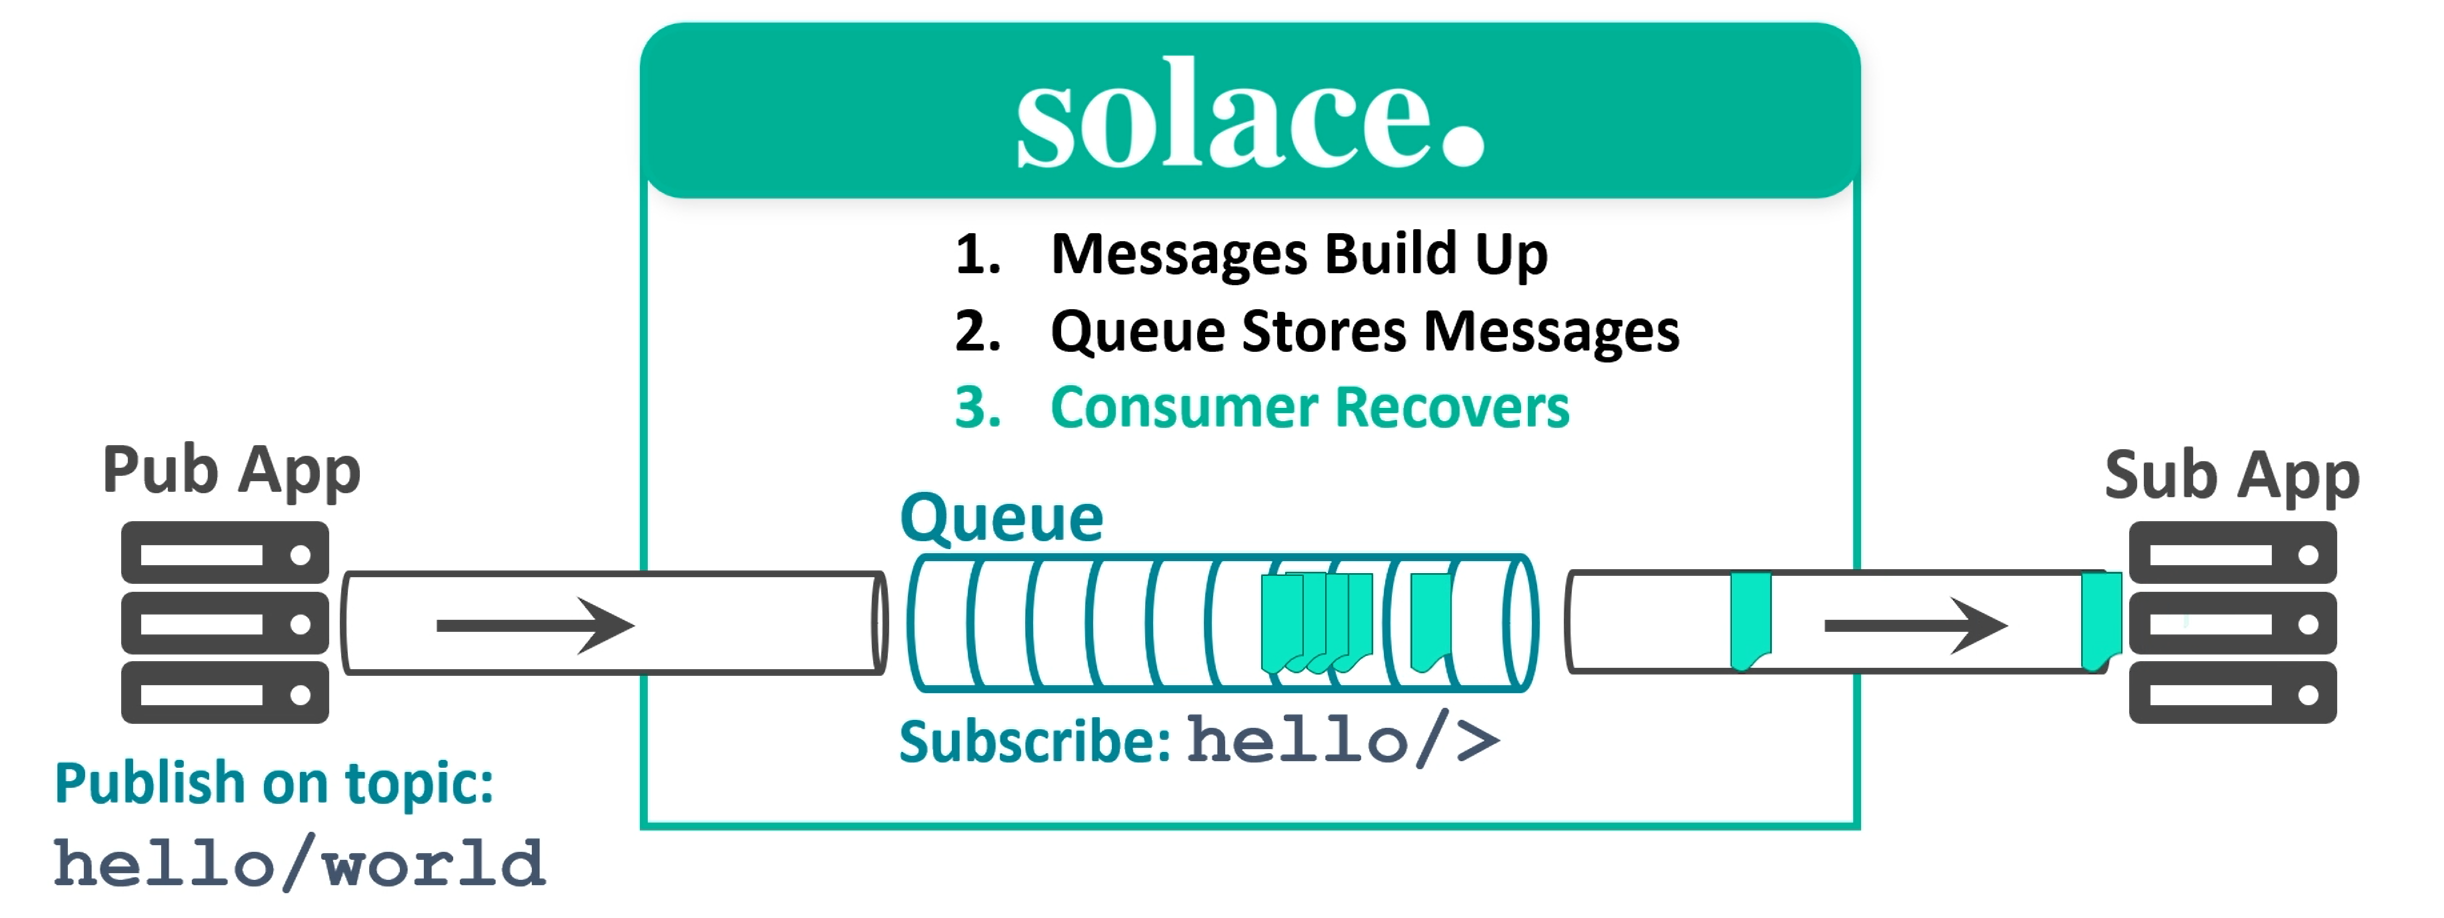
Message queues are persistent endpoints that enable guaranteed delivery when you’re sending a message and need to make sure no data is lost, ever, even during network or power outages. Queues are a short-term storage mechanism inside the broker that hold onto messages until all recipients confirm receipt. That way if a consumer is offline or unable to keep up with message flow, they’re kept around until the consumer is able to retrieve them.
My goal is to introduce you to the four ways you can create and configure message queues in the world of PubSub+.
So let’s get on with it!
The first way to create a queue in Solace is with a GUI called PubSub+ Broker Manager. To access it, you just point your browser to port 8080 of wherever you’re running your broker, or if you’re using Solace Cloud you can click “Manage Service.” Once in, you’ll choose the message VPN in which you want to create a queue and open the “Queues” tab. That will let you see all of that particular message VPN’s existing queues, and let you create a new one.
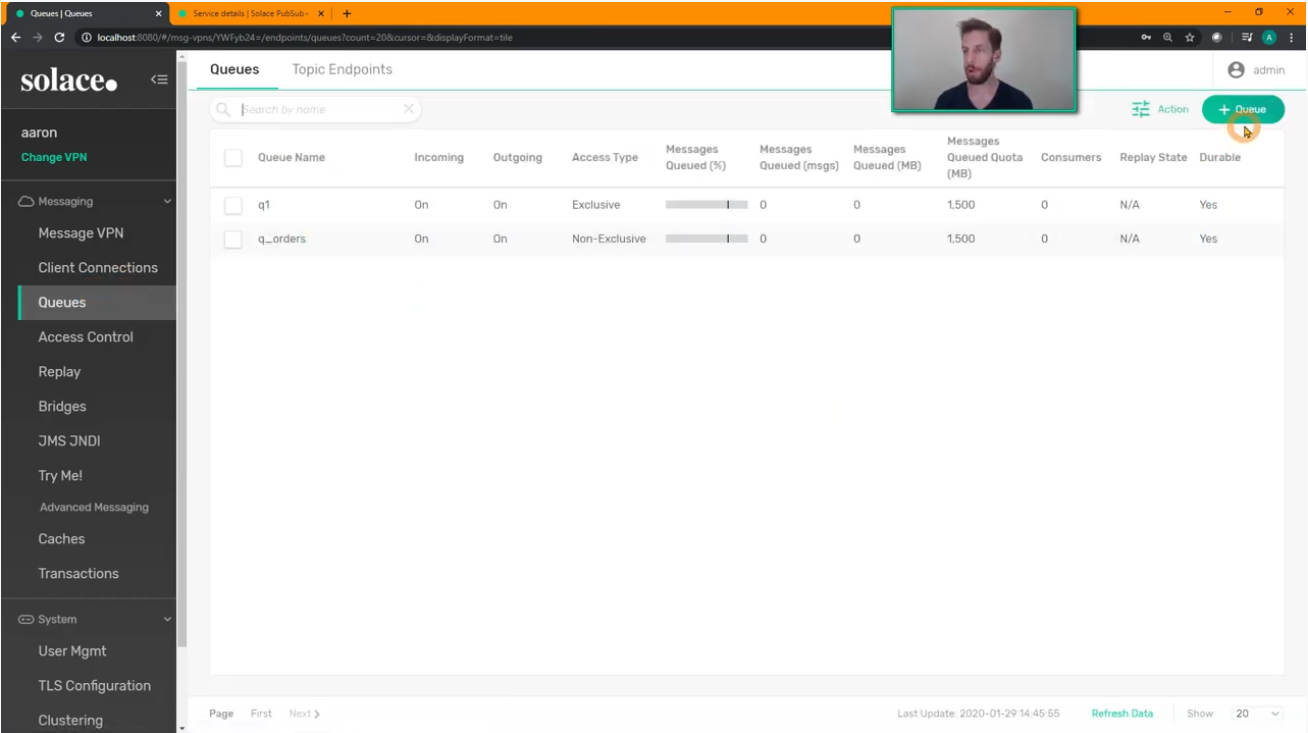
You can choose whether you want exclusive or non-exclusive access types for multiple consumers, the size of the queue in megabytes, some permissions around ownership and if you click on advanced settings, you can see other things like TTL (time to live), dead message queue, etc.
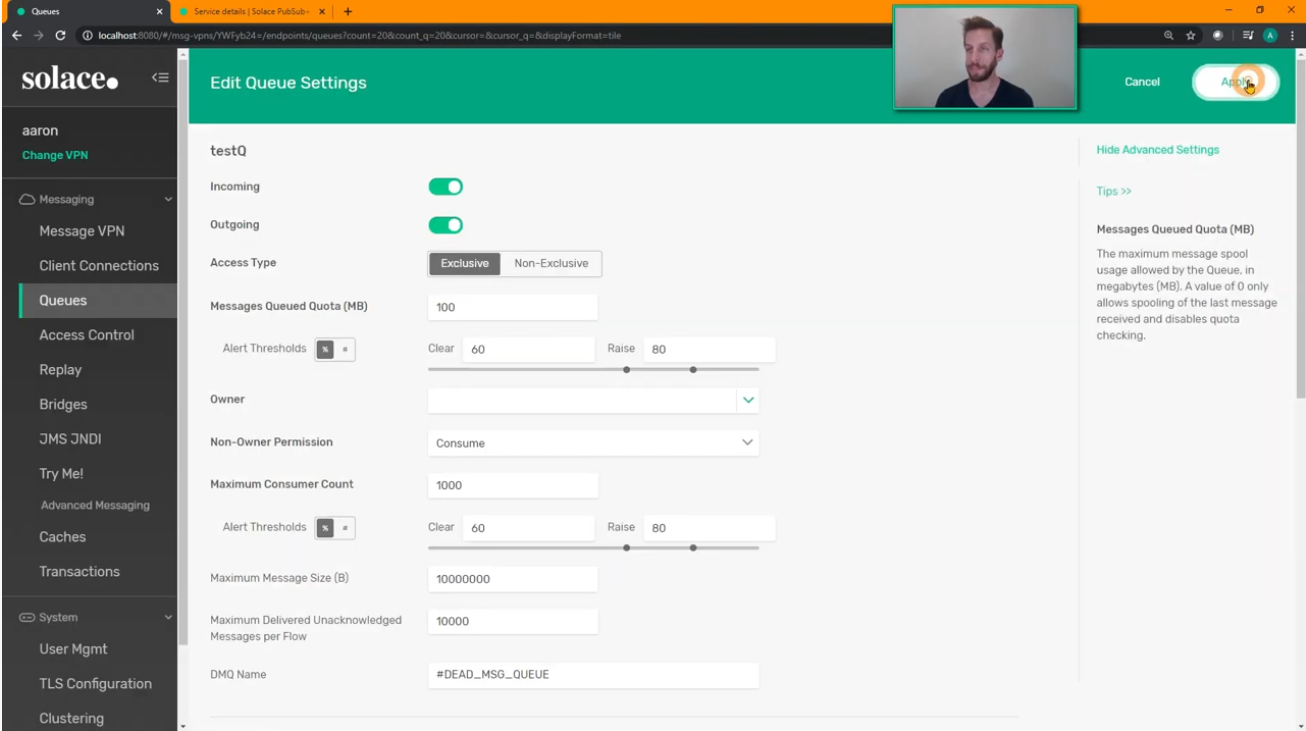
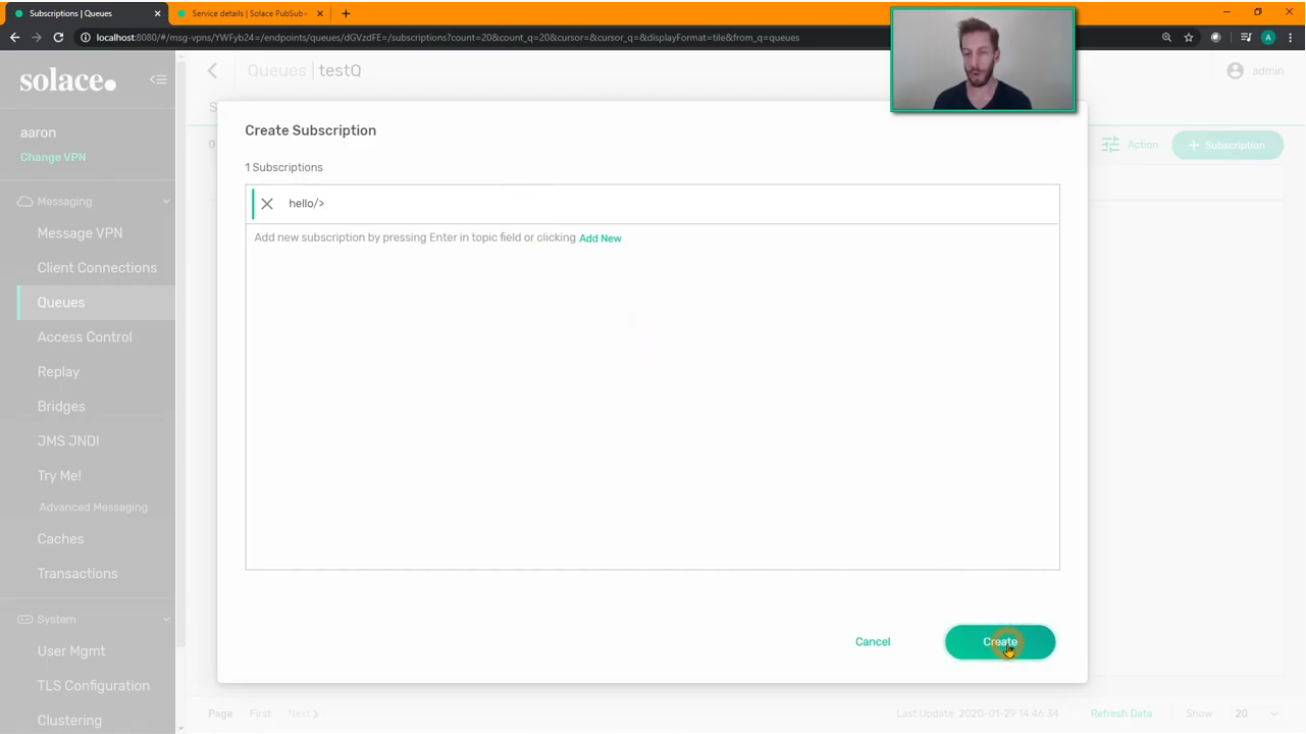
When you apply those settings, you’ll have a queue that’s ready to rock! From there it’s easy to create subscriptions that will attract messages from that queue. Click on the “Subscriptions” tab and hit the “+ Subscription” button. Here I added a subscription for hello/>.
Watch a quick demo of me using PubSub+ Broker Manager GUI to create a message queue.
You can also create queues in Solace programmatically using our management API that we call SEMP (Solace Element Management Protocol). SEMP is a RESTful API that allows easy integration with tooling like Chef, Puppet and Ansible for configuration management.
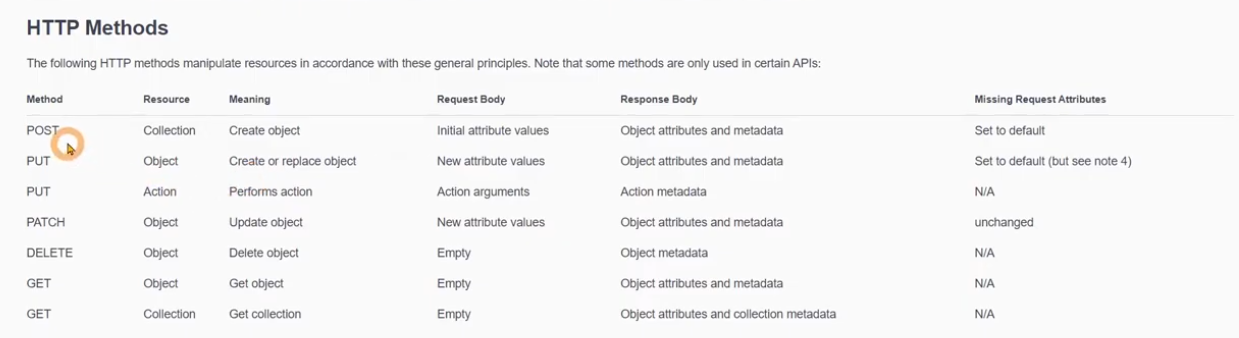
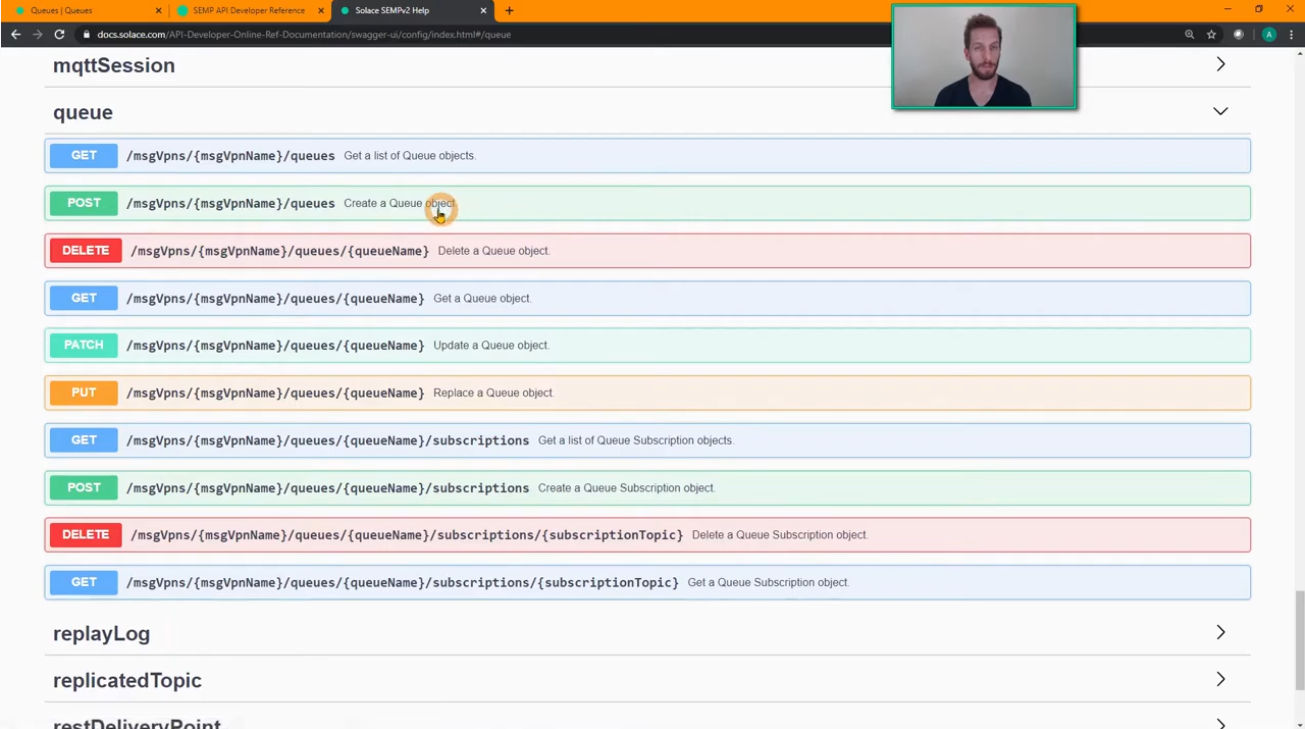
If you’re familiar with REST API, this should be fairly straightforward. You can learn more about what SEMP can do and how to use it at the developer reference guide, and specifically the configuration reference guide, which is documented using Swagger. The configuration reference guide outlines the HTTP verbs or methods you can use to interact with Solace objects: post to create an object, get to retrieve some information, delete to get rid of an object, patch to do an update, etc., all seen here:
The reference guide also includes a comprehensive list of all the Solace objects that you can interact with, create, and configure with SEMP.
Pretty much anything you can do using with PubSub+ Broker Manager’s GUI, you can do programmatically with SEMP. Again, from the reference guide, here’s the SEMP commands related to queue creation and management:
And here’s an example of creating a queue with the program curl. You could of course use Postman or any other REST tool to inject these commands. I’ve got my create queue URL, specify the VPN name (“Aaron”) and the name of the queue is testQ2. It will be exclusive, so have a a 200 megabyte quota and enable it for both ingress and egress.
curl http://localhost:8080/SEMP/v2/config/msgVpns/aaron/queues
-X POST \
- u admin:admin  \
- H “Content-type-type:application/json”  \
- d ‘{ “queneName”:”testQ2”,
“accessType”:”exclusive”,
“maxMsgSpoolUsage”:200,
“permission”:”consume”,
“ingressEnabled”:true,
“egreeeEnabled”:true  },
To add a subscription to that queue, I’m going to use curl again to programmatically add the subscription of hello/> to my queue.
curl http://localhost:8080/SEMP/v2/config/msgVpns/aaron/queues/testQ2/subscriptions
-X POST \
- u admin:admin  \
- H “Content-type-type:application/json”  \
- d ‘{ “subscriptionTopic”:”hello/>”}'
Again, you can learn all about SEMP here.
Watch a quick demo of me using SEMP to create a message queue.
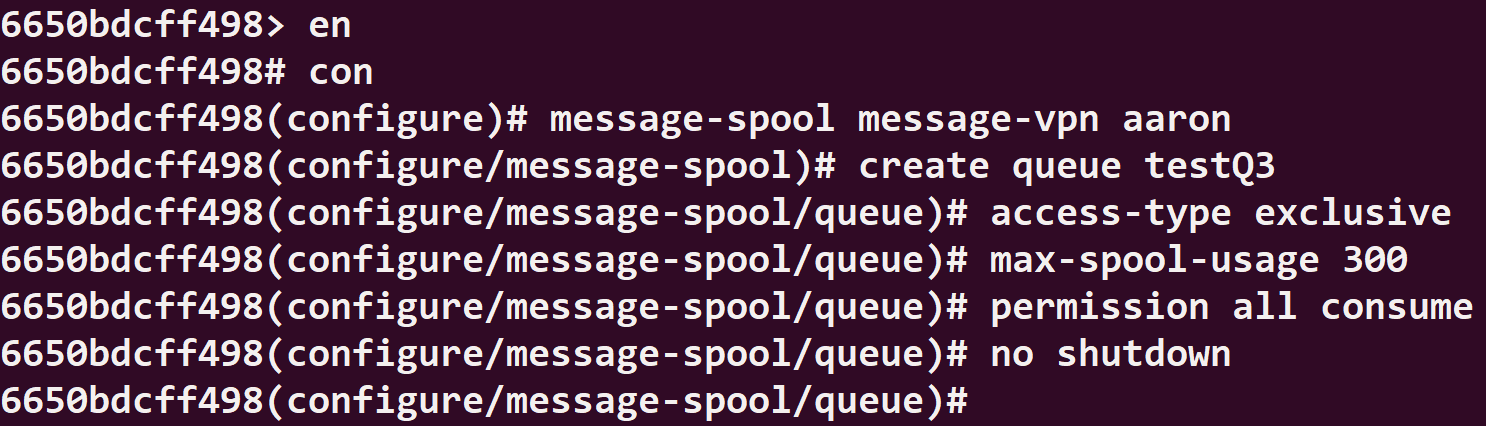
The third way to create a queue in Solace is with our command line interface. Our CLI is a text-based interface for configuring and monitoring Solace event brokers. It’s actually a full-blown shell you can use to configure brokers, take a look at real-time data about connected clients or queues, and do almost anything you can do with PubSub+ Broker Manager or SEMP. You can learn all about our CLI here.
Accessing the Solace CLI
Once you’re logged in, to create a new queue you’ll just go into privileged mode here. Go into config, enter the message spool configuration for your message VPN, and we’re ready to create a queue. Let’s call it “testQ3”, give it a max spool usage of 300 megabytes, and set the permissions – that’s about it!
To confirm proper creation, you can check PubSub+ Broker Manager, or simply enter show queue *, or use with the new queue’s name, like so:

To add the now familiar topic subscription hello/> you just enter subscription topic, hello/> from within the queue’s config “level”.

GUI’s may be the face of admin these days, but CLI is a reliable workhorse that is really, really useful when you only have SSH or terminal access to your broker Once you get used to it, it’s actually pretty fast too!
Watch a quick demo of me using CLI to create a message queue.
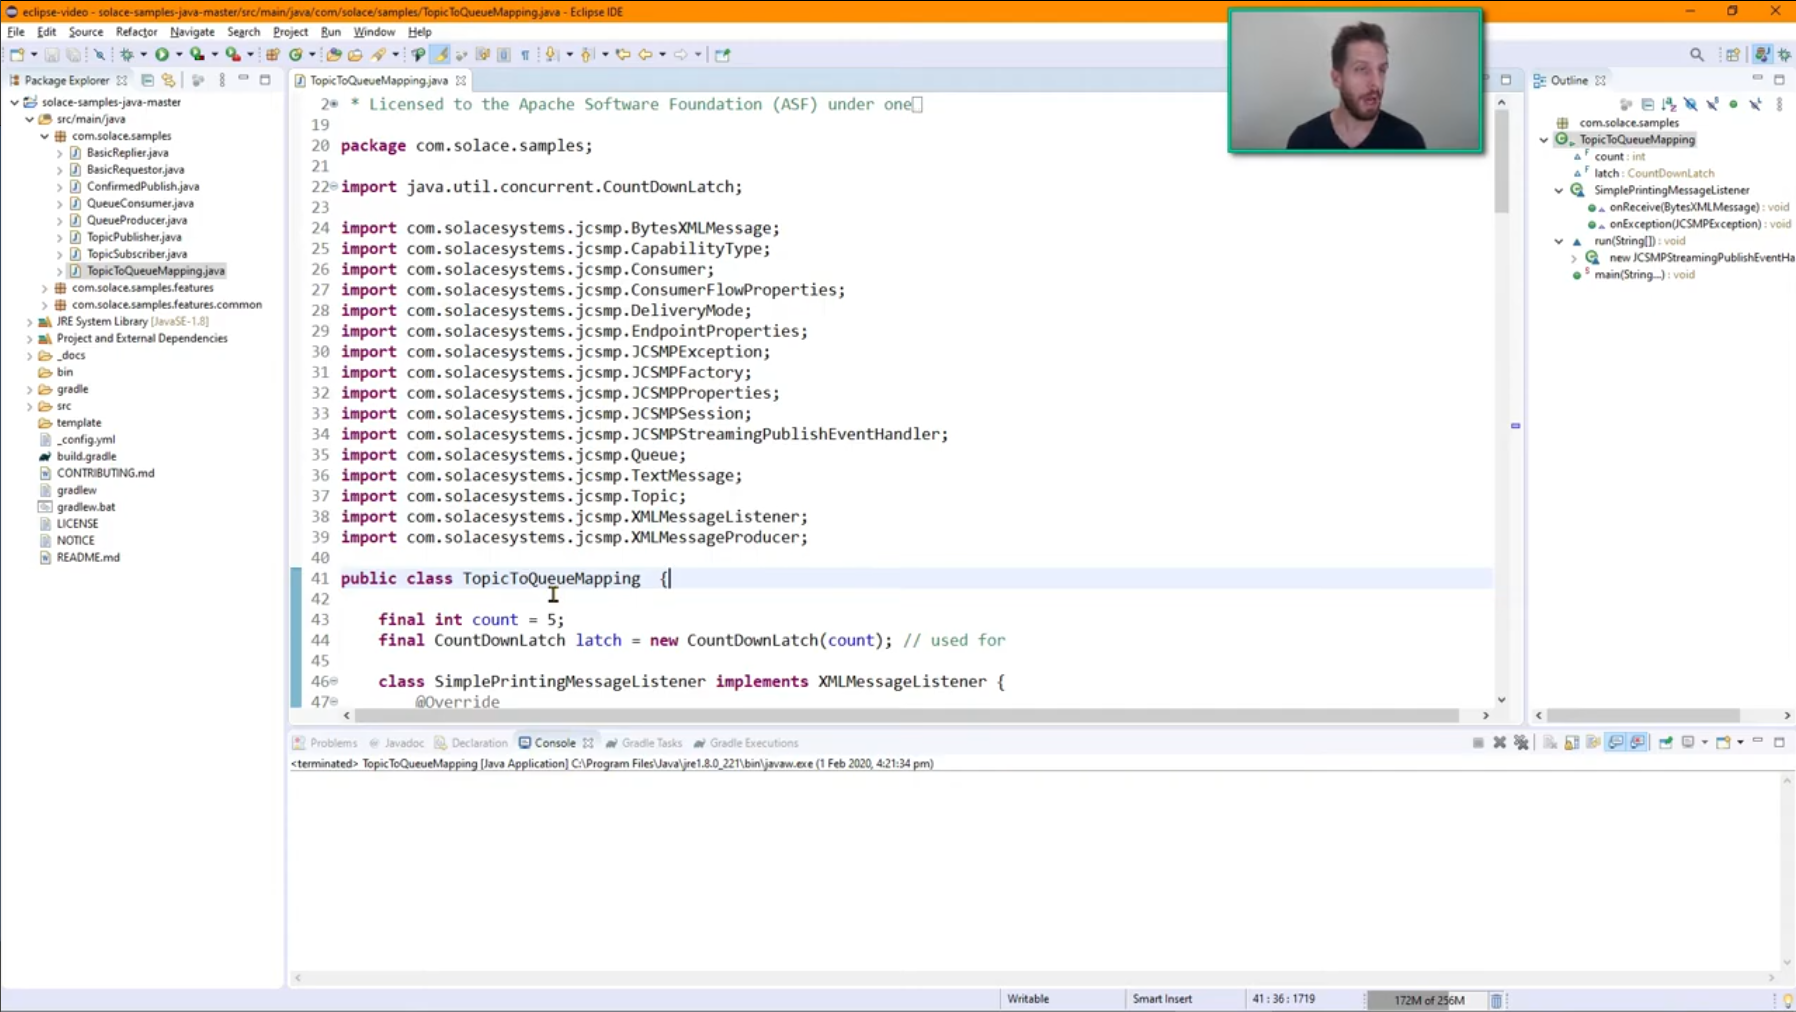
The fourth way of creating a queue in Solace is using a client API. You can either find them on our downloads page or on GitHub. All of Solace’s “native” APIs have the ability to create queues, provision them, and add topic subscriptions to them. You can learn more via our developer guide or reference documentation,
I’m a Java guy, so for the sake of example I’ve downloaded the Java samples and loaded them into Eclipse. Here (again, just for example) is the queue mapping sample because it’s close to what we want to do:
Here’s an example of where you’d swap out the sample code for the name of the queue you want to create:
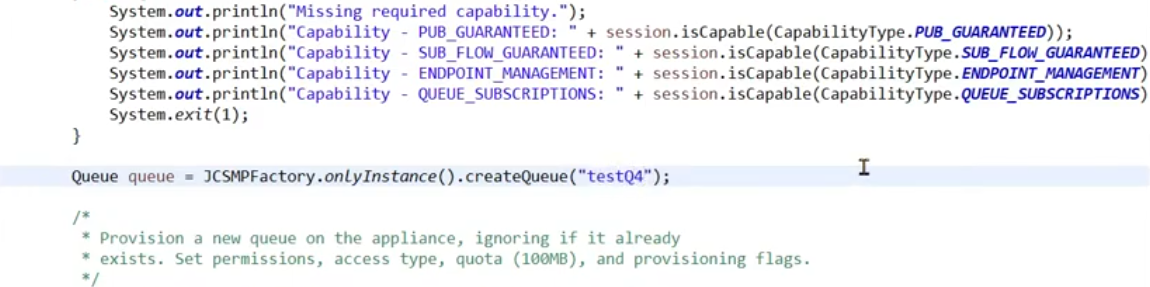
And here’s what it’d look like to create our now topic subscription hello/>

If you need to create and configure a whole bunch of similar message queues. You can create a template queue that includes things like quota and TTL. Then, whenever an application creates a queue, it’ll copy the default values from that template queue automatically.
Watch a quick demo of me using a client API to create a message queue.
So there you go! Four different ways you can create and configure queues in Solace! Those long-familiar with Solace will know about two legacy ways that I didn’t mention: SolAdmin and SEMPv1. I hope you found this information useful. Please subscribe to our blog and YouTube channel for more content like this.
Explore other posts from category: For Developers


Subscribe to Our Blog
Get the latest trends, solutions, and insights into the event-driven future every week.