Donald Le is a quality engineer in software with 9 years of experience.
Slack is one of the most popular tools used for communication in software departments since it allows developers to easily track the conversation they’re on without constantly scrolling the chat window to search for the text they want. In addition, there are tons of integration tools with Slack, enabling developers to get notifications easily about any new events such as a Jira updated task, or a failed CI (Continuous Integration) build.
Event-driven architecture is now being applied more and more in software projects because it allows software applications to easily scale out and prevent the app from issues such as a single point of failure. In event-driven architecture applied applications, a distributed event streaming platform such as Solace PubSub+ is often used as a middleware to consume the event messages and allow other parts of the app to trigger appropriate action based on the subscribed topic events. To subscribe to the Solace topics, you often need to directly update the logic in the service code which is inconvenient. What if you can use Slack to interact with the Solace topics so that you can easily subscribe to the exact Solace topic you like? In this article, you will build a Slack app that allows you to do just that, plus you also can send the event messages to the Solace topic as well.
Go Over the Demo App Functionalities
The demo application will have two services: the calendar service and the notification service. This demo app is for internal use within your development environment, allowing your software developers fellow to book meetings with other members. You will use the Go programming language to build these two services. Users when they book the meeting successfully, there will be a notification sent to their Slack chats.
Initially, your developers need to call the calendar service API to book the meeting, which is inconvenient. You will build the Slack app to help the developers to book the meeting from Slack. This backend service can connect to the Slack workspace, and connect with the Solace topics too. After you build the Slack app, the developers in your team would be able to:
- Book a meeting by using Slack slash command which triggers an API call to the calendar service. Then a meeting event is created by the calendar service and the notification service will send the message to a Slack channel.
- Subscribe to the meeting categories they like through specific Slack channels, so that they can receive the alerts about the recent booked meetings for the meeting categories they like.
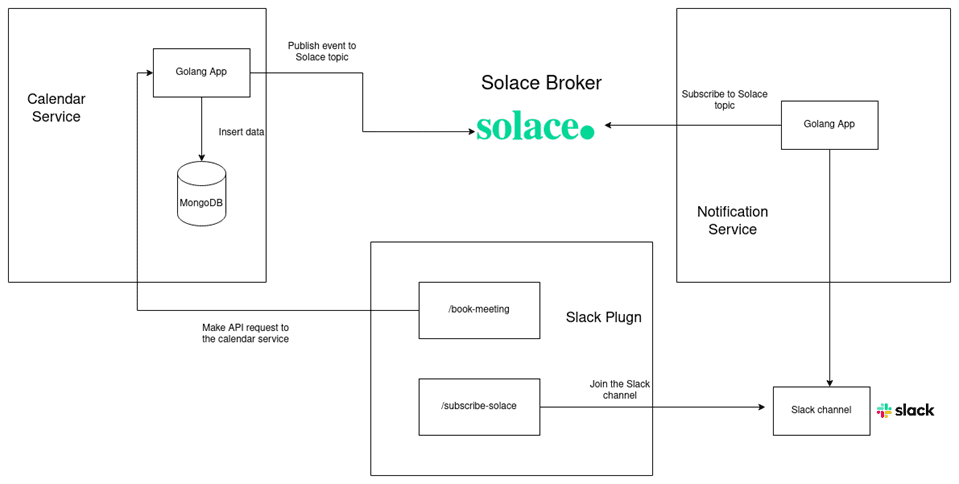
Figure 1: Diagram demonstrating how Calendar Service, Notification Service and Slack plugin interacts with each other.
Prerequisites
- Have a Linux machine, preferably an Ubuntu machine version 20.04
- Have an installed Go environment, preferably version 1.19
- Have a Slack account
- Have a GitHub account
- Have an installed Python environment, preferably version 3.10
- Have a MongoDB Atlas database
- Have a Solace account with one active cluster
- Have a ngrok command line installed and an ngrok account
Step 1: Build the Calendar Service
You will run the calendar service which is built using:
- The Go programming language
- Mongo DB (using Mongo Atlas as a cloud database) database to store the user data
- Solace PubSub+ Event Broker to store published events to enable EDA
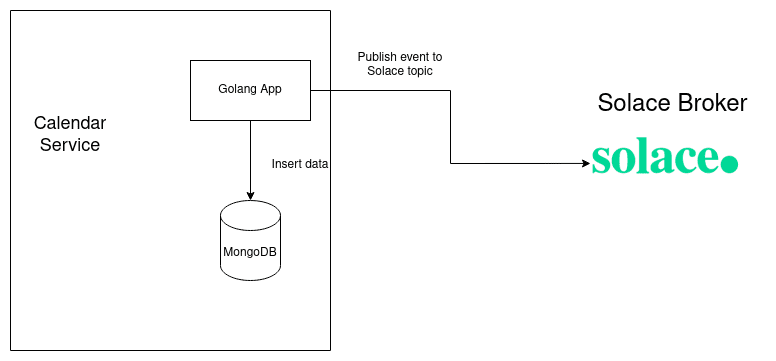
Figure 2: How the calendar service works
Firstly, you need to clone the calendar service code from solace-booking-service repository. Open a new terminal in your machine, run the following command to create new directory named “Projects” and clone the calendar service code inside that directory.
mkdir -p ~/Projects
cd ~/Projects
git clone https://github.com/cuongld2/solace-booking-service.git
cd solace-booking-service
The current structure of the application code looks like this:
├── cmd

│   └── app

│          ├── handlers.go

│          ├── helpers.go

│          ├── main.go

│          └── routes.go

├── go.mod

├── go.sum

└── pkg

└── models

├── models.go

└── mongodb

└── meetings.go
-
handlers.gofile defines the Go functions to create calendar service APIhelpers.godefines the generic client error and server error for the calendar servicemain.gois the entry point of the applicationroutes.godefines the routes of all the APIs of the calendar servicemodels.godefines the model of the MongoDB databasemeetings.goimplements the functions for interacting with the MongoDB database
To run the calendar service , you need to expose the following environments to the current terminal process.
- MongoDB connection URL to connect with the MongoDB Atlas
- Solace PubSub+ credentials to interact with the Solace broker
To set up a MongoDB connection URL, you need to create a new database called meetings and a new collection called meetings inside that database.

Figure 3: Create “meetings” database in Mongo Atlas
Then run the following command and change the `username`, `password`, and `hostname` that match with your own values.
export MONGODB_URI="mongodb+srv://${username}:${password}@${hostname}/?retryWrites=true&w=majority"
With Solace PubSub+ messaging platform, you need to grab the Solace credentials as guided by Solace with the Go programming language from the “Connect to Service” tab.
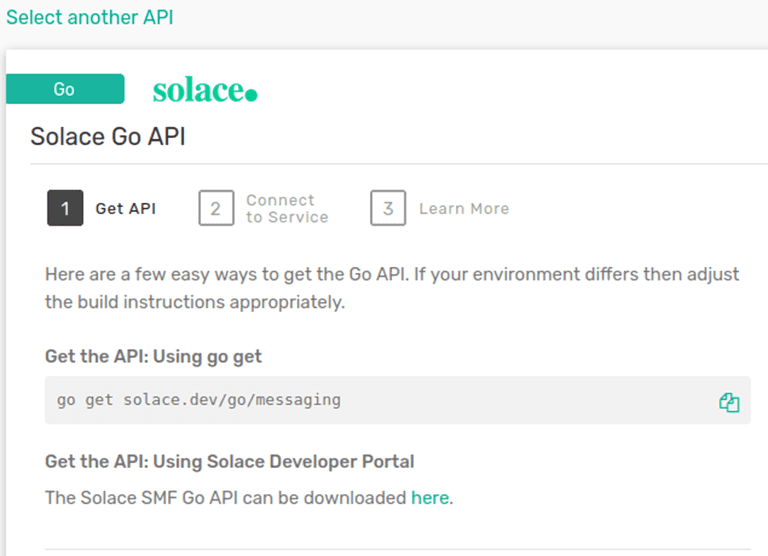
Figure 4: Get Solace credentials for Go programming language from Solace web page
Run the following commands and replace the example values with your own values:
export AuthenticationPropertySchemeBasicPassword=your_scheme_password
export AuthenticationPropertySchemeBasicUserName=your_username_client
export ServicePropertyVPNName=your_service_property_vpn_name
export TransportLayerPropertyHost=your_solace_host_name
Finally run the following command to bring up the calendar service in local environment.
cd cmd/app
go run .
You should see the output as followed:
INFO   2023/05/02 05:08:06 Database connection established

INFO   2023/05/02 05:08:06 Starting server on :4000
Run the following curl command to create a new meeting event using a different terminal window:
curl --location 'http://localhost:4000/api/meetings/' \
--header 'Content-Type: application/x-www-form-urlencoded' \
--data '{
	"sender_userid":"donald",
	"receiver_userid":["paul"],
	"meeting_title":"standup_meeting_02_05_2023",
	"meeting_category":"standup_meeting",
	"meeting_description":"regular_standup_meeting"
}'
Check the log from the calendar service window, you should see the following message:
INFO 2023/05/02 05:26:03 New meeting have been created, id=ObjectID("64503c7be8eddfb28cc90c42")
Checking the Mongo Atlas database, you can see a new meeting is added to the database too.
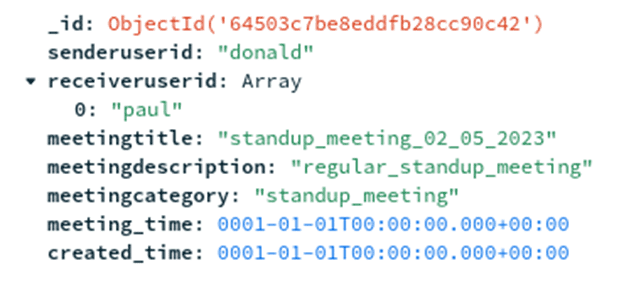
Figure 5: A new record inserted to the ”meetings” MongoDB collection
A new event should also be sent to a Solace topic with format as below:
const TopicPrefix = "services/meetings"
TopicPrefix+"/senderUserId/"+m.SenderUserID+"/meetingCategory/"+m.MeetingCategory+"/meetingTitle/"+m.MeetingTitle+"/"
With each new meeting is created, a Solace topic is created too. For example with the above meeting, the calendar service will automatically create the Solace topic as:
/service/meetings/senderUserId/donald/meetingCategory/standup_meeting/meetingTitle/standup_meeting_02_05_2023
The values for donald, standup_meeting, standup_meeting_02_05_2023 will be different for each meeting. Set up the Solace topic dynamically allows you to easily filter out the exact topic you want to retrieve the events. You can learn more about the difference of message routing, filtering and ordering between Solace and Kafka from this article.
You can check in the details of how to send events to the Solace topics from the calendar service by checking the insert function implementation inside the handlers.go file.
Let’s move on to the next section to check whether the notification service is able to receive the meeting event.
Step 2: Build the Notification Service
In real world project, the notification cand should be able to send message to multiple platforms such as Slack, Gmail, or Jira. In this article, to keep things simple, you will implement the notification to Slack only.
This service subscribes to the meeting topics so that with every new event sent from the calendar service, the notification service will send a new notification to a Slack channel. The flow of the notification service works like this:
- Subscribe to the all the meetings topics with this format:
services/meetings//senderUserId/*/meetingCategory/*/meetingTitle/> - Create a new Slack channel for every new meeting Category
- Add the Slack bot to the Slack channel
- The Slack bot send new notification for every new created meeting
In order to interact with Slack using the notification service, you need to create a new Slack app first.
Go to https://api.slack.com/apps to create a new app.
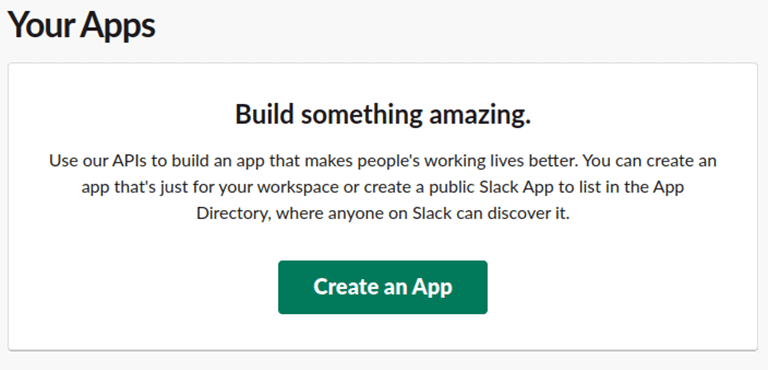
Figure 6: Create a new Slack app
Let’s create a new app named “Demo App”.
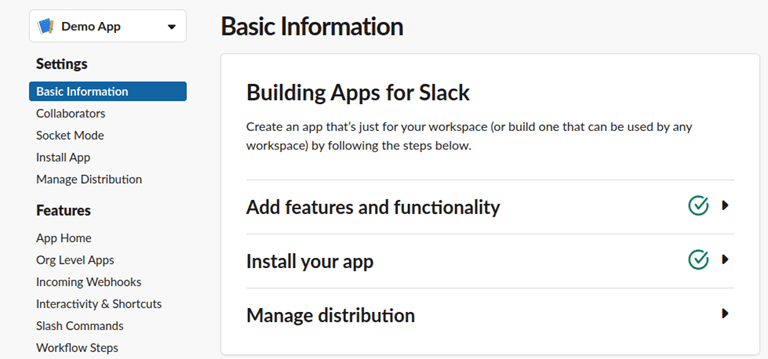
Figure 7: A new Slack app named “Demo App” is created
Then you need to set the permissions for your “Demo App” to create new channels, send messages and add the bot to the channels. You need two kinds of permission for your application:
- Bot permissions so that the bot can interact with the Slack channel
- User permissions so that the app can create new channel, add the bot to the channels
Go to “OAuth & Permissions” page, set the permissions for “Bot token scopes” as follows:
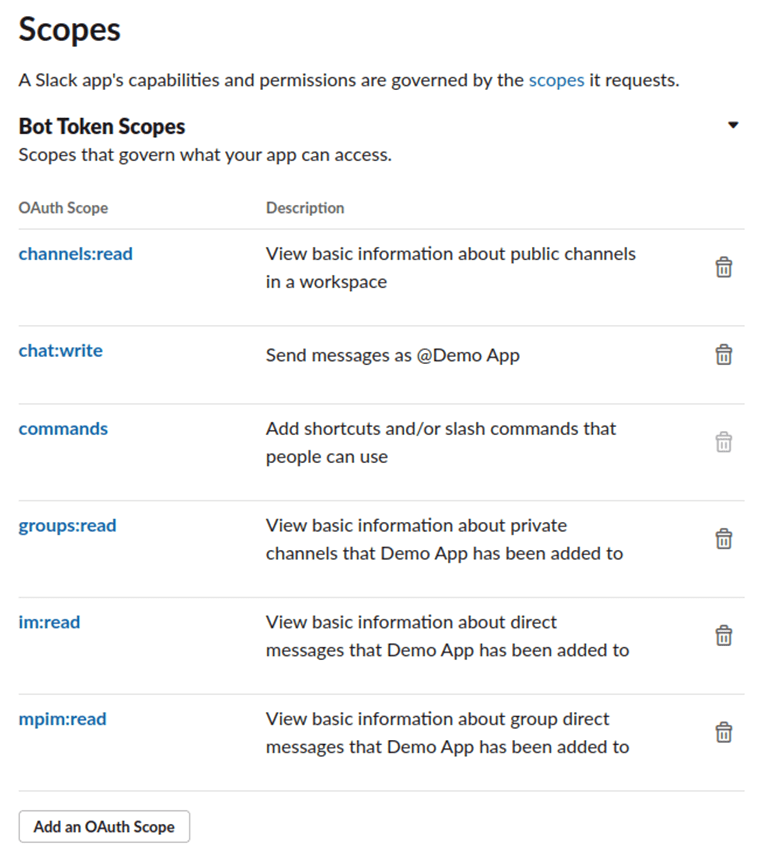
Figure 8: Set permission scopes for bot token
Then set the user token scopes as:
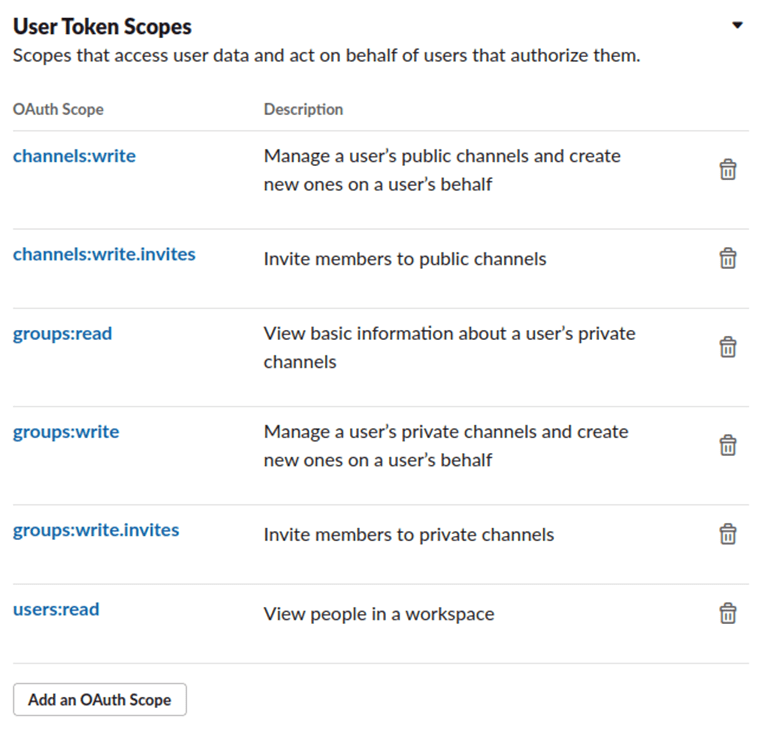
Figure 9: Set permission scopes for user token
Now, you need to grab the “SLACK_BOT_TOKEN” and the “SLACK_USER_TOKEN” from the same “OAuth & Permissions” page for the notification service to interact with Slack.
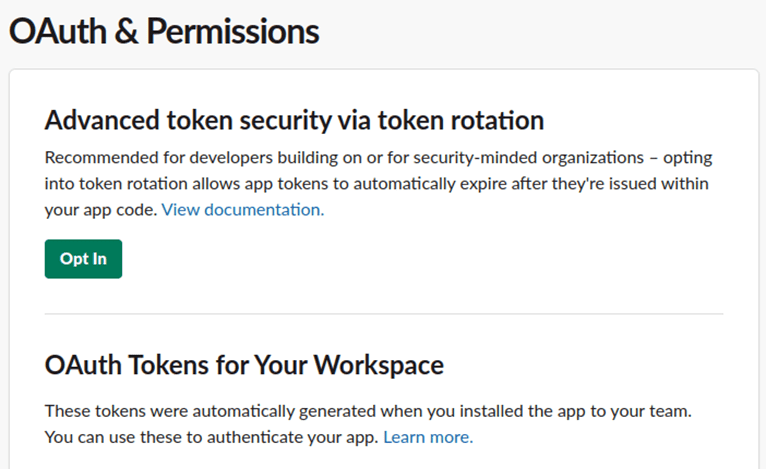
Figure 10: Get Slack bot token and user token
You also need to get the SLACK_BOT_ID so that you can add the bot to the channel. Run the following command to get the slack bot id, change the token with your own slack_bot_token value.
curl --location 'https://slack.com/api/auth.test' \
--header 'Authorization: Bearer your-bot-token'
Now, you need to clone the notification service code from this GitHub repository. Open up a new terminal, run the following commands:
cd ~/Projects

git clone <a href="https://github.com/cuongld2/solace-noti-service.git">https://github.com/cuongld2/solace-noti-service.git</a>

cd solace-noti-service
Run the following commands to expose the credentials for Slack app and Solace PubSub+ platform.
export AuthenticationPropertySchemeBasicPassword=your_scheme_password
export AuthenticationPropertySchemeBasicUserName=your_username_client
export ServicePropertyVPNName=your_service_property_vpn_name
export TransportLayerPropertyHost=your_solace_host_name
export SLACK_BOT_ID=your_slack_bot_id
export SLACK_BOT_TOKEN=your_slack_bot_token
export SLACK_USER_TOKEN=your_slack_user_token
Finally, run the following command to bring up the notification service:
go run main.app
Now let’s create a new meeting using the calendar service by running the following command:
curl --location 'http://localhost:4000/api/meetings/' \
--header 'Content-Type: application/x-www-form-urlencoded' \
--data '{
	"sender_userid":"donald",
	"receiver_userid":["paul"],
	"meeting_title":"standup_meeting_02_05_2023",
	"meeting_category":"standup_meeting",
	"meeting_description":"regular_standup_meeting"
}'
You should see a new channel is created in your Slack workspace called standup_meeting. Inside that channel, you see a new message is sent which looks like below:
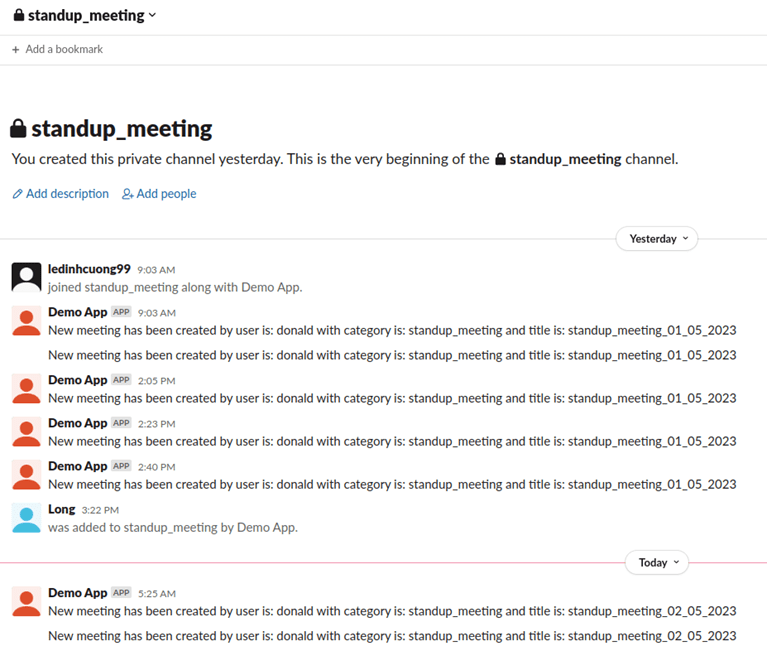
Figure 11: A new meeting has been created and notification is sent to standup_meeting channel
You have now successfully brought up the notification service in your local environment. Let’s move on to set up the Slack plugin so that you can create a new meeting and subscribe to the meeting category you like from your own Slack chat.
Step 3: Build the Slack Plugin
First, you need to clone the Slack plugin code from GitHub solace-slack-plugin repository. Open up a new terminal and run the following commands:
cd ~/Projects
git clone https://github.com/cuongld2/solace-slack-plugin.git
cd solace-slack-plugin
Inside the main.py file you have the following Python functions:
update_home_tabwith the Python annotation named@app.event("app_home_opened"). This function implements the home page view for your Slack “Demo_App”subscribe_solacewith the Python annotation named@app.command("/subscribe-solace")which defines the Slack slash command so that you can subscribe to the Slack channel for the meeting category you’re interested inbook_meetingwith Python annotation named@app.command("/book-meeting")which allows you to create a new meeting directly from Slack chat app
Run the following commands to expose the SLACK_BOT_TOKEN and the SLACK_SIGNING to the current terminal process (The SLACK_SIGNING value you can grab from the “Basic information page” of your Slack app):
export SLACK_BOT_TOKEN=your_slack_bot_token(not_the_user_token)
export SLACK_SIGNING=your_slack_app_signing
Then run the following command to bring up the Slack plugin:
python main.py
You should see the following output:
⚡️ Bolt app is running! (development server)
To allow Slack platform to interact with your Slack plugin running in your machine, you need to expose the local port to the internet. Run the following command to do so using ngrok client tool:
ngrok http 3001
You should see the similar output:
Session Status         online

Account                Le Dinh Cuong (Plan: Free)

Version                3.2.2

Region                 Asia Pacific (ap)

Latency                56ms

Web Interface          http://127.0.0.1:4040

Forwarding             https://8d5c-2001-ee0-4736-7860-550d-7546-d130-bf83.ngrok-free.app -> http://localhost:3001

Connections           ttl    opn     rt1     rt5     p50     p90

47      0     0.00    0.00    0.00     0.24

HTTP Requests
Now, go to the Slack web page for your “Demo App”, you need to enable the Slack app home page and Slash commands from “App Home” page.

Figure 12: Enable Home Tab and allow users to send Slash commands and messages
Then go to “Slash Commands” setting page, create two new Slash commands as below:
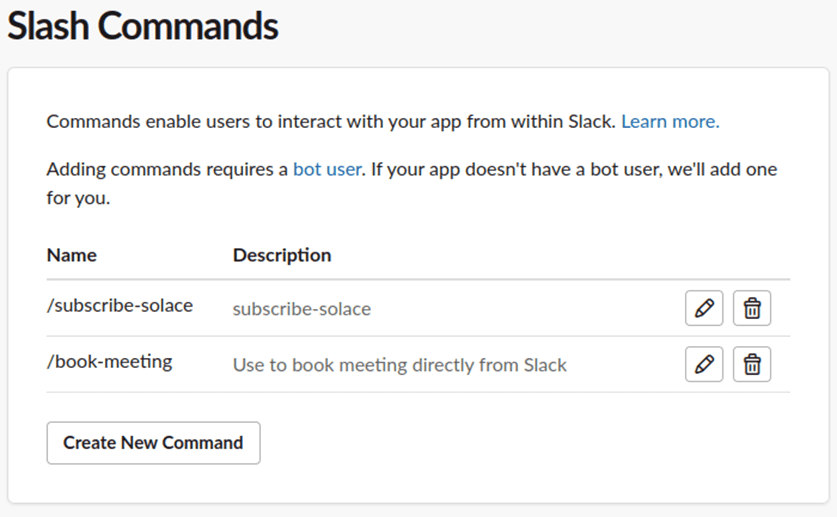
Figure 13: Set up the Slash commands
For each Slash command, you need to define the command path, and the Request URL.
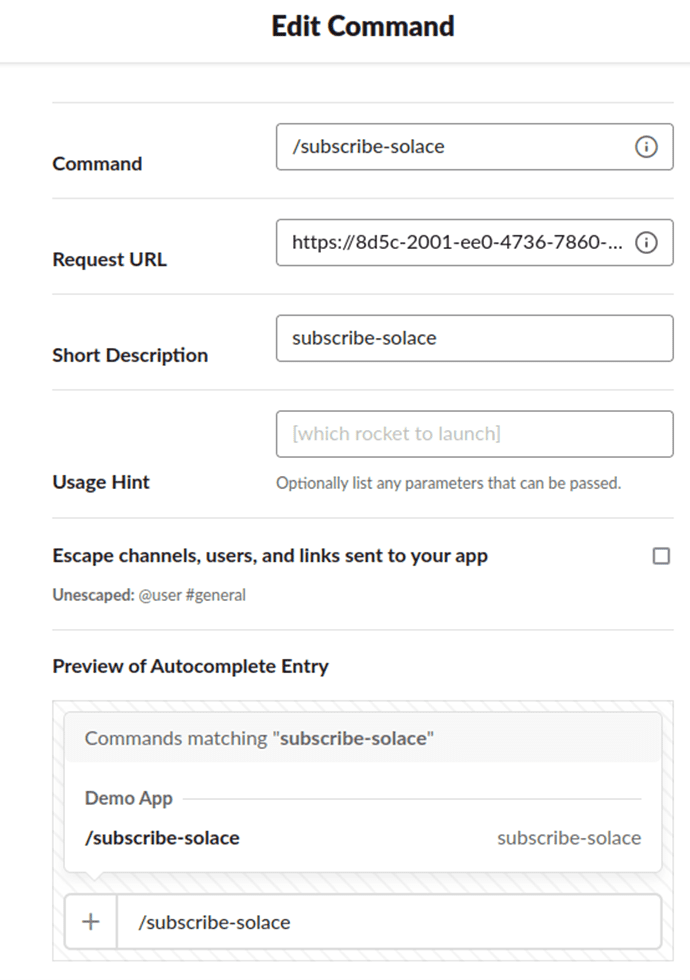
Figure 14: Details of how to set up the Slash command
Note that you to add /slack/events to the exposed ngrok url to put it inside the “Request URL” field. The request url looks like this : “https://auto-generated-number.ngrok-free.app/slack/events”.
You also need to add the redirect URL at the “OAuth & Permissions” page (just the exposed ngrok url without /slack/events).
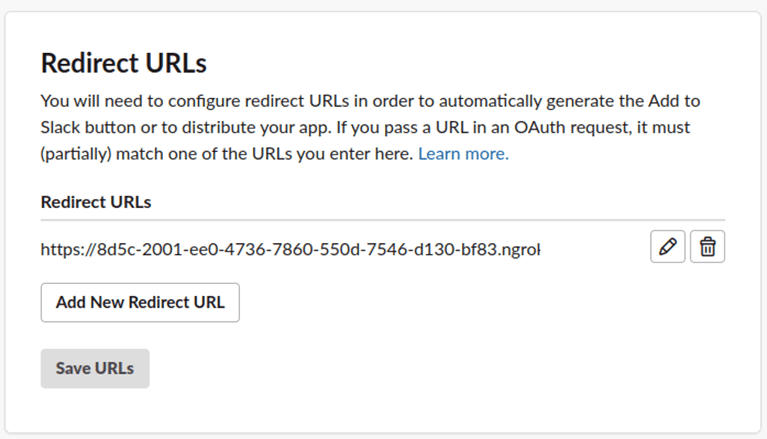
Figure 15: Set redirect URL for the Slack app
Now that you have finished set up the Slack plugin app, let’s move on to the next section to create a new meeting event and subscribe to the Slack channel to be notified for your interested meeting category.
Step 4: Demo the Use Case
First, try to create a new meeting from the Slack app.
Login Slack as a regular member of the Slack Workspace and create a new chat with “@Demo App” bot. Type in “/” command into the chat. You should see the suggested slash commands available.
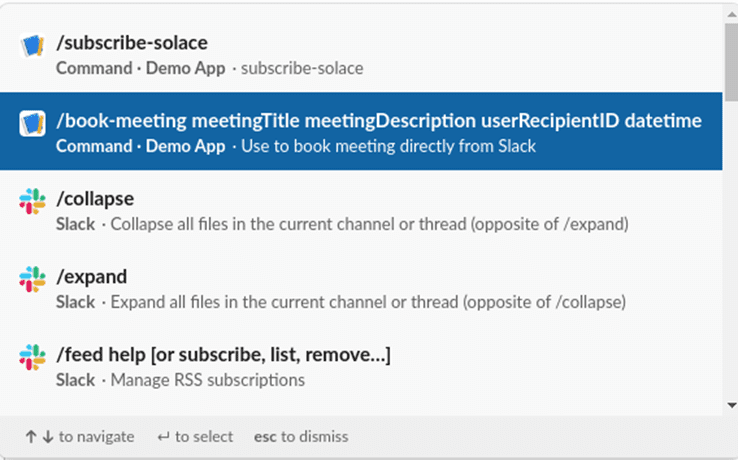
Figure 16: Slash commands are displayed when type “/” in the Slack chat
Choose /book-meeting option and provides sender_userid, receiver_userid, meeting_title, meeting_description, meeting_category.

Figure 17: Example of how to book meeting using Slack slash command
Click on “Send” button. If you do not see any error message, that means you have successfully created the new meeting.
You now do not receive any notification for the newly created meeting because you have not joined the Slack channel for “standup_meeting” category just yet. To join the Slack “standup_meeting” channel, first you need to grab your user id from the profile page.
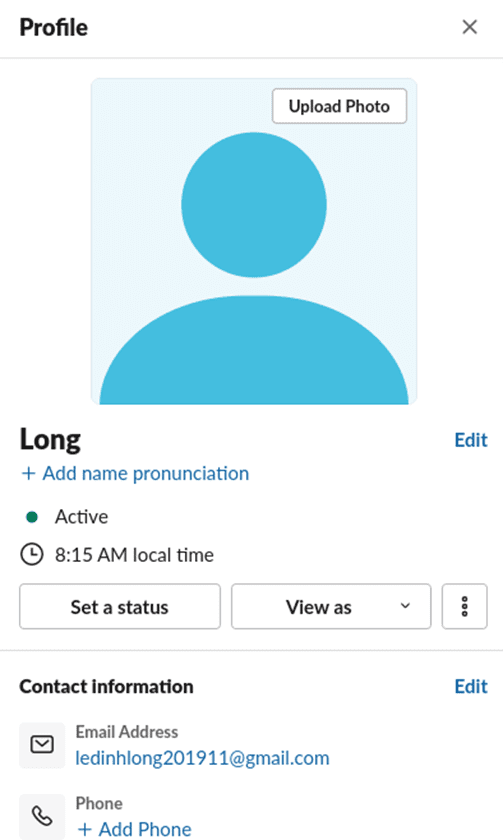
Figure 18: Slack user profile
Choose three dots button beside “View as” button and then click on “Copy member ID”.
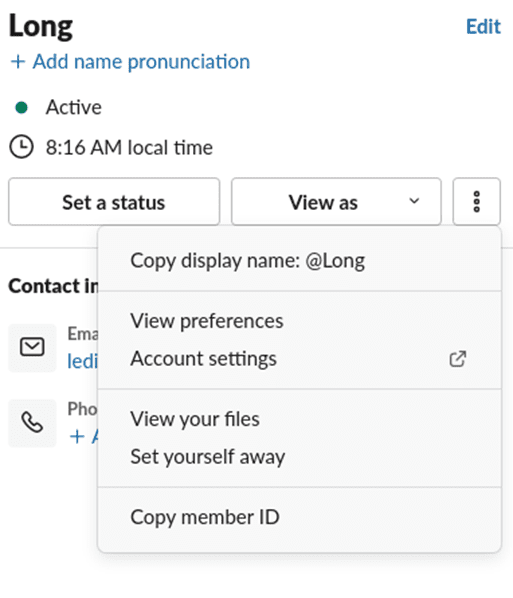
Figure 19: Copy member Id from Slack user profile window
Open a new chat with “@Demo App” then type “/book-meeting” with the meeting category and the your user_id.
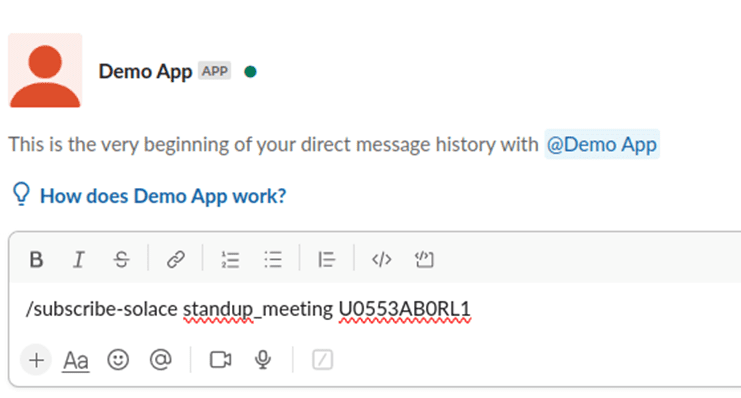
Figure 20: Send Slack slash command to subscribe to a Slack channel
Click “Send” button.
You should see a new standup_meeting channel displayed in your Slack chat app.
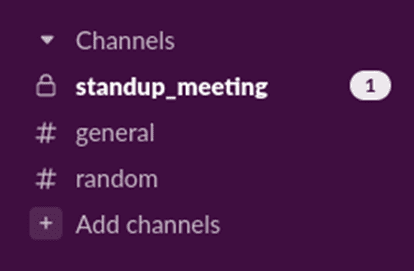
Figure 21: User is added to the Slack channel for “standup_meeting” notifications
Click on “standup_meeting” channel, you should see the previously sent message for the meeting you have created.

Figure 22: User is able to see the previous notification for the created meeting
Conclusion
And that’s how to build the Slack plugin to create meetings and be notified for all new meetings by implementing event-driven architecture with the help of Solace messaging. Through the article, you have learned how to implement a Slack app that allows users to interact with Solace messaging directly from the Slack client application.
About the Author

Explore other posts from categories: For Developers | Solace Scholars


Subscribe to Our Blog
Get the latest trends, solutions, and insights into the event-driven future every week.